Import Nigeria eHealth Africa Places Workflow
In this wiki we will:
- present the general import rules in OSM, then the data itself, the tool set to make the import, and the extra data that can be added as a useful complement.
- describe step-by-step a workflow to make the import, with screenshots and tips.
Presentation
Import rules in OSM
The data from eHealth Africa, considering its high accuracy, is to be imported into OSM and consequently, needs to follow the guidelines of any to-be-imported dataset.
The dataset has been analyzed, the attributes have been converted into tags, presented and validated to the imports mailing list.
Any import must be done through a specific OSM user account. So the advice is to create a new OSM user account (eg the usual name with _import at the end) from a secondary email address.
Only the eHealth Africa data will be uploaded using this account, so any other edit must be uploaded with the everyday OSM account. As the import is the opportunity to add objects around it, the proposed workflow will integrate this to make the whole job easy and efficient.
The eHealth Africa data for North Nigeria
This data has been originally made through field surveys conducted by tens of field collectors during the last 2 years within the 10 Northernmost states of Nigeria (Kebbi, Sokoto, Katsina, Zamfara, Kano, Kaduna, Bauchi, Jigawa, Yobe and Borno).
During the import we will put changeset tags that indicates the source. Nonetheless, it is useful to keep the source tag for each object as the changeset information is not forcefully got from any OSM extract tool and eHealth Africa could be disappointed not to be mentioned for this data + the metadata can disappear easily once the information is shared and shared, and the source can be a very useful information for people who will work with this data.
An import through the Tasking Manager
Rather than a single, blind import, it has been decided to import the data with a control check of each object. An specific HOT Tasking Manager job will be created for this purpose and for each state.
They all share the same grid and a specific feature: they propose to load in JOSM the extract of the data to be imported over the area of each task (tile). Consequently, the normal OSM layer is loaded from the Tasking Manager + a layer containing only the eHealth Africa data for that task tile.
Other data good to be added
Although not part of the import itself, it would be interesting to spend some extra time for each task tracing the roads that access each of the places to be imported. For the classification of the roads, it's very important that you read the roads section in the Nigeria Wikiproject page, that is mainly based in the Highway Tag Africa wiki with some small adaptations to the Nigerian particularities.
You can also improve the existing roads accuracy and their tagging at the same time.
Workflow
The workflow will show:
- first the common steps to start
- then will focus on how to upload the eHealth Africa data, including the required changeset tags, with your OSM special import account
- last but not least, show the final step about how to check and add extra data to the place nodes, with your regular OSM account
Load the data
Open JOSM and the Bing Imagery.
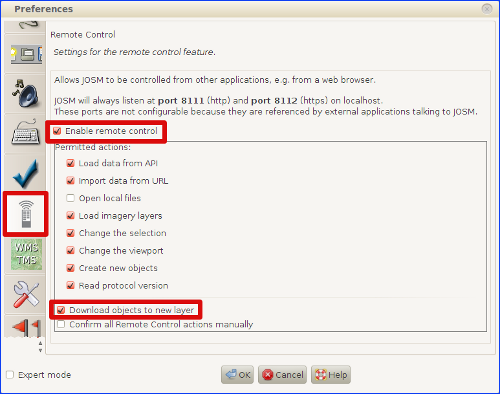
Before you do anything, check that you have the remote control enabled and the Download object to new layer box selected in the JOSM preferences:
Here are the links to the Tasking Manager for every state import job, its status and the number of nodes to be imported:
| State | HOT Task Manager job | Status | Number of nodes |
|---|---|---|---|
| Kano | Kano places TM job | Work in progress | 2,084 |
| Borno | Borno places TM job | Finished | 400 |
You are only interested in the imports with a Work in progress status.
When you decide on which import to work, first choose your task, then click on JOSM button.
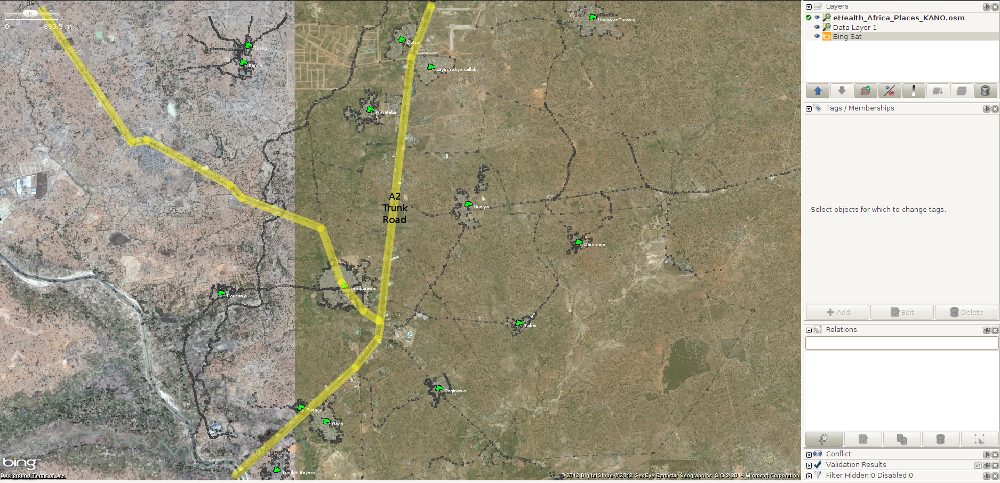
Once the OSM data is loaded click on here in the sentence Import the eHealth Africa data in JOSM by clicking here below the buttons. An eHealth_Africa_Places_NAMEOFSTATE.osm file will be loaded (for example, for Kano state will be eHealth_Africa_Places_KANO.osm). You should get a result as the example shown below:
Never merge these two layers in one, as we will upload our changes to the eHealth_Africa_Places_NAMEOFSTATE.osm layer with the special import account, and the changes to the Data Layer 1 layer (OSM data) with our regular OSM account.
You are now ready to start checking the eHealth Africa data for the task (tile) of your choice.
To organize your task, specially if the number of place nodes is high, we strongly recommend to use the Todo list JOSM plugin. Basically, you only have to select all nodes and then click on the Add button at the bottom of the Todo list window. Then, you will go through the nodes, one by one, and click on the Mark button when you finish a node. To check the first node of the list, just double click on it in the list. When you will mark that node as done, you will be automatically taken to the next one.
Checking the eHealth nodes and merging them with the OSM data
Location
The location of the node is generally correct. Sometimes you will see it near one of the edges of the enclosing residential area, or even outside. This normally happens when the place node was extracted from a set of close to each other residential polygons (multipolygon relation), so even in this case we won't change it's position. Only in very exceptional cases it could be needed to change the position of the node, but as a general rule we'll leave the place nodes in the position they are.
Spelling
First of all, we will check if the name of the place is spelled correctly and respect the cartographic writing conventions. With very few exceptions, each noun of the place must have its initial letter in capital and subsequent letters non-capital, like for example Kurje, Unguwar Abdu and Gwarmai Cikin Gari. In case of doubt, we won't make any change to the name and we will leave a remark on the comments window that pops up when marking the task as done in the Tasking Manager.
False duplicated nodes
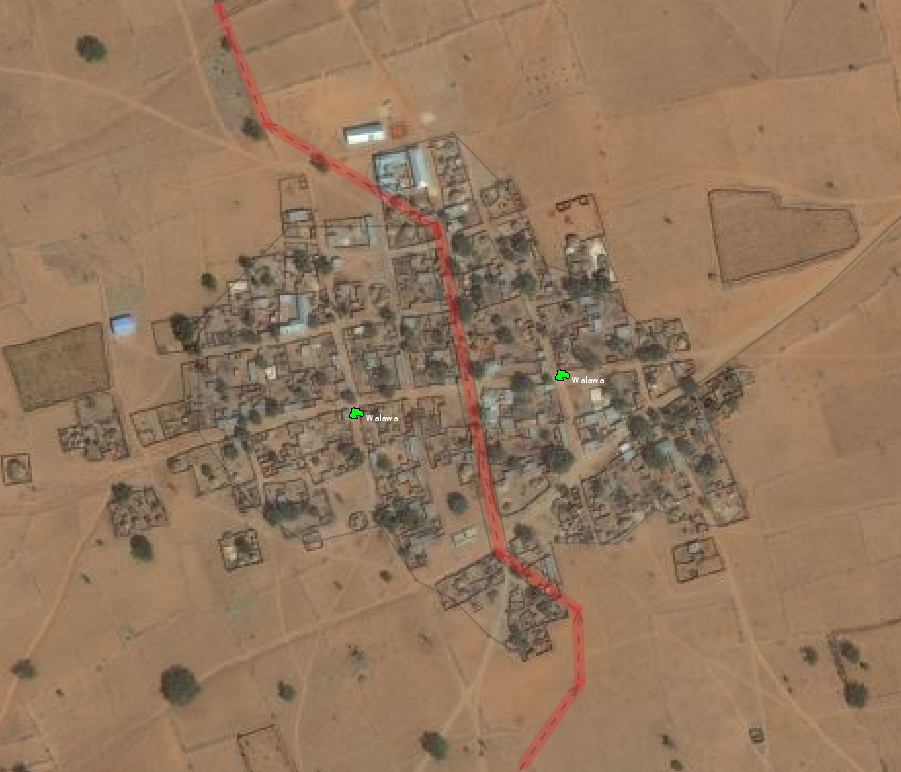
One situation we may encounter is the one where we find two nodes with the same name beside each other. It may seem at first that this is a case of duplicated nodes and that we should delete one of them, but normally they are there on purpose. In the following screenshot we can see the Walawa village with two identical nodes. In this case they are duplicated because the Western side of the village belongs to Durma ward, whereas the Eastern side belongs to Maitsidau ward. In this case, we will change the names to Walawa East and Walawa West. We should leave a comment about it in the pop up window of the Tasking Manager.
GNS nodes
In 2009 a huge set of GNS data was imported into OSM, an import that now is assessed as poor and inconvenient. In that dataset we have many duplicated, misspelled and badly located nodes, having many nodes located in the middle of nowhere or just in the non-inhabited area between several settlements. Worse, many of the nodes don't have any relation to the village where they are located (if they are located over a settlement), nor any of the villages nearby. And, except for the name, we aren't interested in the other GNS tags, that shouldn't be imported to OSM in the first place.
The GNS nodes for settlements are easy to spot, as they have the fixme tag as one of their tags, and therefore they appear as an ![]() in JOSM, instead of the usual green polygonal icon that JOSM uses to represent a place.
in JOSM, instead of the usual green polygonal icon that JOSM uses to represent a place.
We will deal with these GNS nodes in the following way:
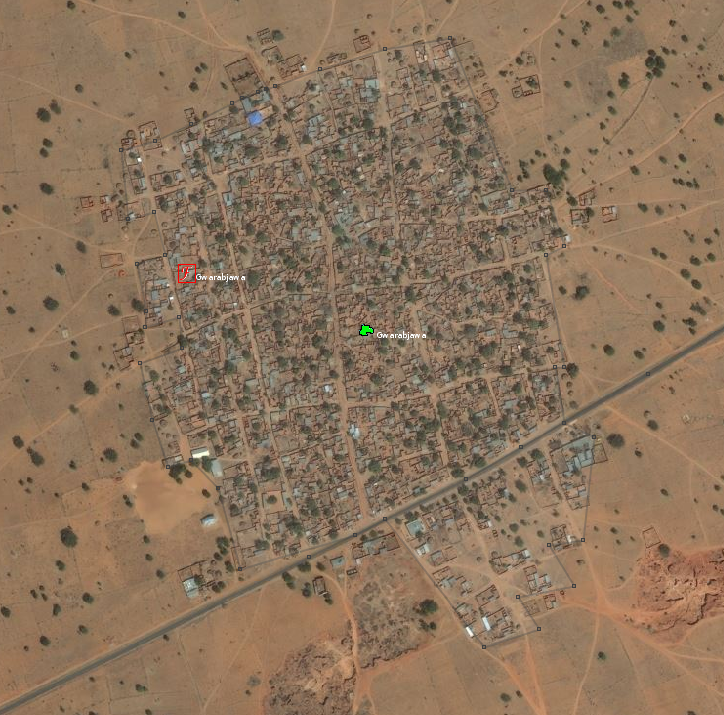
1. The first scenario is when we have a GNS node inside or near the village/town of the eHealth Africa node that we are checking for import, and that it has the same name to that of the eHealth Africa counterpart, like in the following example:
In this case, we will:
- Delete the GNS node from the Data Layer 1 layer.
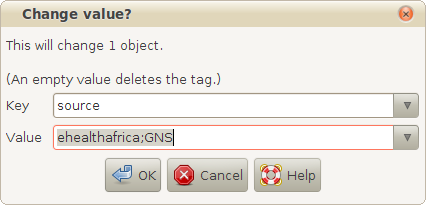
- Add GNS to the source tag of the eHealth Africa node: source=ehealthafrica.org;GNS
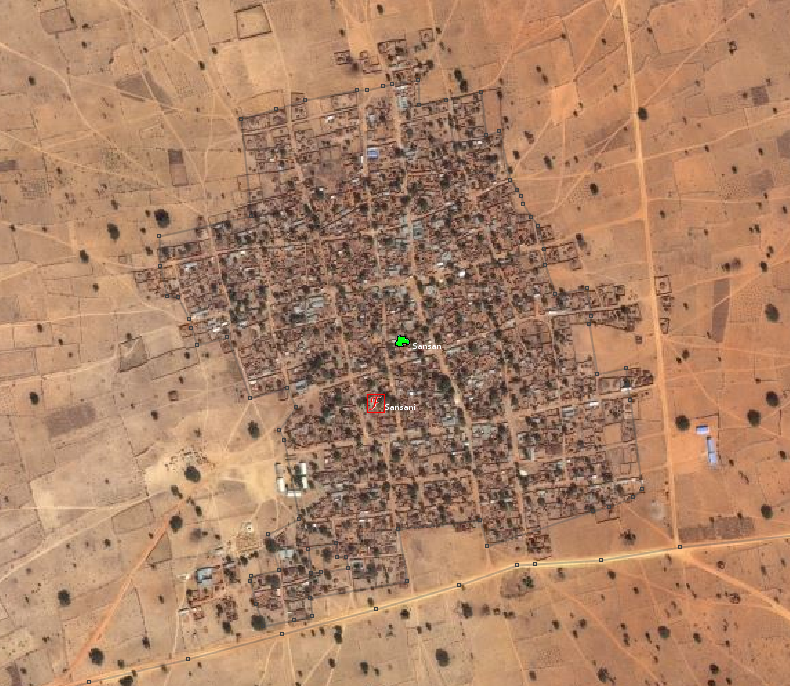
2. A very similar case is when the GNS has a similar name to the eHealth Africa node, and we want to keep that GNS name in the database as an alternate name, like in the following example:
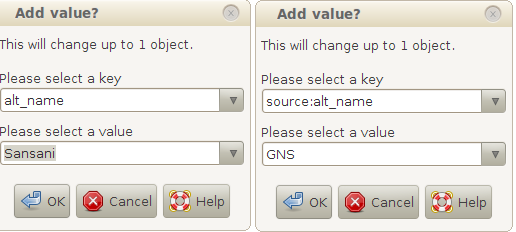
As we can see, the eHealth Africa node name is Sansan, but the GNS node name is Sansani. In this case we would proceed as follows:
- Add also the source:alt_name=GNS tag to the eHealth Africa node.
- Delete the GNS node from the Data Layer 1 layer.
In the following table we show some other examples:
| eHealth Africa name | GNS name |
|---|---|
| Dangora | Dan Gora |
| Badafi | Sabuwar Badafi |
| Yaryasa | Yaryasa-ta-Yamma |
| Fuskar Maaji | Faskar Ma’aji |
| Yarmariya Cikin Gari | Yar Maraya |
Bear in mind that GNS nodes are sometimes duplicated, so make sure you get rid of all the copies.
3. In case the name of the GNS node is different enough from the eHealth Africa one, we will just delete the GNS node. The limit on when the name is similar enough to add it as an alternative name or different enough to dismiss it, is difficult to define.
Examples that we would consider as definetly different:
| eHealth Africa name | GNS name |
|---|---|
| Unguwar Dodo | Unguwan Dan Gambo |
| Kurkujawa | Yalwa |
| Tudun Fulani | Turedasau Ta Fulani |
In case of doubt, we suggest you to add it as an alt_name and always leave a comment on the comments box when you save the task in the Tasking Manager, so it will be carefully reviewed during the validation process.
GNS nodes that are far enough from the eHealth Africa nodes that we are importing and that are over or near a settlement or group of small hamlets will be left for the time being. They would be eventually replaced in future imports of eHealth Africa data, like the RuralVillages one.
Nodes inside big towns and cities
The nodes inside big towns and cities have to be retagged manually, because the village/town schema doesn't make any sense inside them. Depending on the extension they cover and their importance in the city, they can be tagged as place=suburb, place=quarter or place=neighbourhood.
In case they cover roughly one ward or a bigger area, we suggest tagging them as place=suburb. For nodes that cover smaller areas, we would tag them as place=quarter. The place=neighbourhood tag is for even smaller areas inside a city, but it's quite unprobable that you will find any eHealth Africa node that deserves that tag within this dataset.
About the GNS nodes inside big towns and cities, we will proceed similarly as we did in rural areas. The general goal is to get rid of the GNS nodes and substitute them by eHealth Africa data or, in general, by more accurate data.
Finally, if we find any suspicious name in the eHealth Africa layer, we will add a fixme=* tag with a comment to that eHealth Africa place node, and we will also leave a comment in the pop-up window when we mark the corresponding task of the Task Manager as done.
If you have further questions, you can contact mapping_at_ehealthafrica_dot_org.
Adding access roads to the OSM layer (Data Layer 1)
As we said before, it would be very interesting to take an extra time for each task to complete the road accesses to each of the villages or towns nodes being imported, and perhaps some extra contextual data, as the main buildings.
You can also take some extra time to correct the existing roads accuracy and tagging.
Upload the data to OSM
Uploading the eHealth data to OSM
First, we will upload the eHealth_Africa_Places_NAMEOFSTATE.osm layer to OSM with the special imports account. For doing that we will follow these steps:
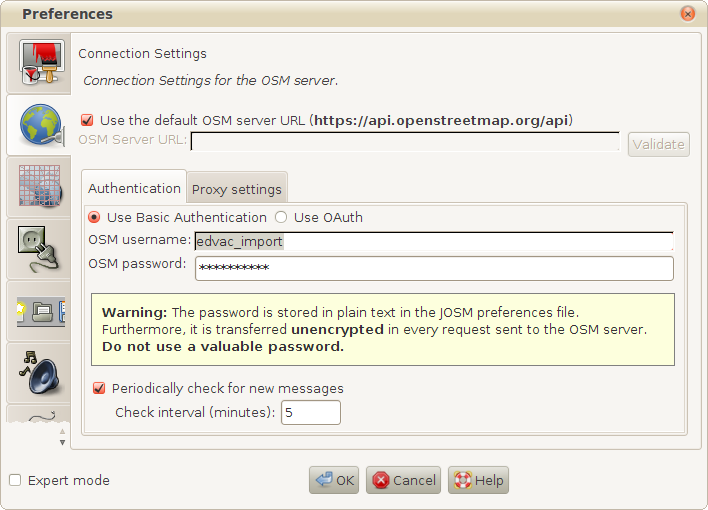
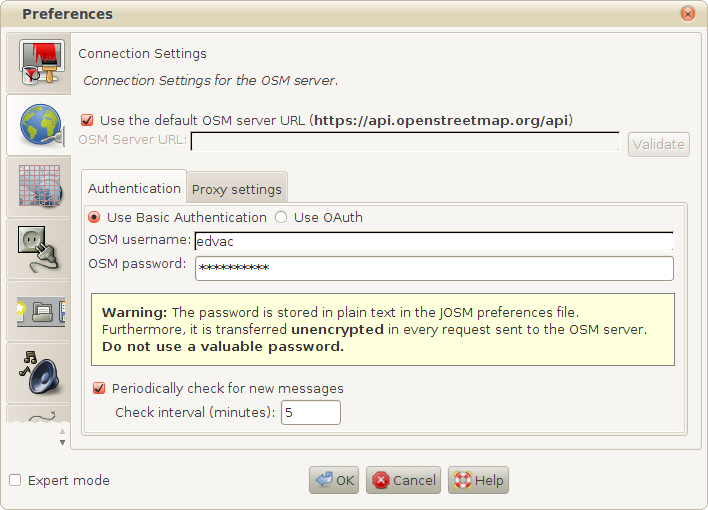
- Go to the JOSM -> Edit -> Preferences... and change the user and password to the special import user in the Connection Settings section.
- Make sure the eHealth_Africa_Places_NAMEOFSTATE.osm layer is the active layer, checking that it has the Active Layer mark enabled to its left:
 .
.
- Once you have done this, we can proceed with the upload. Press the JOSM upload button, resolve any error or warning that may arise from the validator and, before we click on the Upload Changes button, we have to add the following changeset tags under the Tags of new changeset tab:
- comment=eHealth Africa NAMEOFSTATE places import, #hotosm-task-NUMBEROFJOB
- created_by=JOSM/version
- source=ehealthafrica.org
- source:date=2014
- import=yes
- url=http://wiki.openstreetmap.org/wiki/Import_Nigeria_eHealth_Africa_Places
where we will substitute NAMEOFSTATE by the state and NUMBEROFJOB by the number of the job in the HOT Tasking Manager.
You can check the comment=* tag for each state import in the following table:
| State | Changeset Comment |
|---|---|
| Kano | comment=eHealth Africa Kano places import, #hotosm-task-581 |
| Borno | comment=eHealth Africa Borno places import, #hotosm-task-921 |
Uploading the changes in the OSM data layer (Data Layer 1)
If you made any changes in the Data Layer 1 layer, like deleting GNS nodes and/or adding roads or buildings, you will have to upload this changes to the OSM database, but we will do this upload with our regular OSM account instead of the special imports account. Follow these steps:
- Go to the JOSM -> Edit -> Preferences... and change the user and password to your regular OSM user account in the Connection Settings section.
- Make sure the Data Layer 1 layer is the active layer, checking that it has the Active Layer mark enabled to its left:
 .
.
- Once you have done this, we can proceed with the upload. Press the JOSM upload button, resolve any errors or warnings that may arise from the validator and upload the changes with the comment and source tags as follows:
comment=* (The same like we did before with the eHealth Data layer. For example, for Kano state is comment=eHealth Africa Kano places import, #hotosm-task-581)
source=* (in the source, you can put Bing, GNS or Bing;GNS, depending which sources your have used for the editing).
It is done now. You can mark the task as done in the Tasking Manager and take another task to import more data!
