WikiProject Tanzania/Tanzania MSD & JSI road import workflow
Quick Reference
What we need
a) Have a dedicated import account.
b) Have JOSM Remote control enabled.
c) Have utilsplugin2 and DownloadAlong JOSM plugins installed.
d) Have the following filters ready:
- type:node untagged
- highway="road" AND source="msd.or.tz & deliver.jsi.com"
Steps
1) Choose a task and open the OSM data and the MSD&JSI roads, and merge them in one layer. Open the Bing imagery and, if cloudy or low resolutions, try with Mapbox imagery.
2) Select all MSD&JSI roads that go beyond the OSM downloaded area and download data around them with the Download Along plugin (Alt+Shift+D).
3) Pick a MSD&JSI segment. If that segment is part of a chain of segments that form one single way, combine (C) the JSI segment with the rest of segments.
4) Unless the MSD&JSI segment is already mapped (partially or totally) in OSM, do the following:
- Change its highway=road tag value according to the Highway Tag Africa.
- Change its surface=* when needed.
- If it is a prolongation of an existing OSM way, try to keep the existing OSM way tags unless you are sure they aren't correct. Avoid changing any ref=* tags.
5) Finally, join the resulting way to the existing OSM data when needed.
6) If the resulting way is still wrong geometry and can be corrected, please do it.
7) Proceed with the rest of the MSD&JSI segments and upload the result with the specific OSM user account and the specific changeset tags:
- comment=Tanzania MSD & JSI Roads import. #hotosm-project-NUMBEROFPROJECT
- source=msd.or.tz & deliver.jsi.com;imageryProvider
- source:date=2014..2015
- import=yes
- url=http://wiki.openstreetmap.org/wiki/WikiProject_Tanzania/Tanzania_MSD_%26_JSI_road_import
where:
- imageryProvider = Bing or Mapbox or Bing;Mapbox, depending the imagery provider/s used while importing the data.
- NUMBEROFPROJECT is the Tasking Manager project number.
8) You are ready to start a new task. If you want to leave it here, don't forget to switch back to your regular OSM account now, to avoid using it for purposes other than importing!
Before you actually start with any task
a) You need to create one specific import OSM user account for this import (if you don't have one yet). You will need a different email account than the one you used to create your regular user account.
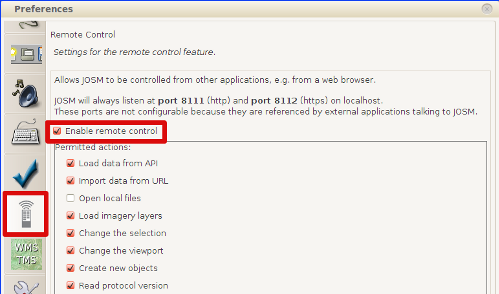
b) Open JOSM and check that you have enabled the Enable remote control option in the JOSM preferences (F12):
c) Install the following two JOSM plugins (if you don't have them yet):
d) We will have the following useful filters ready to work with the data:
- type:node untagged
- highway="road" AND source="msd.or.tz & deliver.jsi.com"
Workflow steps
Getting OSM data and MSD&JSI road segments
1) Open JOSM editor.
2) Select one unfinished project from the following list of HOT Tasking Manager projects for this import:
| Type | Dates | Project | Created by | Status | Done by |
|---|---|---|---|---|---|
| TM project | 15 Sep. 2015 - 4 Oct. 2015 | Mtwara & Lindi Regions + Tunduru District | Rafael Avila Coya | Finished | OSM Community |
| TM project | 5 Oct. 2015 - 16 Oct. 2015 | Kigoma and Tabora regions | Rafael Avila Coya | Finished | OSM Community |
| TM project | 22 Oct. 2015 - 1 Apr. 2016 | West Ruvuma region | Rafael Avila Coya | Finished | OSM Community |
| TM project | 5 Dec. 2015 - 27 Dec. 2015 | Zanzibar Region | Rafael Avila Coya | Finished | OSM Community |
| TM project | 3 Feb. 2016 - | Rukwa and Katavi regions | Rafael Avila Coya | Available | OSM Community |
| TM project | 23 May 2016 - 1 Dec. 2016 | Tanga region | Fernando Cruz Matute and Rafael Avila Coya | Finished | OSM Community |
| TM project | 17 Jun. 2016 - 26 Jun. 2016 | Arusha region | Fernando Cruz Matute and Rafael Avila Coya | Finished | OSM Community |
| TM project | 17 Jun. 2016 - 17 Jul. 2016 | Kilimanjaro region | Fernando Cruz Matute and Rafael Avila Coya | Finished | OSM Community |
| TM project | 17 Jun. 2016 - 4 Jul. 2016 | Manyara region | Fernando Cruz Matute and Rafael Avila Coya | Finished | OSM Community |
| TM project | 2 Jul. 2016 - 13 Aug. 2016 | Singida region | Fernando Cruz Matute and Rafael Avila Coya | Finished | OSM Community |
| TM project | 2 Jul. 2016 - 31 Aug. 2016 | Kagera region | Jacob Sprang and Rafael Avila Coya | Finished | OSM Community |
| TM project | 11 Jul. 2016 - 18 Aug. 2016 | Dodoma region | Fernando Cruz Matute and Rafael Avila Coya | Finished | OSM Community |
| TM project | 5 Aug. 2016 - 17 Aug. 2016 | Shinyaga region | Jacob Sprang and Rafael Avila Coya | Finished | OSM Community |
| TM project | 5 Aug. 2016 - 11 Aug. 2016 | Morogoro region | Fernando Cruz Matute and Rafael Avila Coya | Finished | OSM Community |
| TM project | 17 Aug. 2016 - 29 Aug. 2016 | Mara region | Jacob Sprang and Rafael Avila Coya | Finished | OSM Community |
| TM project | 30 Aug. 2016 - | Pwani region | Fernando Cruz Matute and Rafael Avila Coya | Available | OSM Community |
| TM project | 30 Aug. 2016 - 20 Sep. 2016 | Mbeya region | Fernando Cruz Matute and Rafael Avila Coya | Finished | OSM Community |
| TM project | 16 Sep. 2016 - 21 Oct. 2016 | Iringa region | Fernando Cruz Matute and Rafael Avila Coya | Finished | OSM Community |
| TM project | 10 Sep. 2016 - 13 Nov. 2016 | Mwanza region | Jacob Sprang and Rafael Avila Coya | Finished | OSM Community |
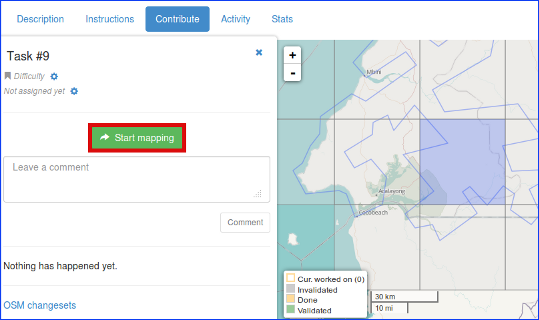
3) Choose one task:
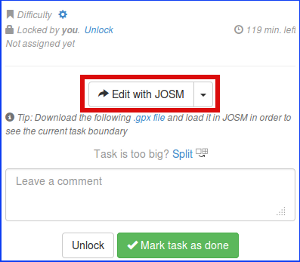
4) Click on Edit with JOSM:
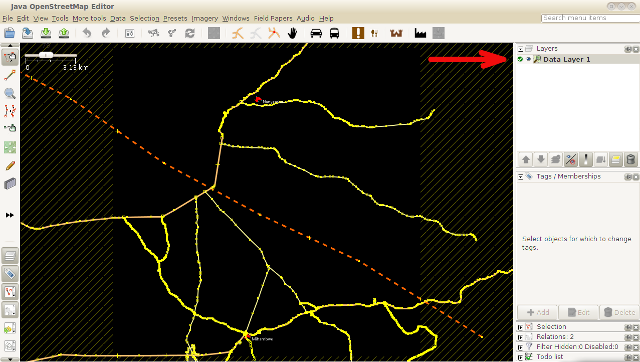
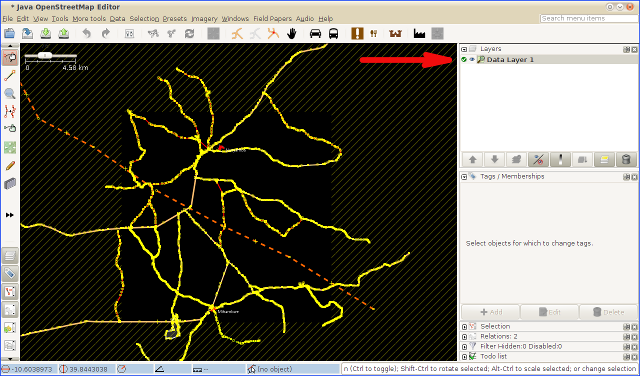
... and you will download the OSM data for that task area into one layer called Data Layer 1 (or similar):
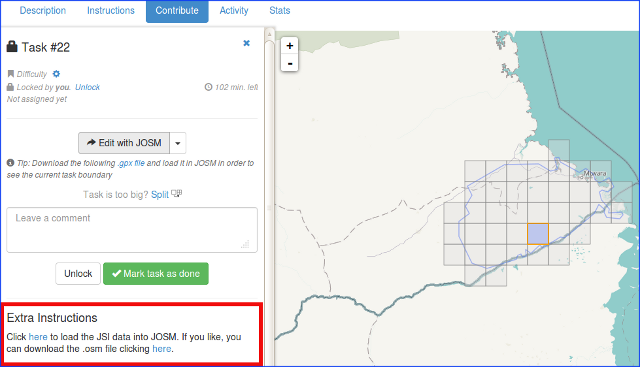
5) We will now download the MSD&JSI roads for that same area. Go to Extra Instructions...:
... and click to load the MSD&JSI data into JOSM:
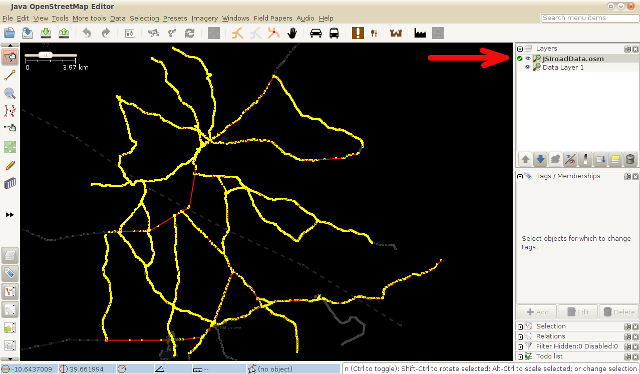
The MSD&JSI data will be loaded in a new data layer, called MSDJSIroadData.osm :
6) We merge both layers into one layer. If you are unsure on how to do this, please read the Appendix 1.
7) Finally, open the Bing imagery and, where it is cloudy or low resolution, try opening Mapbox imagery too.
Download data along MSD&JSI segments beyond the task tile
Some of the MSD&JSI segments have some of their nodes beyond the downloaded area, so we need to download the OSM data around those nodes.
For this purpose, we will first use the following filter to see only the MSD&JSI roads (you have here one introduction to JOSM filters and how to invoke them) and without their nodes, to make their selection easier:
We will see something like this:
Now we select carefully all the segments that have a part beyond the downloaded area (hold the CTRL key and click on all of them, one by one):
Be carefull not to leave behind any segment unselected.
Now disable the nodes filter:
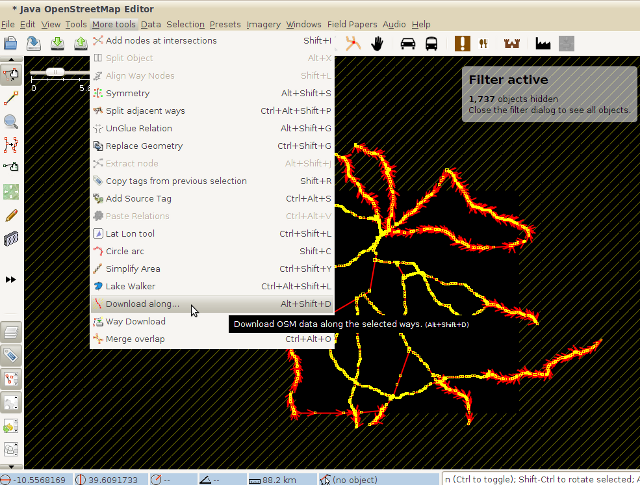
We invoke the Download Along tool by clicking on More tools -> Download along... or by the shortcut Alt+Shift+D:
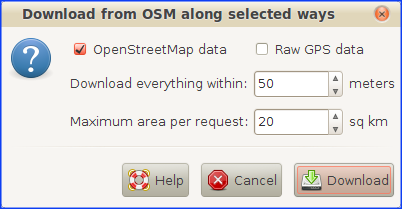
A tool settings window will pop-up. We will keep the settings as they are in the next screenshot, and hit the Download button:
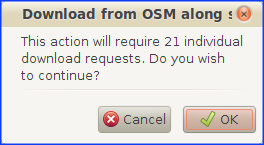
After a few seconds, the tool will inform us of the number of download requests to the OSM server we will need to complete (in the example, they are 21):
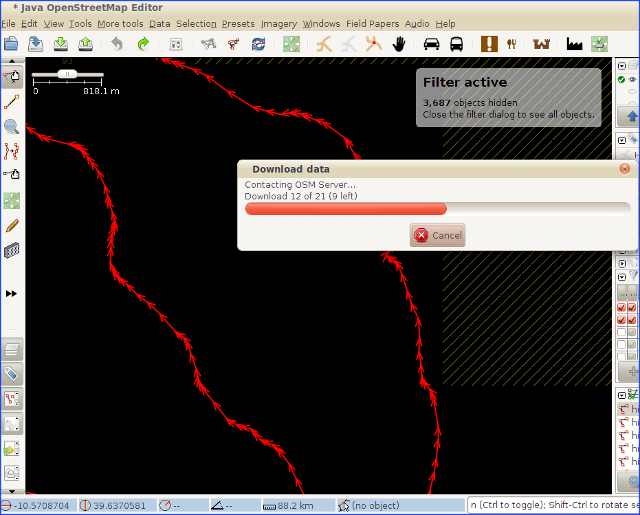
Just hit the OK button, and the Download along tool will start to download the OSM data around those "out-of-bounds" MSD&JSI roads:
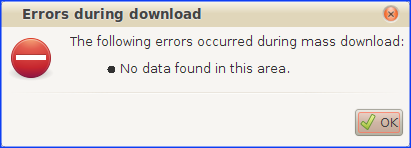
At the end, you may find an error or warning pop-up window.
a) If the window is about No data found in this area error, you can ignore it.
b) In case you get the following warning window:
... just click on Check on the server button and let JOSM do its job. It may take some extra seconds.
Working with the data
Now we are ready to work with the data!
To work with the MSD&JSI segments, we will pick one unprocessed MSD&JSI each time, and follow the steps that we will explain in the next sections. To know which MSD&JSI segments are still in the waiting list, we can apply the same filter we used before:
Combining MSD&JSI segments that are part of a single road
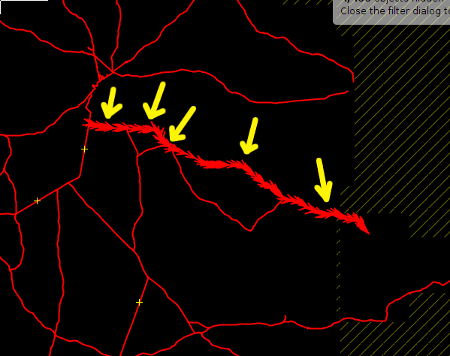
Sometimes, we will find that some JSI segments are part of a of longer way, like the 5 segments in the next image:
We of course see that those segments belong to the same road after checking against aerial imagery.
In case we see this situation, we will select them all and combine them (keyboard shortcut c) to form only one segment, unless we have an important reason to work with them separately. In case of doubt, we won't combine them.
We don't have to do this at once; we can combine ways during the process as we find them.
Merging MSD&JSI segments with OSM data, and tagging them according to Highway Tag Africa
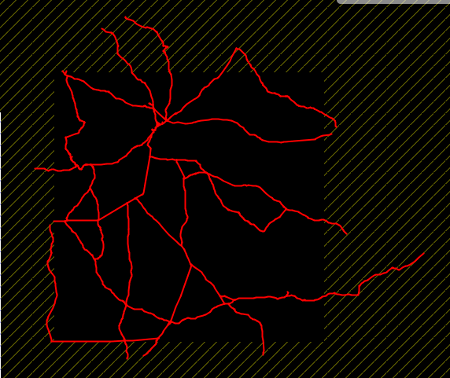
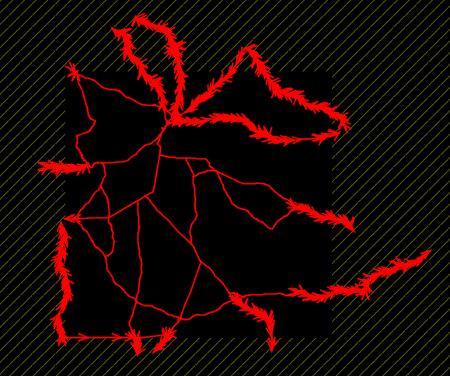
During data reduction and simplification, we have deleted the segments that are already mapped in OSM, except when an OSM way is clearly of poorer quality than the MSD&JSI way(s) that substitutes it, or some segments that are only partially mapped in OSM.
There is another case when you will find an MSD&JSI segment that is already mapped in OSM. It happens when a MSD&JSI segment that goes beyond the downloaded area was already imported by a user who worked with the adjacent Tasking Manager task (tile). In this case, just delete your new MSD&JSI segment.
And finally, you may find some segments that are already mapped because, during the time since data simplification until you started your task, an independent user has mapped some new roads in the area of the task you are working.
But in most of the cases, we will find that the MSD&JSI ways are ways not yet mapped in OSM. So we will focus first in how to deal with these majority of MSD&JSI segments, and finally explain what to do with those MSD&JSI segments that have already an OSM way in its place.
If there isn't any OSM way where our MSD&JSI segment is (as we have said, this is the huge majority of the cases), we will do as follows:
1) Change the highway=road tag of the MSD&JSI segment to the most suitable value, according to the Highway Tag Africa wiki (unclassified, tertiary, residential, service, etc.). In any case, we have to make sure not to leave any MSD&JSI road as highway=road.
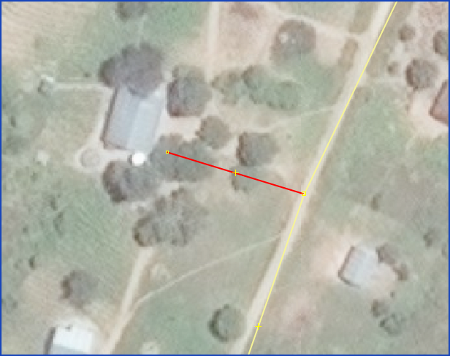
Be aware that many of the very short MSD&JSI segments are highway=service roads, giving access to health related facilities, like in the next example:
But in some cases they may be highway=residential
2) Change the surface=* tag value to surface=paved, in case it is paved.
3) In case the MSD&JSI segment is a prolongation of an existing OSM road, we will try to be conservative and keep the existing OSM tags, unless we are sure we need to change them. We will avoid to change the ref=* tags if we find any.
We explain in Appendix 2 what to do when a MSD&JSI segment is already mapped, totally or partially, in OSM.
Joining MSD&JSI segments to OSM roads
The third thing we have to do with our MSD&JSI segment is to join its end points to OSM ways, if applicable. To do this, you may need to unglue (g) the MSD&JSI end point node from another MSD&JSI segment(s). Then, to join that MSD&JSI segment to the OSM ways, you can use the merge tool (m) when there is a suitable node in the OSM way, or the join tool (j) when there isn't that node available in the OSM way (sometimes, you may have to join the MSD&JSI segment to other OSM way(s) along the segment path as well (use the merge or join tools again)).
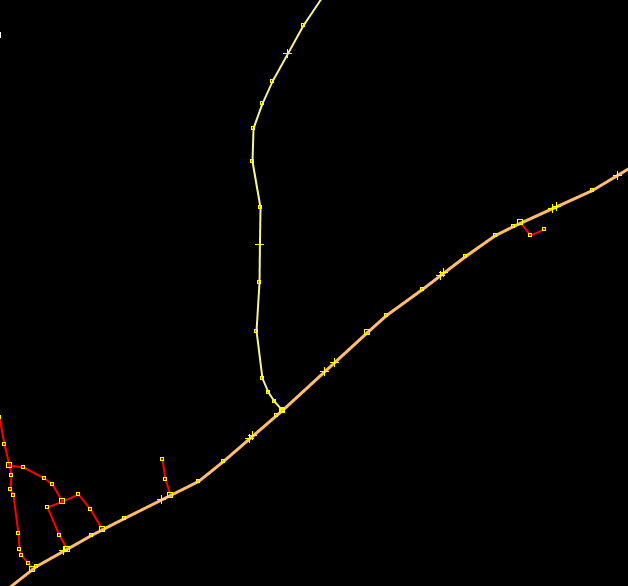
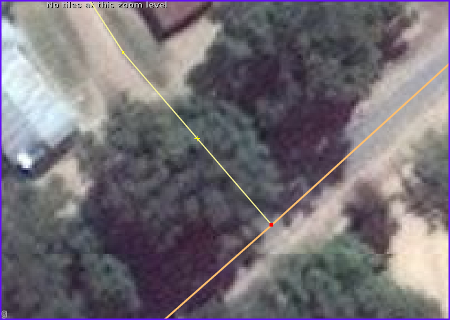
Bear in mind that MSD&JSI new segments are NEVER joined to OSM ways, even when it looks aparently that they are. And this is a quite common case. In the following image, we see a tertiary road coming from the North. It is a MSD&JSI segment that we want to join to the OSM secondary way that goes from Southwest to Northeast:
It looks that the tertiary road is joined to the secondary road, but if we zoom in a lot, we will see that it isn't joined to the secondary road. In fact, in this case it is joined to other MSD&JSI segments (this is the most complete case):
The correct thing would be to unglue (g) that MSD&JSI segment from the other MSD&JSI segments, and then join it to the OSM way (secondary highway). But there isn't any problem in keeping the MSD&JSI segment joined to the other MSD&JSI segments, so to make things easier and faster, we can just join the node directly. To do this, we just select the node and hit m.
In this example, we hit m because the secondary way has a node in that position. In case it didn't, we would use j.
Final correction of the resulting ways
Although very unusual, you may find that the resulting way, after applying last three steps, is wrong for a part of the total length. In that case, you should correct it manually.
Upload new data to OSM
Proceed with the rest of MSD&JSI segments until you finish with all of them. Once you are done with all MSD&JSI segments, we will upload the data:
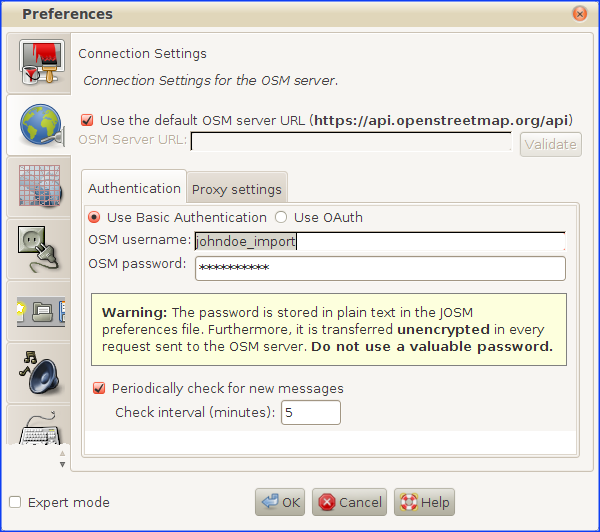
1) As we will import these nodes with the special OSM import account, we need to make sure we changed the user in the preferences (F12):
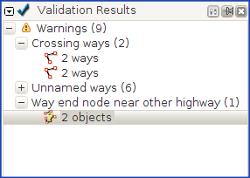
2) Now, we can click on the Upload button. We will most probably find that some segments weren't joined properly to the OSM previously existing ways. So you will find quite often the following two warnings of the JOSM validator: Crossing ways and Way end node near other highway.
We can go to each error selecting them and zooming to them (right click in the error and Zoom to problem or shortcut 6).
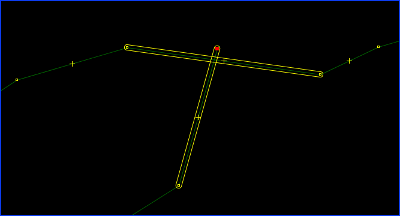
a) Crossing ways comes for two reasons:
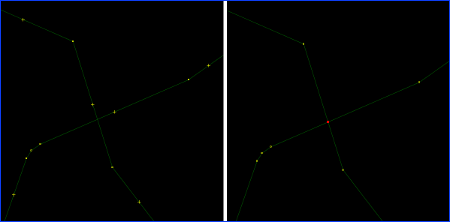
The most common one is the overshoot:
It also may happen when two ways cross each other:
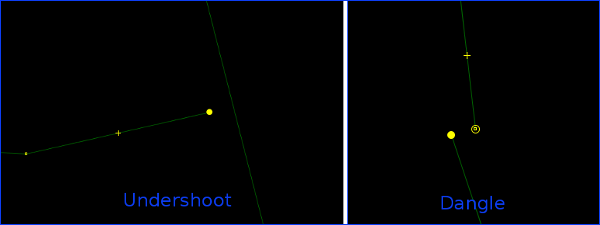
b) Way end node near other highway means typically an undershoot or a dangle:
We will correct all this cases using m and j tools as we explained before, in #Joining MSD&JSI segments to OSM roads.
We will ignore any Unnamed ways warning.
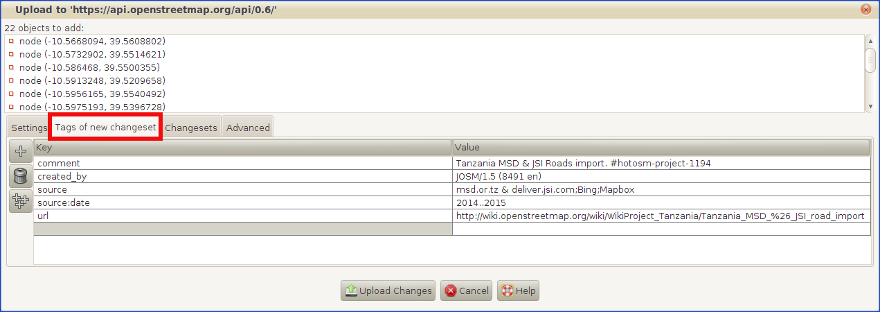
3) Once we have dealt with all warnings, we only have to set the following changeset tags:
- comment=Tanzania MSD & JSI Roads import. #hotosm-project-NUMBEROFPROJECT
- source=msd.or.tz & deliver.jsi.com;imageryProvider
- source:date=2014..2015
- import=yes
- url=http://wiki.openstreetmap.org/wiki/WikiProject_Tanzania/Tanzania_MSD_%26_JSI_road_import
where:
- imageryProvider = Bing or Mapbox or Bing;Mapbox, depending the imagery provider/s used while importing the data.
- NUMBEROFPROJECT is the Tasking Manager project number.
Example:
And now we (finally!) upload the data.
You may now proceed with another task. In case you don't want to continue for now, DON'T FORGET TO GO TO JOSM PREFERENCES (F12) AND SWITCH BACK TO YOUR REGULAR OSM USER. It's quite common to leave the import user account active and go mapping other things that you should map with your regular OSM user account.
Need some inspiration?
You can check OSM data, MSD&JSI segments and resulting data after merging (import) for two already done tasks:
| Task | OSM data before import | MSD&JSI segments to be imported | OSM data after import | Comments |
|---|---|---|---|---|
| TM Project 1194, Task 50 | 1.8 MB | 374 KB | 1.9 MB | |
| TM Project 1194, Task 68 | 2.8 MB | 370 KB | 3.1 MB | This task had plenty of already mapped MSD&JSI segments, so it's interesting to practice what we explain in Appendix 2 |
Appendix
Appendix 1: Merging OSM and MSD&JSI data layers
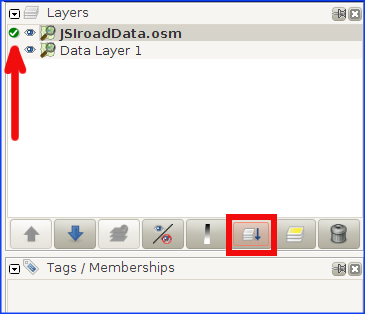
To merge the two data layers - MSDJSIroadData.osm and Data Layer 1 - into one layer, we make first the MSDJSIroadData.osm as active layer, and then click on the merge button to merge both layers into one:
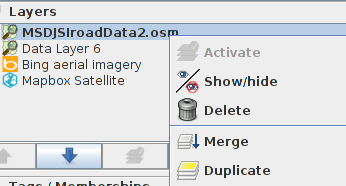
If our JOSM version is newer than release 8727 then this function is only available in the context menu of the source layer. We activate the context menu with the right mouse button and choose the Merge option:
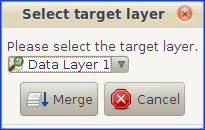
In both cases we are asked for the target layer:
Now we have both OSM and MSD&JSI data in only one layer.
Appendix 2: What to do in case a MSD&JSI segment is already mapped
When 1) there is already an OSM way that covers all MSD&JSI segment path, or 2) There is an OSM way that covers part of the MSD&JSI segment path, we will proceed as follows:
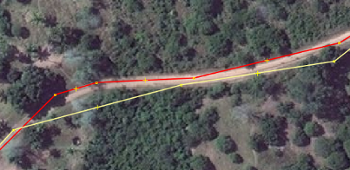
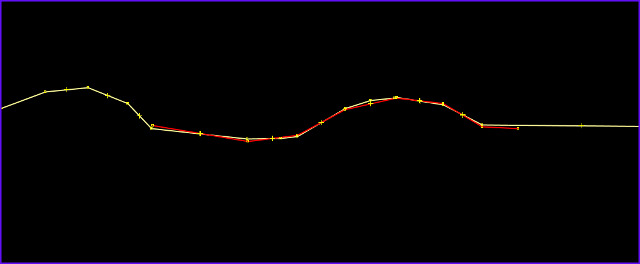
1) If it the MSD&JSI segment has already been mapped in OSM for all its length, we will check visually if the MSD&JSI segment accuracy is clearly better than that of the OSM counterpart or, on the contrary, the OSM way accuracy is similar or better than the MSD&JSI segment accuracy. Let's see this with the help of one image:
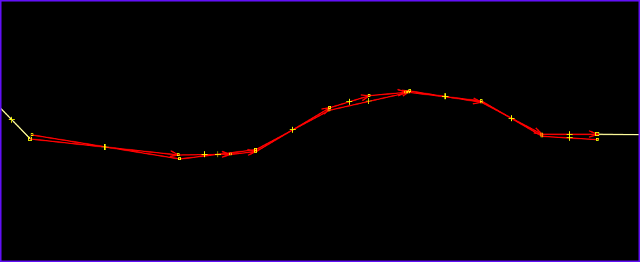
a) A MSD&JSI segment (red colour) is more accurate than the OSM way (a tertiary road in yellow) if for most of its length we see something like this:
b) An OSM way is similar or better accuracy than the MSD&JSI segment if what we have seen in the above image happens only in less than 50% of the total length. It may also happen that both OSM and JSI ways are really good quality.
Let's see what we do in each case:
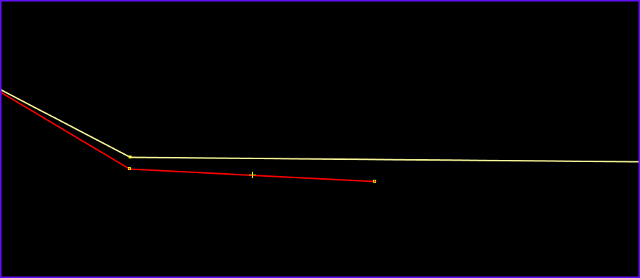
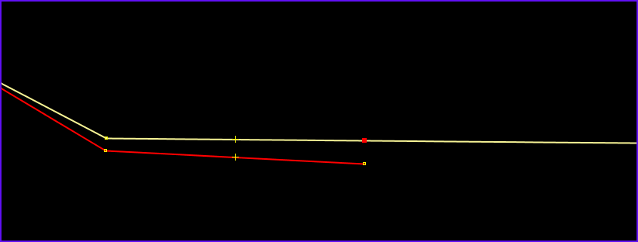
1.1) In case the MSD&JSI segment is better than the OSM way, we will replace that OSM way with the new MSD&JSI segment. Many times we will see that the OSM way goes beyond the limits of the MSD&JSI segment, so in those cases, the first thing we have to do is to split the OSM way in those limits, so we get an OSM segment that has the same limits of the MSD&JSI way. Another case is when we have several joined OSM segments that cover all the MSD&JSI way length. And surely, both issues can happen at the same time. Let's see this graphically:
We can see that the OSM way goes beyond the MSD&JSI segment limits from both ends (West and East). So in this case we will split the OSM way from both ends:
a) West:
Here we see that the OSM way has a node more or less on the limit of the MSD&JSI segment, so we just select the OSM node and split (keyboard shortcut p):
b) East:
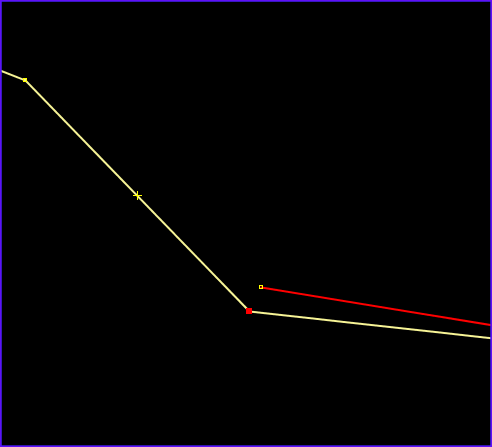
Here there isn't node in the OSM way next to the last MSD&JSI node:
So in this case we will create a new node in the OSM road and then split it in two (p):
In case we have the OSM way divided in 2 or more segments along the MSD&JSI segment, we will select all of them and combine them in only one way (c). But that situation is quite unusual.
Now, we can replace the OSM segment with the MSD&JSI segment. We will do that with the Replace Geometry tool when possible, so we will keep the OSM way history (using the Wikipedia simile, this would be as writing a new version of a Wikipedia article; deleting the OSM way would be equivalent to delete an article and all their older versions and start a new article from scratch).
To use the Replace Geometry tool, just select both the MSD&JSI segment and the OSM segment we want to replace and hit Ctrl+Shift+G:
There may happen two things:
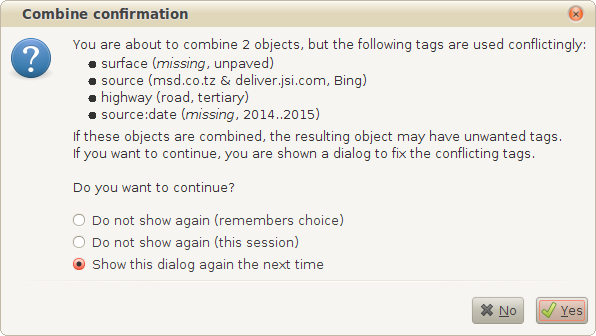
a) Both the OSM and MSD&JSI ways are ok for the replacement. If this is the case, you will see first a pop-up window with JOSM telling you what tags are conflictive. This window is like this:
It says that one way has surface=unpaved and the other lacks that surface=* tag, that one way has source=msd.co.tz & deliver.jsi.com and the other source=Bing, etc.
Tip: if you don't want to see this window, you can select the Do not show again (this session) at the bottom of the window.
We can find hundreds of different situations, so we can't cover all of them, but in general we will:
- Check the surface=* against the Bing (or Mapbox) imagery and tag it accordingly (unpaved or paved).
- For the source=*, we will keep the source=msd.co.tz & deliver.jsi.com
- We will keep the highway=* tag of the OSM way (in this example: highway=tertiary), unless we really think it is wrong according to the Highway Tag Africa wiki. But in any case we will never keep highway=road.
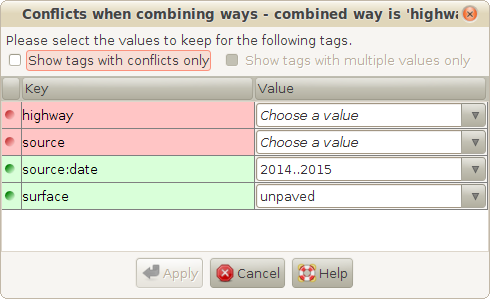
We click Yes and we get the next window:
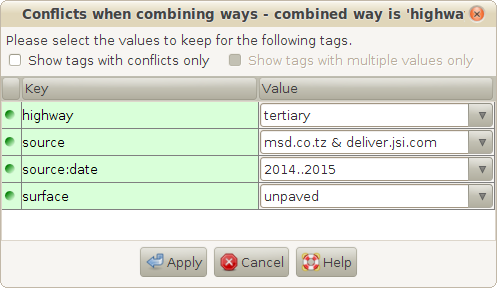
And then we go tag after tag, setting the correct value. In our case we set them like this:
Now we hit Apply and we will see the MSD&JSI segment in place of the OSM way, but with the new tags (some of them coming from the former OSM way).
In case you see this warning at the bottom of the JOSM editing area, just ignore it:
b) But it can happen that the OSM segment (generated after the splitting) is a new segment for the OSM server, and therefore it doesn't make any sense for the tool to replace it. This happens sometimes because, when you split one OSM way in two segments, one keeps the history of the former OSM way, but the other segment is a new way, still not in the OSM server. In this case, you won't get those pop-up windows, but instead you will get a warning at the bottom of the JOSM editing area:
In this case we will check the OSM segment tags (if they are just 2 or three we can memorize them for a few seconds), we delete that OSM way and we transfer those tags to the MSD&JSI segment. We will change the highway=road value to the highway=* value of the OSM way, set the surface=* tag to its correct value, etc. The same like we did in a), but in this case a bit more "manually".
1.2) Otherwise, if the OSM segment is of similar quality or more accurate than the MSD&JSI one, we will ignore the MSD&JSI segment (we will delete it). But we will check the surface and highway category (unclassified, tertiary, secondary, etc.) of the OSM way. In case it doesn't have the surface=* tag, we will add it. We will be careful not to change the highway category unless it's clearly wrong.
2) If only a part of the JSI segment is present already in OSM, we will check like in 1) if the MSD&JSI segment accuracy is clearly better than that of the OSM counterpart or, on the contrary, the OSM way accuracy is similar or better than the MSD&JSI segment accuracy.
2.1) If the JSI segment is of better quality than the OSM way, we will split the MSD&JSI segment so we get a new MSD&JSI segment that can replace the OSM way, using the Replace Geometry tool similarly as we did in 1.1). We then have to combine this new segment with the rest of the MSD&JSI original segment. One easy way is to first delete the tags of the part/s of the MSD&JSI original segment (excluding the segment that replaced the OSM way), join the ends of all segments with the merge tool (keyboard shortcut m) and then select all those segments and combine them in one only way (c).
2.2) Otherwise, if the OSM segment is of similar quality or more accurate than the MSD&JSI one, we will ignore the MSD&JSI segment (we will delete it). We will check the surface and highway category (unclassified, tertiary, secondary, etc.) of the OSM way. And finally, we will combine it (c) to the MSD&JSI segment(s) that laid beyond the OSM way. In case there isn't surface=* tag, we'll add it. We will be careful not to change the highway category unless it's clearly wrong.
