Viking
| Viking | |
|---|---|
| Author: | |
| License: | GNU General Public License |
| Platforms: | Windows and Linux |
| Version: | 1.10 (2021-11-27) |
| Languages: | Czech, Danish, German, Greek, English, Spanish, Basque, Finnish, French, Croatian, Indonesian, Italian, Japanese, Lithuanian, Latvian, Norwegian Bokmål, Dutch, Polish, Portuguese, Russian, Slovenian, Swedish, Ukrainian, and Chinese |
| Website: | https://sourceforge.net/projects/viking/ |
| Source code: | http://viking.git.sourceforge.net/git/gitweb.cgi?p=viking |
| Programming language: | C |
|
GTK+3 application to manage GPS data | |
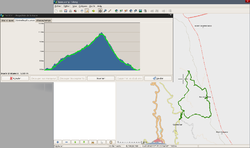
Viking is a free/open source program to manage GPS data.
You can import, export and plot tracks, routes and waypoints, show OpenStreetMap, Bing aerial and other online maps and also (Raster) MBTiles files.
You can import and export data via a frontend to GPSBabel
You can generate maps using Mapnik.
Download Wikipedia points, OSM Traces or Your Personal OSM Traces for an area on the map.
Make new tracks, routes and waypoints and ![]() geotag images.
geotag images.
See real-time GPS position (but not on Windows as no GPSD support on this platform).
It is written in C (and some C++) with the GTK+3 toolkit, available for Linux, other POSIX operating systems, and Windows, and is licensed under the GNU GPLv2+.
Height data
One nice feature of Viking is that it can apply height data to your track and show the height for the cursor on the map. To map height data work you need so called 'DEM' files which Viking can download for you:
- Create a new DEM layer using Layers --> New DEM Layer (Ctrl+Shft+D)
- Make the layer active by selecting it
- Press the 'DEM download' button, the most right button on the top button bar, your cursor will now have the DEM icon attached to it
- Hover over the map and check if you see the height information after the current coordinate that is displayed in the bottom of the window
- If the height information is not displayed, press (with you cursor still having the DEM icon attached) the right mouse button
- Viking will now download the height information for the tile where you pressed your mouse
- To view which tiles you have loaded, only activate the DEM layer, i.e. deactivate or hide all other layers
If things do not work, it might be that download the DEM files fails. If so, start viking with the -D and -v options to see what is possibly wrong.
Keep in mind that viking becomes slower when using DEM data, so better only enable it when you "need" it.
Apply height data to your track
Right click on your track, Transformation --> Apply DEM data and choose either Overwrite or Keep existing. After the update a window will come up telling how much points are adjusted.
Configuration
Custom Map Tiles Sources
- Viking reads this file if it exists: ~/.viking/maps.xml and allows to define/use your own map tile source
- Example
 <objects>
   <object class="VikSlippyMapSource">
     <property name="label">Custom Tile Server</property>
     <property name="hostname">tile.server.tld</property>
     <property name="url">/path/%d/%d/%d.png</property>
     <property name="id">100</property>
   </object>
 </objects>
