Potlatch 2 is deprecated and has been replaced by Potlatch 3.
This page describes a historic artifact in the history of OpenStreetMap. It does not reflect the current situation, but instead documents the historical concepts, issues, or ideas.
Potlatch 2 is a OpenStreetMap editor. It runs directly in your web browser without installing anything (apart from a flash plugin, which you probably already have).
Before you begin editing, you need sign in to OpenStreetMap (or sign up if you don't already have an account) Having done that, let's take a look at what Potlatch 2 has to offer.
Clicking the Background button will allow you to select one of the background layers such as aerial imagery to assist you with your editing. Aerial imagery is especially helpful if you're looking to trace over new features or edit existing ones.
Dimming the background image
After clicking the Background button, check the Dim Background box to toggle on/off the dim feature. Doing so can further help with editing, depending on what your current task is.
Realigning the background layer
With background images, sometimes you'll notice they are not aligned with the OSM data. If this is the case, hold down Space on your keyboard and drag the background image to its correct location in the map view.
Map style
To further customize the look and feel of Potlatch, you can change the Map Style. Similar to changing the background image, some styles simply works better for the type of edit you're currently applying.
GPS data/my tracks
Selecting GPS data will display thin blue lines representing all gps tracks in the area.
Selecting My tracks will enable display of your own tracks that you loaded into OSM via the GPS traces - upload a trace function (https://www.openstreetmap.org/trace/create). To switch displayed a own trace off again, go to Background -> Vector file... and remove the tick from the GPS line with the correct trace file name.
Note that apparently GPS traces get simplified if displayed in Potlatch 2 from the server. They seem to not get simplified if loaded locally (that's a workaround if no simplification is needed).
Editing tools and techniques
Before you begin editing, the first rule you need to know is the use of proprietary data. Data from copyrighted maps or any other proprietary data is strictly prohibited! Copying, tracing, or any act of reproduction of copyrighted work is not allowed! (Source: Copyright)
Please note: Linear features such as streets, footpaths, railways, and building outlines will hereby be referred to as ways.
Creating features
Upon creating new features, be sure to tag them. See the Tagging Features section below for more information.
To create a point (or node), first make sure there are no features selected and just drag and drop the appropriate icon from the sidebar onto the map. Alternatively, you can double-click on the map to create a Point of Interest. Then refer back to the sidebar and select the appropriate tag in order to display the correct feature and icon.
To create a way, begin by a click on the map at its start point, then click at each successive point. Double-click to finish the line or press ↵ Enter.
To create a new way extending from an existing way, ⇧ Shift+click on one of the end points of the way. Then continue drawing as usual to create a new way with a new set of tags. If you were just looking to extend the existing way and keeping the same tags, see To extend a way below.
To create a polygon, begin by a click on the map at its start point, then click at each successive point (similar to creating a linear way), and finish by a click on the very first point to close the polygon. Hint: The cursor will change from the pen tool to a pen tool with a small black circle when hovering directly over the first point.
Basic edits
To add a point to an existing way, select the way and ⇧ Shift+click at the desired location. Adding more points will help realign features and smooth curves.
To delete a point, select the point and click the Delete Item button in the bottom right corner or press ⌦ Delete or ⌫ Backspace on your keyboard.
To delete a way, select the way and click the Delete Item button in the bottom right corner or press ⇧ Shift+⌦ Delete or ⇧ Shift+⌫ Backspace on your keyboard.
To move a point, click and drag the point.
To move a way, click and drag the entire feature (hint: grab a segment where you won't accidentally move a node).
To extend a way, click on one of the end points of the way. Then continue drawing as usual.
Advanced edits
To make a junction between two ways, … junctions
… draw as usual until you need to make a junction. Then as you move your mouse over another way, the mouse pointer will show a "+" and the way's points will light up in blue. Click on one of the blue points or any other desired location on the way. Junctions must be made if the features are connected. For example, if two roads are connected, creating a junction will allow the two to share a common node and proper routing can take place.
… if you already got two ways crossing each other and have one node of each way on the (roughly) same location, then just select one of the nodes and hit the J key. See also Potlatch_2/Shortcuts.
To disconnect a junction, select the point on the way you wish to alter. Then press - on the keyboard to remove the point.
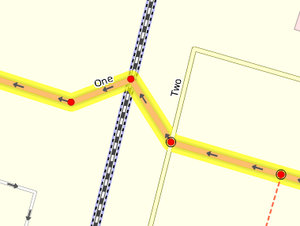
toolbar (older program style) To reverse the direction of a way, click the Reverse Direction button in the bottom right corner. The direction of a way is only a concern for those features with a "oneway" tag - oneway streets, coastlines, islands, and so on.
To split a way, select the point at which you want to cut, and click the Scissor tool (or press X on your keyboard). Splitting ways are obviously helpful for disconnecting ways but the main purpose of splitting is often to tag the split features differently. For example, an overpass should be split and tagged separately as a bridge, and roads should be split at county borders and tagged as being in different counties.
To straighten a way, select the way and click the Straighten Way button in the bottom right corner. This will straighten the way by removing all points that are not junctions.
To make a way circular, select the way (must be a closed polygon) and click the Make Circular button in the bottom right corner.
To make a way right-angled, select the way (must be a closed polygon) and click the Make Right-Angled button in the bottom right corner.
To create a way running parallel, select the way and click the Create Parallel Way button in the bottom right corner or press P on your keyboard. This is especially useful where a divided highway exists and only a single way is shown.
select a node or way which is a member of that relation
select 'Advanced' mode on the left to see the relation list (screenshot)
double-click the relation name ("Edit Relation" window pops up; screenshot)
you may need to scroll down … then you can do the following:
directly do simple edits in the form of the shown 'simple' mode
click 'Advanced' to edit the relation's tags and relation memberships (to add this relation to another, parent relation, click 'Add to').
click 'Members' to see the members in order. You can change the order by dragging the list entries.
Note: when you select a way that is a member of a multipolygon relation, the relation will be selected on the left. To switch to selecting the way, click the downward triangle next to the relation ID at the bottom then choose the way.
Deleting relations
To delete a relation (caution, this is a very seldom needed operation! This is not only deleting the membership of one element.):
select a node or way which is a member of that relation
select 'Advanced' mode on the left to see the relation list
in the line of the relation which is to be deleted, click on the small triangle to see the list of advanced relation operations (list: "Select all members", "Deselect all members", "Add selection to this relation" and "Delete relation").
Select the "Delete relation" option. → You are presented with the prompt: "This relation has nnn members. Deleting it will affect all of them and erase this route. Are you really sure?".
Press "Yes" to delete the relation.
Tagging
Tagging is a major aspect of editing in OpenStreetMap. Fortunately, this process has been simplified over the years to reduce errors and unconventional tags from being used.
A great resource you should probably have bookmarked is Map Features. It describes the differences between the various tags and what additional tags should probably be captured.
Tagging a point with drag/drop
When creating a new point feature, dragging an icon from the sidebar to the map will automatically take care of some basic tagging. For example, when you drag an airport icon to the map, Potlatch has already tagged it as an airport.
Just as a side note, click the Advanced tab on the bottom. You will see the key=value pairs that make up the airport tag. aeroway=aerodrome is what's used to tag an airport in OpenStreetMap. It's not the most intuitive tag (at least in the United States), nor very memorable so we should feel quite fortunate that Potlatch has taken care of this for us. Now that you've seen how complex tags can get, click on the Simple tab to return to where you were.
With the feature still selected, refer to the sidebar again and begin typing in the airport's name in the Name field to add additional tags. Browse through all the fields and tabs, and fill out as much information as you can.
Once you're satisfied with the tags you have added, save, and move on to your next edit!
Tagging a point with double-click
If you had already created a generic point by double-clicking on the map, you'll need to edit the tag manually or else no one will know what the point represents. Make sure this point feature is selected and choose the appropriate tag via the drop down menu in the sidebar currently labelled unknown.
Once you've chosen the correct POI type, browse through all the fields again and fill out as much information as you can.
Tagging a way
Unlike tagging a point, you can't drag and drop a primary road onto the map. You'll need to first draw the way and manually edit the tag later. Begin by drawing your new way and with the feature still selected, choose the appropriate tag via the drop down menu in the sidebar currently labelled unknown.
There are a number of similar options here regarding the road types, transportation, etc, so please don't forget to refer back to the Map Features documentation.
Once you've chosen the correct way type, browse through all the fields again and fill out as much information as you can.
Tagging multiple ways in one go
Often, multiple ways must be tagged identically. For example, a city street often consists of several ways, and while some tags will be different, many (such as highway=residential and name=Main Street) will be the same. To make this easier, you can select multiple ways in one go, using Ctrl+Click (⌘ Command+Click on a Mac). Then, the detail pane will allow you edit tags which will apply to all selected ways. Tags which have different existing values for different ways will be marked as '<different>'.
Importing (GPS, shapefiles, etc.)
Import other sources (be sure respect the copyrights if you did not survey yourself) into the editor to assist you with your editing:
In the "Background" button (top row inside the editor) drop-down,
If you make a mistake, you can always hit the Undo button or press Z on your keyboard.
Undo all edits for a feature
Pressing the Esc key will undo all your edits for the current feature.
Saving
Saving with a comment
When all your edits are complete and look satisfactory, click the Save button and a small dialog box will prompt you to add comments on the edits you made. OpenStreetMap encourages users to leave a comment informing others of what changes were made and why.
Remember that any edits you save will not be immediately visible on OSM maps. This generally takes about five minutes in Mapnik, one day in OSM Cycle Map, a day in MapQuest OpenMap so don't worry if you don't see your changes right away.
Note: If you want to close your changeset after saving, use the C shortcut.


