Este breve tutorial tiene por objeto proporcionar una forma fácil de mapear servicios de transporte público. Se publicará otro tutorial sobre el mapeo adecuado del transporte público conforme a la versión 2 del transporte público.
Advertencia: Existen muchas más aplicaciones móviles para mapear servicios de transporte público, acá usaremos OsmAnd, una de las aplicaciones Android más usadas, pero asegúrese de que puedan usar otras aplicaciones.
Al iniciar la aplicación, OsmAnd le sugerirá el área a descargar. Si desea mapear el transporte público en su país o región (por ejemplo, Nicaragua), diríjase a "Descargar" el mapa. Si no, "seleccione otra región" y descargue el "mapa estándar".
Once the download of your region completes, OsmAnd will automatically start to download the "World overview map" for you which is recommended to have.
After the successful download, open the menu at the bottom-left corner, go to "Plugins" and enable the "Trip recording" plugin.
Go to "Configure screen" in the app's menu, enable the "Quick action", add the item "Add GPX waypoint", enable the "interim dialog" and tap on "Apply".
Tap on the "Configure map" icon at the top-left corner and then on "Transport", enable "Transport stops" and the corresponding "public transport routes" that you wish to map. Also, it is recommended to enable "Point labels" to see the name of the stops you will create.
Activate your device's GPS and check that OsmAnd shows your current position on the downloaded map.
You are now ready to start tracking your public transport route!
Screenshots to prepare your tracking environment
(1) The start screen of OSMAnd
(2) Download the map for your region or country
(3) Download the world overview map
(4) Activate the 'Trip Recording' plugin
(4) Plugin activated
(5) The 'Configure Screen' menu
(5) Activate the 'interim dialog'
(5) Quick action added
(6) Enable 'Point labels'
(6) Enable 'Transport stops' and the corresponding transport types
(7) OSMAnd shows your current position
Get on the bus/train/ship etc.
Go to the first stop of the public transport service you would like to track and ensure you will have the possiblity to note down the names of the stops while you are passing them (any timetable, sign, display or audio inside the public transport vehicle or ask a person who knows the names to help you).
Turn on your GPS, open OsmAnd and sit down at the window's side to ensure good GPS connection.
Once the public transport service starts, tap on the "GPX" button at the top-right, "start GPX logging", choose your prefered "Logging interval" (recommended: 5 seconds) and the option "Show on map" to track your journey. Note the red circle on the "GPX" button and the red line that will show you your transcured way while your public transport vehicle is in motion.
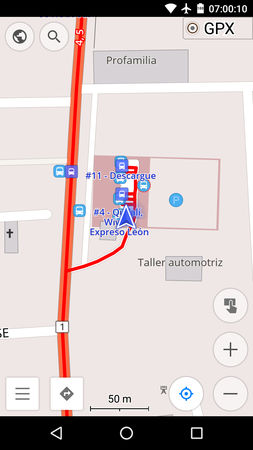
Center the map by your GPS position by tapping the symbol at the lower-right corner and then tap on the "Quick action" symbol and "Add GPX waypoint" to add your first stop. Do not forget to give it the corresponding name (ex. COTRAN Sur).
For each public transport stop, do the same as above, search or ask for the name and mark the position as a "GPX waypoint". Remember that your waypoint's name has not to be well written, it's only important that you (or the person who will map the route afterwards) understands what you mean.
Reaching the final stop, assure to mark it as waypoint, too, and tap on the "GPX" button (that now shows your travelled distance) in the upper-right to "Stop GPS logging". Tap the same button another time to "Save current GPX track".
Go now to "My Places" > "My Tracks" and search for your newly recorded track in the "Rec" folder, open the file menu on the right side and give it a significant name. You can also "Analyze on map" to ensure all worked well (you should see a red line from the start to the end point with several star symbols on the way, featuring the stop names.
Screenshots while tracking your public transport service
(2) Ensure having good GPS connection inside the vehicle
(3) Start tracking your journey
(4) Mark the position of the first stop
(5) Marking the intermediate stop 'Maxi Pali'
(5) Note the red line showing your journey
(6) Mark the position of the last stop
(6) Mark the position of the last stop
(6) Stop the GPS tracking
(7) Rename your GPS track
(7) View your recorded track on the map
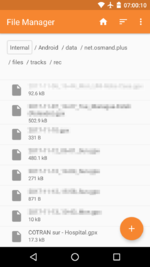
Copy tracks to your PC
(1) The recorded GPX Track
Now it's time to copy your recorded journey to the PC from which you want to upload the public transport route to OpenStreetMap. You should find your newly created *.gpx file inside the 'Android/data/net.osmand.plus/files/tracks/rec' folder and you can copy it via USB, Bluetooth, E-Mail or whatever.
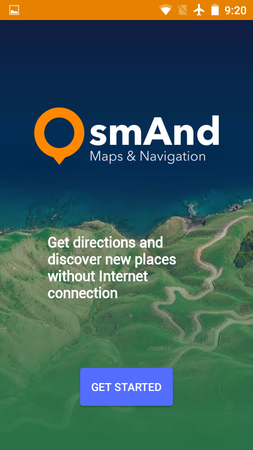 (1) The start screen of OSMAnd
 (2) Download the map for your region or country
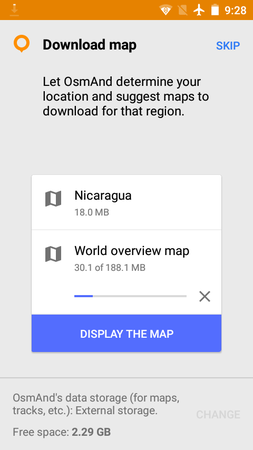 (3) Download the world overview map
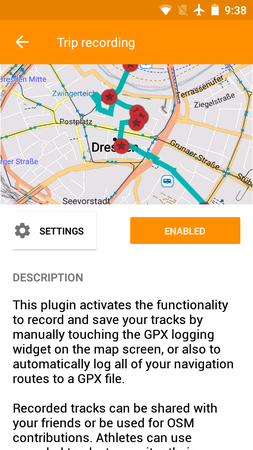 (4) Activate the 'Trip Recording' plugin
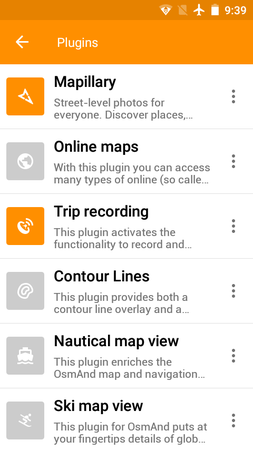 (4) Plugin activated
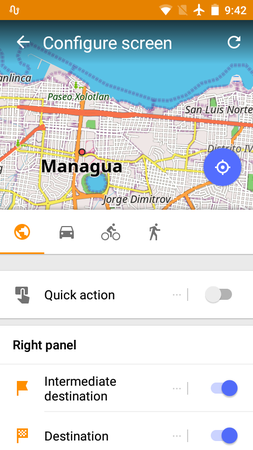 (5) The 'Configure Screen' menu
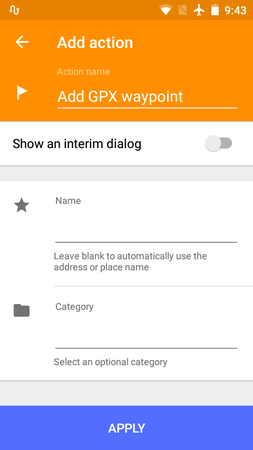 (5) Activate the 'interim dialog'
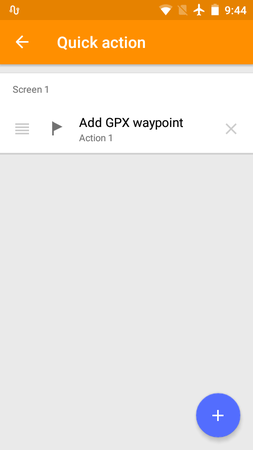 (5) Quick action added
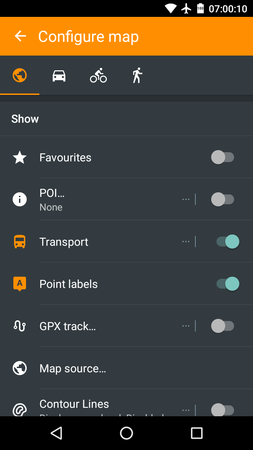 (6) Enable 'Point labels'
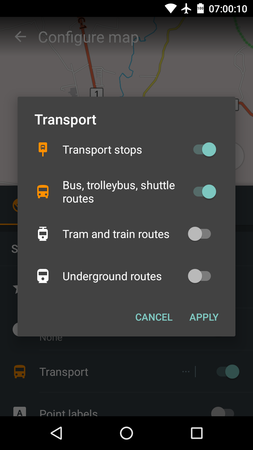 (6) Enable 'Transport stops' and the corresponding transport types
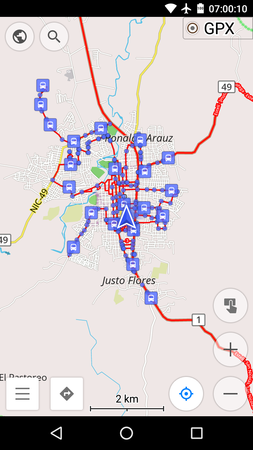 (7) OSMAnd shows your current position


 (2) Ensure having good GPS connection inside the vehicle
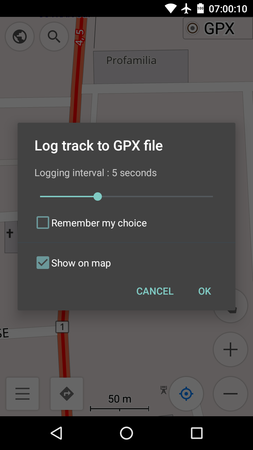 (3) Start tracking your journey
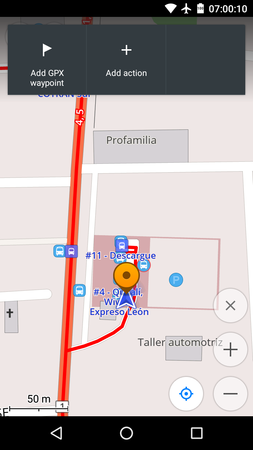 (4) Mark the position of the first stop
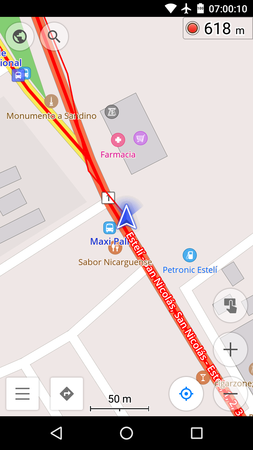 (5) Marking the intermediate stop 'Maxi Pali'
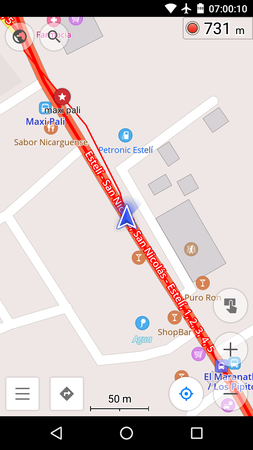 (5) Note the red line showing your journey
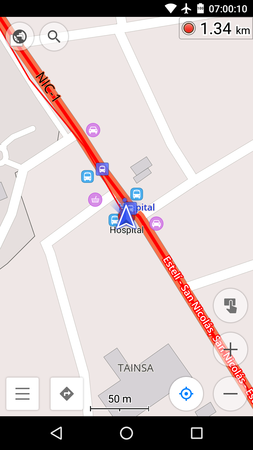 (6) Mark the position of the last stop
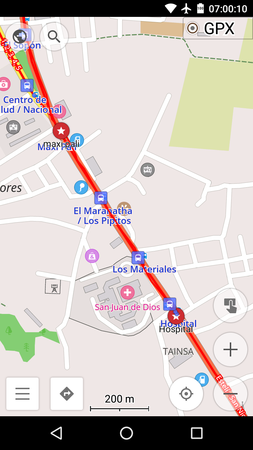 (6) Mark the position of the last stop
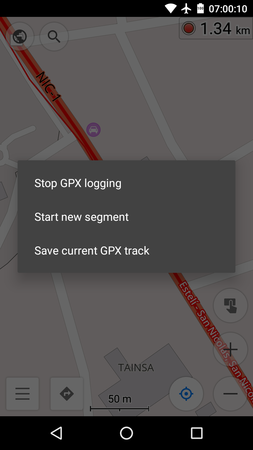 (6) Stop the GPS tracking
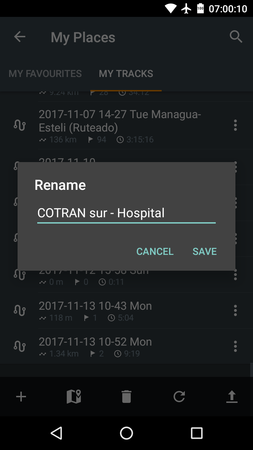 (7) Rename your GPS track
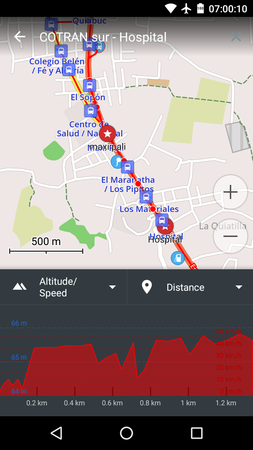 (7) View your recorded track on the map


