User talk:Higa4/OSM book Japan/Editing with the offline editor JOSM
原文: http://en.flossmanuals.net/openstreetmap/editing-with-josm/
Editing with JOSM
JOSMでの編集
JOSM is the Java OpenStreetMap editor. It is used for editing the OpenStreetMap data on a desktop computer. This means you don't have to be online to edit data. JOSM requires the Java Runtime Environment--if it is not yet installed on your computer, you can download it from http://www.java.com/en/download/ .
JOSMはJavaで作成されたOpenStreetMapエディタです。JOSMはデスクトップ・コンピュータ上でのOpenStreetMapデータの編集に使用されます。JOSMではデータを編集するのにはオンラインである必要はありません。JOSMにはJavaランタイム環境が必要です。コンピュータにインストールされていない場合は、http://www.java.com/en/download/ からダウンロードできます。
This chapter explains how to download and install JOSM, step by step. We will also cover changing some of the settings in JOSM to make it easier to use! Then we will open a sample map and learn about some of the basic operations of the software. Downloading JOSM
本章は、JOSMをダウンロードしてインストールする方法について、一歩ずつ説明します。さらにJOSMの使用をより簡単にするため、いくつかの設定変更についても説明します!その後、私たちはサンプルマップを開いてJOSMの基本操作のいくつかを学習します。
JOSMのダウンロード
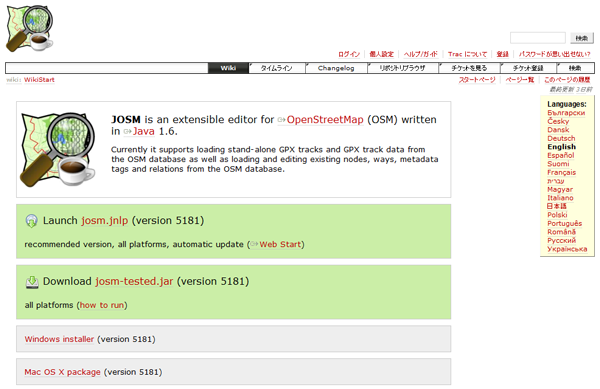
Go to the JOSM website at: josm.openstreetmap.de. You can also find this website by searching for “JOSM”. The website looks something like this:
JOSMのサイト http://josm.openstreetmap.de へ行ってください。"JOSM"で検索してサイトを見つけることもできます。 JOSMサイトはこのように見えます:
The JOSM Website
JOSMサイト
If you have Windows installed on your computer, click “Windows JOSM Installer” to download JOSM. If you have a different operating system, click on the link for your system. Your download should begin.
Windowsがインストールされたコンピュータの場合は、JOSMをダウンロードするために“Windows JOSM インストーラー” をクリックしてください。それ以外のOSの場合は、それぞれのOSシステムのリンクをクリックしてください。そうするとダウンロードが始まります。
Note that in general, JOSM works the same on all operating systems, except for some installation steps. When required, we will specify the appropriate steps for your system.
通常、JOSMはいくつかのインストール・ステップを除いて、すべてのオペレーティング・システム上で同じ動作をします。必要な時は、あなたのシステムに適切なステップを指定します。
Installing JOSM
JOSMのインストール
Find the JOSM install file on your computer. Double-click it to begin setup.
ダウンロードしたJOSMインストールファイルをダブルクリックするとセットアップが始まります。
Note: You must have at least version 1.6 of Java installed on your system for JOSM to work.
注意: JOSMを動作させるには、Java Ver1.6以降がインストールされている必要があります。
On Windows the installer first asks you to choose a language. Then you get a welcome screen click 'Next’. Click ‘I Agree’ to accept the license. Then you can choose the components you want (the defaults are usually fine). Finally choose the install location and click ‘Install’. When the installation is complete, click 'Next' and then ‘Finish’ to launch JOSM for the first time. Later, when you want to start JOSM, you can do so by clicking on the Start Menu in the lower left corner of your computer, and clicking the JOSM icon.
Windowsでは、インストーラーで最初に言語を選択して、画面の「次へ」をクリックします。その後、ライセンスを承認して「私は同意します」をクリックします。その後、あなたが使いたいコンポーネントを選ぶことができます(たいていはデフォルトでOK)。最後にインストール場所を選んで'インストール'をクリックします。インストールが終わったら'次へ'、'終了(Finish)'をクリックしてJOSMの初回起動を行います。後で、JOSMを開始する時は、コンピュータ画面の左下隅のスタートメニューを選んで、JOSMアイコンをクリックすると起動できます。
On Mac OS X, double-click the compressed file to open it and then double-click the Application file to launch JOSM.
Mac OS Xでは、圧縮ファイルをダブルクリック、解凍した後、アプリケーションファイルをダブルクリックするとJOSMが立ち上がります。
You may see a window pop up that asks if you want to update the software. You don’t need to update it since it is new. Press the button that says “Cancel.” If you don’t ever want to see this message again, check the box at the bottom before pressing “Cancel.”
ソフトウェア更新を尋ねるポップアップウィンドウが表示されることがあります。ソフトウェアは新しいので更新する必要はありません。「キャンセルしてください」と言うボタンを押してください。このメッセージを今後見たくない場合は、「キャンセル」を押す前にいちばん下のチェックボックスをチェックしてください。
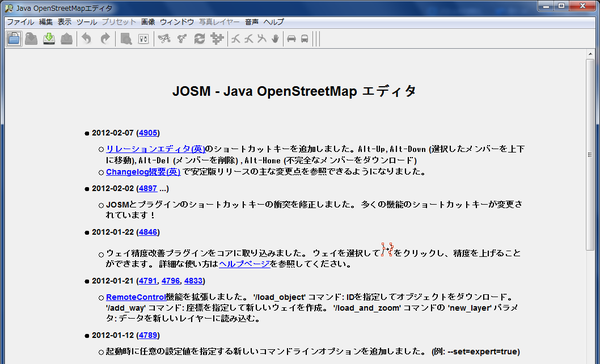
When JOSM starts, it looks like this:
JOSMのスタート画面です。
JOSM when it opens
The initial JOSM screen Learning Basic Drawing with JOSM
JOSM最初の画面 JOSM基本作図についての学習
Now let’s open up a sample OSM file to learn the basic ways to draw maps with JOSM. Note that this map is not real, in that it is not a real map of a real place, so we will not save it on OpenStreetMap.
では、サンプルOSMファイルを開いてJOSMでマップを描く基本操作を学びましょう。このサンプルマップは実際の場所の実際のマップではないという点に注意してください。OpenStreetMapにサンプルマップは保存しません。
Go to addresshttp://www.learnosm.org/files/sample.osm and click “Save File As…” Choose a location on your computer to save the file.
オンラインでhttp://www.learnosm.org/files/sample.osm に接続して、あなたのコンピューターにosmファイルを保存してください。
Now open the sample map file in JOSM. Open JOSM. Click the “Open” button in the upper left.
JOSMで保存したサンプルファイルを開いてください。JOSMを立ち上げます。画面左上の"開く"ボタンをクリックして下さい。
Find the file sample.osm. Click on it, and then click “Open”.
サンプルファイルsample.osmを選択して"開く"ボタンをクリックして下さい。
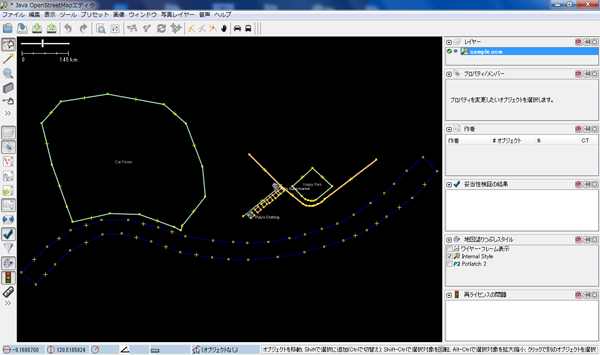
You should now see a sample map, similar to this:
このようにサンプルマップが見えるはずです:
サンプルOpenStreetMapファイル
Basic Operations
基本操作
To move the map left or right, up or down, hold your right mouse button down, and move your mouse.
地図を左右、上下移動させたい時にはマウスの右ボタンを押してドラッグして下さい。
There are several ways to zoom in and out of the map. If you have a mouse, you can use your scroll wheel to zoom in and out. If you are using a laptop and don’t have a mouse, you can zoom in and out using the scale bar in the upper left of the map window. Drag the bar left and right by holding your left mouse down and moving the bar left or right with your mouse.
地図のズームイン、ズームアウトにはいくつかの方法があります。マウスを使うならスクロールホイールでズームイン、ズームアウトができます。ノートパソコンでマウスを持っていなければ、地図ウィンドウの上部左のスケールバーを使用してズームイン、ズームアウトができます。スケールバーの目盛をマウス左ボタンで押しながら左右に動かします。
JOSMのスケールバー
Look at the sample map. There a few different types of objects here. There is a river, a forest, some buildings, several roads, and a couple of shops. To select an object, click on it with your left mouse button.
サンプルマップを見てください。異なるタイプのオブジェクトがいくつかあります。川や森林、いくつかの建物や道、お店が2、3軒あります。オブジェクトを選択するには、マウス左ボタンでそれをクリックしてください。
Points, Lines, and Shapes
ポイント、ラインおよびシェイプ
As you click on different objects on the sample map, notice that there are three different types of object on the map. There are points, lines, and shapes.
サンプルマップ上の異なるオブジェクトをクリックすると、3つの異なった種類のオブジェクトがあることがわかります。ポイント、ラインおよびシェイプがあります。
Points are a single location, represented by symbols. On this sample map, there are two points, a clothing shop and a market. The clothing shop is represented by a shirt symbol, and the market is represented by a shopping cart.
ポイントはシンボルで表されるひとつの場所です。このサンプルマップでは2か所、洋服店とスーパーマーケットがあります。洋服店は、シャツの記号で表され、スーパーマーケットはショッピングカートの記号で表されます。
There are several lines on the map as well, which represent roads. If you look closely you will see that within the lines, there are points as well. These points do not have any symbols or other information associated with them, but they help to define where the line is located.
地図上の複数のラインも同様に、道路を表わします。よく見るとライン内にポイントが含まれることがわかります。これらの点は、任意の記号やそれらに関連するその他の情報を持っていませんが、ラインの位置を定義しています。
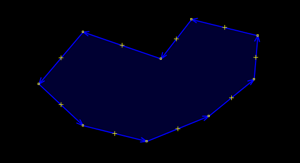
Lastly, there are numerous shapes on the sample map, representing different places – a forest, a river, and buildings. A shape generally represents an area, like a field or a building. A shape is exactly like a line – the only difference is that the line begins at the same point where it ends.
最後に、森や川、そして建物といった違う場所を表す多くのシェイプがサンプルマップにあります。シェイプは一般に土地や建物のように、領域を表します。シェイプは厳密にはラインのようなものです。 シェイプとラインの唯一の違いは、ラインが終了するのと同じポイントで始まるということです。
You may notice that when you select an object, a list appears to the right of the map in a window called “Properties”. The items in this list are known as tags.
オブジェクトを選択した際にプロパティと呼ばれる窓が地図の右に現れることに気が付くでしょう。このリスト内の項目は、タグと呼ばれています。
Tags are information that is tied to a point, line or shape that describes what it is. For now all you need to know is that this information helps describe whether our object is a forest, a river, a building, or something else.
タグは、ポイント、ライン、シェイプが何であるか説明する情報です。今のところ、知る必要のあるのは、私たちが描いたオブジェクトが森林、川、建物あるいは他のものかどうかこの情報が説明するということです。
Think about drawing a map by hand, and how you are also drawing points, lines, and shapes. What other places are best represented by points? Lines? Shapes?
地図を手書きすることやどのようにポイントやライン、シェイプを描くかについても考えます。別の場所をいちばんよく表現できるのはポイント?ライン?シェイプ?
Changing Objects
オブジェクトの変更
Select the forest on the left side of the map. Be sure to click on the line around the forest, not one of the points on the line. Now hold your left mouse button down and drag your mouse. You should be able to move the forest to a new location on the map.
マップ左側の森林を選択してください。必ず、ライン上のポイントではなく、森林の周りのラインをクリックしてください。マウスの左ボタンを押しながら、マウスをドラッグしてください。森林をマップ上の新しい位置に移動させることができるはずです。
Click on on of the points on the line around the forest. Hold your left mouse button down and drag your mouse. You should be able to move the point.
森林周りのライン上ポイントをクリックし続けてください。マウスの左ボタンを押しながら、マウスを引きずってください。そのポイントを移動させることができるはずです。
This is how you can change the shape of an object, or move a point.
このようにして、オブジェクトの形を変更したり、ポイントを移動させることができます。
Drawing
描画
On the left side of a JOSM is a column of buttons. Many of these button open new windows on the right side that provide more information about the map. However, the most often used buttons are at the top of this column. These buttons change what you can do with your mouse.
JOSM画面左側にボタンの列があります。このボタンの多くは、地図についてより多くの情報を提供する新しいウィンドウを画面右側に開きます。しかし、最も多く使用されるボタンはこの列の一番上にあります。これらのボタンは、マウスでできることを切り替えます。
The top four buttons in this column are the most important. They allow you to:
この列の上4個のボタンは最も重要なものです。次のような操作ができます:
   * Select
   * Draw
   * Zoom in
   * Delete
   * 選択
   * 描画
   * 拡大表示
   * 削除
Until now, you have been using the Select tool, which looks like this:
今まで、あなたはこのような選択ツールを使用しています。:
Select Tool
選択ツール
Before you draw, you need to make sure that nothing is selected. Click in the black space on the map, where it is empty, to make sure nothing is selected.
作図する前に、何も選択されていないことを確かめる必要があります。何も選択されていないことを確かめるには、地図の中で何も無い、黒い画面上をクリックしてください。
Click on the second button, the Draw tool.
2番目のボタン、描画ツールをクリックしてください。
Draw Tool
描画ツール
Find an empty area on the map, and double-click with your mouse. This will draw a single point.
地図上で空白のエリアを見つけて、マウスでダブルクリックしてください。これでポイントがひとつ描けるはずです。
To draw a line, single-click with your mouse. Move your mouse and click again. Continue until you are happy with your line. To end the line, double-click your mouse.
ラインを描くためには、マウスでシングルクリック。マウスを動かして、再びクリックします。ラインを描きたいだけ続けます。ラインの描画を終了するには、マウスをダブルクリックします。
Draw a shape the same way that you draw a line, but finish the shape by double-clicking on the point where you started the line.
シェイプはラインを描くのと同じ方法で描き始めますが、終了はラインを描き始めた最初のポイント上でダブルクリックします。
Add Presets
プリセット(属性)付与
Now we know how to draw points, lines and shapes, but we still haven’t defined what they represent. We want to be able to say that our points are shops, schools, or something else, and whether our shapes are fields, buildings, or something else.
ここまで、私たちは、ポイント、ラインとシェイプを描画する方法を知りましたが、それらが何を表しているかまだ定義されていません。描いたポイントがお店、学校、その他の何か表したり、描いたシェイプが、土地、建物、その他の何かを表すようにしたいと思います。
Click on the Select tool, in the column of buttons on the left.
画面左の列にある選択ツールボタンをクリックします。
Select Tool
選択ツール
Select one of the objects that you drew with the Draw tool. On the top menu, click “Presets”. Move your mouse through the sub-menu to the type of location you would like to define.
あなたが描いたオブジェクトのいずれかを選択します。上部メニューで、"プリセット"をクリックします。サブメニュー内であなたが定義したい場所の種別にマウスを移動させます。
When you click on a preset, a form will pop up asking you for more information. You do not have to fill in every field, but you may wish to add some of the important fields, such as the name of the object.
プリセットをクリックすると、より多くの情報の入力を求めるポップアップ表示されます。すべての項目に入力する必要はありませんが、オブジェクトの名前などの重要な項目のいくつかには情報を追加するのが望ましいです。
When you are finished entering the information, click “Apply Preset”. If everything went well, your point, line, or shape should change colors or show a symbol. This is because you have defined what it is.
情報の入力が終わったら、"プリセットの適用"をクリックします。プリセットの付与がうまくいけば、ポイント、ライン、シェイプの色が変わったり、記号が現れるはずです。これはそれが何であるか定義されたためです。
Draw Your Own Map
自分のマップを描く
Drag the map away from the sample map. Hold the right mouse button and drag your mouse, until you have a nice empty area to draw on.
サンプルマップからマップをドラッグして離します。描画するための空白の領域ができるまで、マウスの右ボタンを押したままドラッグします。
Use the Draw tool to create points, lines, and shapes. Describe what your objects are by selecting from the Presets menu.
ポイント、ライン、シェイプを作成するための描画ツールを使用してください。あなたが描いたオブジェクトは、プリセットメニューから選択することで、何であるかを表します。
When you are finished, you should have your own map, similar to the sample map that we opened in sample.osm.
終了したら、あなたは私たちがsample.osmで開いたサンプルマップのように、自分のマップを持ったことになります。
Editing OpenStreetMap
オープンストリートマップの編集
In this chapter we will learn how to edit the map on OpenStreetMap and add our improvements. We’ll learn the basic cycle of mapping on OSM.
この章では、OpenStreetMapにおける地図編集方法と修正を追加する方法を学習します。OSMでの基本的なマッピングのサイクルを学びます。
Step 1: Download
ステップ 1: ダウンロード
Get the current map data from OSM.
OSMから現在の地図データを取得します。
Step 2: Edit
ステップ 1: 編集
Modify the map using GPS, Walking Papers, and notes as a guide.
GPS、ウォーキングペーパー、それにメモなどを補助的に使って地図を変更します。
Step 3: Save
ステップ 3: 保存
Save changes to OpenStreetMap.
OpenStreetMapへ変更を保存します。
Before you begin: prepare JOSM
作業を始める前に:JOSMの準備
To start JOSM on Windows, click on the Start Menu in the lower left corner of your computer, and find the program JOSM. On Mac, double-click the JOSM application to start it.
WindowsでJOSMを起動するには、コンピュータの左下隅の[スタート]メニューをクリックし、プログラムのJOSMを見つけます。 Macでは、JOSMのアプリケーションをダブルクリックします。
Next, load your gpx file and your Walking Paper. You don’t need to open both, but you can if you want.
次に、あなたのGPXファイルやウォーキングペーパーを読み込みます。あなたは両方を開く必要はありませんが、必要に応じて操作できます。
Prepare JOSM
JOSMの準備
Download OSM Data
OSMデータのダウンロード
Before we can edit the map, we must download the existing OSM data in our area. To download the data, we need to be connected to the internet, because we are in fact downloading the data from OpenStreetMap.
地図を編集する前に、私たちは編集範囲の既存OSMデータをダウンロードする必要があります。データをダウンロードするには、実際にOpenStreetMapのデータをダウンロードするため、インターネットに接続する必要があります。
When you open your gpx track or Walking Paper, the map window will show what you have opened, and will automatically move to the correct coordinates. After you open your files, look in the bottom left corner of JOSM. You can see the latitude and longitude (coordinates) of your mouse cursor.
GPXトラックやウォーキングペーパーを開くと、地図ウィンドウはあなたが何を開いたか示して、正確な座標位置へ自動的に移動するでしょう。ファイルを開いた後、JOSMの左下隅にあなたのマウスカーソルの緯度と経度(座標)を見ることができます。
JOSM lat lon
JOSM 緯度 経度
Because our map window is already showing the area that we want to edit, it is easy to download the OpenStreetMap data for this area. Click on “File” in the top left corner of JOSM and click “Download from OSM”. This will open up the download window. You can access this window more simply by clicking on the download button, shown here:
すでにマップウィンドウが編集したい範囲を表示しているので、この範囲のOpenStreetMapデータをダウンロードすることは簡単です。 JOSMの左上隅の"ファイル"をクリックし、"OSMからダウンロード"をクリックします。これで、ダウンロードウィンドウが開きます。ダウンロードボタンをクリックすることで、もっと簡単にこのウィンドウを開くことができます。
JOSM Download
JOSM ダウンロード
When the download window opens, you should see a map with a pink box drawn on it. If you don’t see the map, click on the tab marked “Slippy map”.
ダウンロードウィンドウが開くと、ウィンドウ内にマップとピンクのボックスが表示されるはずです。もしマップが表示されない場合は、ウィンドウ内の"スリッピーマップ"タブをクリックします。
JOSM Slippy Map
JOSM スリッピーマップ
The pink box represents the area of the map that we would like to download for editing. Unless you have moved the map window since you opened your GPS file or Walking Papers, the box should be drawn around the correct area. However if you would like to download a larger area, you can draw a new box. To draw a new box, click on the map, hold your left mouse button down, and drag your mouse to create a box. Release the mouse button to finish drawing the box.
ピンクのボックスは、編集のためにダウンロードしたい地図の範囲を表しています。GPSログファイやウォーキングペーパーを開いた後では、マップウィンドウを移動していない限り、ボックスは正しい位置の範囲の近くに描かれます。しかし、より大きなエリアをダウンロードしたい場合は、新しいボックスを大きく描くことができます。新しいボックスを描くには、地図をクリックしてマウスの左ボタンを押したままマウスをドラッグします。ボックスの描画を終えるにはマウスボタンを離します。
When you are satisfied with the size and location of the box, click “Download” at the bottom of the window. JOSM will get the data for this area from OpenStreetMap and open it in your map window for editing.
ボックスの大きさと位置に問題がなければ、ウィンドウ下の"ダウンロード"ボタンをクリックします。 JOSMはOpenStreetMapからこの範囲のデータを取得して、編集するために地図ウィンドウが開きます。
Edit
編集
The next step is to edit the map and add new items. This is not always easy at first, but with practice you will get better and better.
次のステップは、地図を編集し、新しいアイテムを加えることです。これは必ずしも、初めは必ずしも簡単ではありませんが実際に編集することで次第に上達するでしょう。
If you want to move a point, line, or shape, use the select tool. Click on an object and drag it where it should be. This can be used to correct the location of items that have been put in the wrong place.
ポイントやライン、シェイプを移動したい場合は、選択ツールを使用してください。オブジェクトをクリックして、目的の場所にドラッグします。これは、間違った場所にあるアイテムの位置を修正するために使います。
JOSM Select Button
JOSM 選択ボタン
Use the draw tool to draw new points, lines, and shapes. Describe these objects by selecting from the Presets menu.
新しいポイント、ラインおよびシェイプを描く場合は、描画ツールを使用してください。描いたオブジェクトについてはプリセット・メニューから選択して属性を付与してください。
Remember that your GPS points and your Walking Papers don’t automatically go into OpenStreetMap. You need to add them to the OSM map digitally, using the draw tool. But your points, tracks, and Walking Papers can be seen in the background as a guide.
あなたのGPSポイントやウォーキングペーパーが自動でOpenStreetMapに地図として入力されないことに注意してください。あなたは描画ツールを使用して、デジタルデータとしてOSMマップにそれらを追加する必要があります。しかし、GPSポイント、GPSトラック、そしてウォーキングペーパーは地図を描く際のガイドとして背景に見ることができます。
Let’s assume that you saved a waypoint on your GPS named 030, and you wrote in your notebook that 030 is a school. To add this point into OpenStreetMap, you should select the draw tool, and double-click on top of point 030 in your map window. This will create a point. Then go to the Presets menu, and find the preset for school. Enter the name of the school and click “Apply Preset”. Do the same to add lines and shapes.
"030"という名前をつけてGPSでウェイポイントを登録保存し、"030"が学校であることをノートにメモしているとします。OpenStreetMapにこのポイントを追加するには、描画ツールを選択して、マップウィンドウ内のポイント"030"をダブルクリックします。これでポイントが作成されます。その後、プリセットメニューに移動して、学校のためのプリセットを見つけます。学校の名前を入力し、"プリセットの適用"をクリックします。ラインやシェイプを追加する場合も同じ操作を行います。
JOSM Tracing GPS Points
JOSM GPSポイント トレース
Upload Changes
変更の保存(アップロード)
After you have made a couple of changes to improve the map, let’s save those changes to OpenStreetMap.
地図を改善するため2、3の変更を行った後、OpenStreetMapにそれらの変更を保存してみましょう。
Click “File” on the top menu, and then click “Upload Data”. This will open up the upload window. You can access this window more simply by clicking on the upload button, shown here:
トップメニュー上の「ファイル」をクリックして、次に「アップロード・データ」をクリックしてください。これでアップロード・ウィンドウが開きます。「アップロード・ボタン」をクリックすることでこのウィンドウにより簡単にアクセスすることができます。
JOSM Upload Button
JOSMアップロードボタン
The window that appears shows a list of the objects that you are adding and the objects you are modifying or deleting. In the box at the bottom you are asked to provide a comment about the changes that you are making. Type in here a description of your edits.
表示されるウィンドウは、追加したオブジェクト、および修正もしくは削除しているオブジェクトのリストを示します。ボックスの下部では、これらの変更に関するコメントを書くように求められます。ここに編集の説明を記述してください。
Upload Comments
アップロードコメント
Click “Upload Changes”.
"変更アップロード"をクリックします。
If this is your first time saving changes to OpenStreetMap, you will be asked for the username and password that you created in Chapter 2. Enter them in the window that appears. If you check the box in this window, your username and password will be saved and you won’t need to enter them again in the future. Click “Authenticate”.
初めてOpenStreetMapの変更を保存する場合、ユーザーは、第2章で作成したユーザ名とパスワードの入力を求められます。表示されるウィンドウでそれらを入力してください。このウィンドウでチェックボックスをオンにした場合、ユーザ名とパスワードが保存され、その後はそれらを再度入力する必要はありません。
"認証"をクリックします。
JOSM Authentication
JOSM認証
You will need to wait a few seconds for your changes to be uploaded, and then you are done! You have made your first edits to OpenStreetMap. You may continue editing to add all your points if you wish. Always be sure to upload your changes before you close JOSM.
変更がアップロードされるまで数秒待つ待ちます。これで作業は終わりです。あなたはOpenStreetMapへの最初の編集をしました。ポイントをすべて加えたいならに編集を続けても構いません。JOSMを終了する前に、必ず忘れずに変更をアップロードしてください。
See Your Changes on the Map
地図の変更箇所を確認します。
Open your internet browser and go to openstreetmap.org. Move the map to the area that you edited.
インターネットブラウザでOpenstreetmap.orgのサイトを開き、地図上で編集したエリアに移動します。
You should see your changes now appearing on the map! If you don’t, try pressing CTRL+R to refresh the web page. Sometimes the map doesn’t update properly and needs to be reloaded.
地図に表示された変更箇所を見ることができるはずです。見られない場合は、CTRL+Rを押してウェブ・ページをリフレッシュしてください。時々、地図は適切に更新しない場合があるので再ロードする必要があります。
What if you don’t see your changes? Don’t worry – it may take a few minutes for the changes to be shown on the map. Also, check your additions in JOSM to make sure that you added them correctly. A good general rule is, if your point has an icon in JOSM, then it should be seen on the main map at the OpenStreetMap website.
もし変更箇所を確認できなかったらどうしますか。心配しないでください。変更箇所がマップに示されるのに数分かかるかもしれません。さらに、変更を正確に加えたことを確かめるためにJOSMで追加した内容をチェックしてください。一般的にJOSMで見たとき、あなたの追加したポイントがアイコンを持っている場合、そのポイントはOpenStreetMapサイトのマップ上で見られるはずです。
More JOSM
もっとJOSM
Now you have learned how to draw points, lines, and shapes in JOSM, how to open your GPS waypoints and tracks in JOSM, and how to download, edit, and upload your changes on OpenStreetMap. Now we will describe in more detail some of the features of JOSM, so that you can beyond the simple editing tools and have a better understanding of the software.
あなたは、JOSMでのGPSウェイポイントとトラックを開く方法、JOSMでのポイント、ライン、シェイプを描画する方法、地図データをダウンロードする方法、編集、およびOpenStreetMapへの変更内容のアップロード方法について学びました。 さらにJOSMの機能のいくつかについてより詳細に説明します。これによって単純な編集ツールを越えて、JOSMについてより深く理解することができます。
Useful Features of JOSM
JOSMの便利な機能
JOSM Overview
JOSM概要
JOSM has many different features. The main window in JOSM you are already familiar with – this is the map window, and it is where most of the action takes place. Here you view, edit, and add to the OpenStreetMap data.
JOSMは、さまざまな機能を持っています。よく知られたJOSMのメインウィンドウ - これはマップウィンドウで、ほとんどの操作がここで行われます。ここでは、表示、編集、およびOpenStreetMapへのデータ追加を行います。
To the right of the map window are a series of panels, which each do something different. Typically when you first install JOSM several panels are shown by default, such as Layers, Properties, and Selection. When you select a point, line, or shape in the map window, it will be shown in the Selection panel. Information about the object will be shown in the Properties panel, and the username of the author of that object will be shown in the Authors panel.
地図ウィンドウの右側に一連のパネルがあり、それぞれが異なる内容です。通常、あなたが最初にJOSMをインストールした時は、いくつかのパネルはレイヤ、プロパティおよび選択のようにデフォルトの設定で示されます。あなたがマップウィンドウ内でポイント、ライン、シェイプを選択した場合、それは選択パネルの中で示されます。オブジェクトに関する情報はプロパティパネルの中で示されます。また、そのオブジェクトを描いた著者のユーザー名はオーサーパネルの中で示されます。
On the left side of JOSM, there are several toolbars, which consist of many buttons. At the top of this bar are different buttons which change what you can do with your mouse. You are already familiar with the first two, the Select tool and the Draw tool. The other tools make it easier to zoom in, delete an object, draw a shape, or create a line that is parallel to another line.
JOSMの左側に、多くのボタンから成るいくつかのツールバーがあります。このツールバーの一番上に、マウスでの操作を変更することができるボタンがあります。最初のボタン2つ、選択ツールおよび描画ツールは既に学びました。他のツールを使うことで、拡大表示やオブジェクトの削除、シェイプを描く、あるいは平行なラインを作ることがより簡単に行えます。
Below these tools are many more buttons. These buttons control what you see on the right side of JOSM. Using these buttons you can open and close the boxes on the right, such as properties, selection, and author.
これらのツールの下に多くのボタンがあります。これらのボタンを使用するとJOSMの右側に表示される内容を管理できます。これらのボタンを使用して、プロパティ、選択、および著者名などの右上のボックスを開いたり閉じたりすることができます。
JOSM Layers
JOSMレイヤ
Open your GPS file and download data from OpenStreetMap, if you haven’t already. You may notice that when you open a file, or add Walking Papers, or download from OpenStreetMap, another item is added to the Layers panel on the right side of JOSM. Your Layers panel may look something like this:
GPSのファイルを開き、OpenStreetMapからデータをダウンロードしてみます。あなたがファイルを開いたり、ウォーキングペーパーを加えるか、OpenStreetMapからデータをダウンロードする場合、JOSM右側のレイヤーパネルに別のアイテムが加えられることがわかるでしょう。レイヤパネルはこのように見えます。:
JOSM Layers
JOSMレイヤ
Each item in this list represents a different source of data that I have open in my map window. In the example above, “Data Layer 2” is the OpenStreetMap data that I want to edit. “Markers” are the waypoints from the GPS, and “30 Juni 2011.gpx” is the track from the GPS. Finally, “Walking Papers” is the layer created when I added my Walking Paper into JOSM. I can add the Bing imagery layer, which shows satellite imagery, by clicking “Imagery” on the top menu of JOSM and selecting “Bing Sat.”
このレイヤーリスト内の各アイテムは、マップウィンドウで自分が開いているデータの異なるソースを表します。上記の例では、“データレイヤー 2”が編集しているOpenStreetMapのデータです。 “Markers”はGPSからのウェイポイントであり、そして“30 Juni 2011.gpx”はGPSからのトラックです。“Walking Papers”はJOSMにウォーキングペーパーを追加したときに作成されたレイヤです。JOSMの上部メニューの"画像"をクリックして選択することにより、衛星画像を表示するBing画像のレイヤを“Bing Sat”として追加することができます。
To hide one of these layers you have displayed, select one of them with your mouse and click the Show/Hide button that looks like this:
表示されているこれらのレイヤーの1つを非表示にするには、マウスでいずれかを選択し、このような表示/非表示ボタンをクリックしてください。
Show/Hide Button
表示/非表示ボタン
You should see the layer that you selected disappear in the map window. Click Show/Hide again, and it will reappear.
非表示に選択したレイヤーがマップウィンドウでわかります。再び表示/非表示をクリックします、するとレイヤーが再び表示されます。
You can close a layer by selecting it and using the delete button:
あなたはそれを選択して使用してレイヤーを閉じることができます。削除ボタンの使用方法:
Delete Button
削除ボタン
Lastly, it’s important to know that you can only edit the layer that is considered active by JOSM. If you are unable to edit the map in your map window, it’s probably because you don’t have the correct layer set as active. Most layers, such as GPS points, Walking Papers, and satellite imagery, can’t be edited. The only layers that can be edited are data layers from OpenStreetMap, which are usually called “Data Layer 1”.
最後に、JOSMではアクティブなレイヤーのみ編集ができることを知っておくことが重要です。マップウィンドウで地図編集できない場合は、おそらく正しいレイヤーが有効化設定されていないためでしょう。GPSポイント、ウォーキングペーパー、および衛星画像などのほとんどのレイヤーは編集できません。編集可能な唯一のレイヤは通常、"データレイヤー1"と呼ばれているOpenStreetMapのデータレイヤーです。
To make a layer active, select it in the Layers panel, and click on the Activate button:
レイヤーを有効化するには、レイヤーパネルで有効化したいレイヤを選択し、有効化ボタンをクリックしてください:
Activate Button
有効化ボタン
Saving OSM files
OSMファイルの保存
Sometimes after you download some OSM data, you may wish to save it so that you can edit it offline, and then upload it later when you have internet access again. To save an OSM file, make sure that it is the active layer in the the Layers panel. Click “File” on the top menu, and click “Save”. Choose a location for the file and give it a name.
いくつかのOSMデータをダウンロードした後、それをオフラインで編集できるように保存し、再びインターネットにアクセスできるようになったら、後にアップロードすることもできます。 OSMファイルを保存する場合、それがレイヤーパネルで有効化されたレイヤーであることを確認してください。上部メニューの"ファイル"をクリックして、"保存"をクリックします。ファイルを保存する場所を選択、名前を付けて保存します。
You can also save by clicking this button:
このボタンをクリックして保存することもできます:
Save Button
保存ボタン
You can now close JOSM and your data will be saved. When you want to open the file again, simply open JOSM, go to the “File” menu, and click “Open…”
これでJOSMを閉じることができ、データは保存されます。再びJOSMでファイルを開きたいときは、単に"ファイル"メニューの"開く..."をクリックします。
Additional Drawing Tools
補助的な描画ツール
JOSM has some additional tools to make it easier to draw lines and shapes. These tools are found in the “Tools” menu at the top of JOSM.
JOSMは、簡単にラインやシェイプを描画するためにいくつかの補助ツールが用意されています。これらのツールは、JOSMの上部の"ツール"メニューにあります。
Tools Menu
ツールメニュー
In order to apply the functions in this menu, you must first select a point, line or shape in the map window. Some of the most useful functions are described here:
このメニューの機能を使用するためには、まず、マップウィンドウのポイント、ライン、シェイプを選択する必要があります。最も便利な機能のいくつかをここで説明します。:
   * Split Way – This allows you to divide a line into two separate lines. This is useful if you want to add different attributes to different parts of a road. To use this function, select a point in the middle of the line that you want to split, Select Split Way from the Tools menu, and your line should be split in two.
   * Combine Way – This does the opposite of Split Way. To combine two lines into a single line, they must share a single point. To use this function, select both lines that you want to combine. You can select more than one object by holding the SHIFT key on your keyboard and clicking on each line. When you have selected both lines, select Combine Way from the Tools menu.
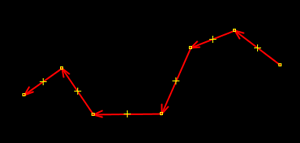
   * Reverse Way – This will change the direction of the line. If your line represents a road that is one way, you may want to change its direction. In other cases, direction doesn’t matter.
   * Simplify Way – If your line has too many points in it and you’d like to make it simpler, this will remove some of the points from a line.
   * Align Nodes in Circle – If you are trying to make a circular shape, draw the circle as best you can and then select this function. It will help arrange your points in a circle.
   * Align Nodes in Line – This function will align a series of points into a straight line.
   * Orthogonalize Shape – This function is very useful for drawing buildings. After you draw a building, this function will reshape it to have square corners.
   * ウェイの分割 – 1本のラインを2本の別々のラインに分割します。道路の異なる部分にそれぞれ違った属性を追加する場合に便利です。 この機能を使用するには、分割したいライン中のポイントを選択し、ツールメニューから"ウェイを分割"を選択するとラインは2つに分割されるでしょう。
   * ウェイの結合 – これはウェイの分割と反対のことを行います。2つのラインを結合するには、それらが1つのポイントを共有する必要があります。この機能を使用するには、結合する両方のラインを選択します。Shiftキーを押しながら各ラインをクリックして、複数のオブジェクトを選択することができます。あなたが両方のラインを選択したら、ツールメニューから"ウェイの結合"を選択します。
   * ウェイ方向反転 – これはラインの方向を変更します。ラインが一方通行の道路を表す場合、その方向を変更したい場合があります。他の場合、方向は関係ありません。
   * ウェイの単純化 – これはラインがあまりにも多くのポイントを持っていて、それを単純化したい場合、ラインからポイントをいくつか削除してくれます。
   * ノードを円形に配列 – 円の形を作ろうとしている場合は、円を描くにはこの機能を選択することが最もよいでしょう。それは、円の形にポイントを整理するのに役立ちます。
   * ノードを一直線に配列 – この機能は、一連の点を直線状に位置合わせしてくれます。
   * 直交した形状 – この機能は、建物を描くのに非常に便利です。あなたが建物を描画した後、この機能を使うと、それは直角の角を持つように変形されます。
Tags
タグ
When you draw a point, line, or shape, it is create with a location, but no information about what it is. In other words, we know where it is, but not what it is. Before now, we have been using items from the Presets menu to define what it is.
ポイント、ラインあるいはシェイプを描くと、位置付きで作成されます、しかしそれが何であるかについての情報はありません。言いかえれば、私たちはそれが何処なのかは知っていても、それが何であるかは知りません。ここまで、私たちはそれが何であるか定義するためにプリセット・メニューからアイテムを使いました。
The way OpenStreetMap knows what an object is is by using tags. A tag is like a label that you can put on something. For example, if I draw a square, it’s only a square. But then I add multiple tags to it that describe what it is:
OpenStreetMapでオブジェクトが何か知る方法はタグを使うことです。タグは、あなたが何か書くことができるラベルのようなものです。例えば、私が正方形を描くとそれはただの正方形にすぎません。しかし、次に私はそれが何であるか説明するために複数のタグを追加します:
   * this square is a building
   * the name of the building is “Menara Thamrin”
   * the building is 16 levels high
   * この正方形は建物です。
   * 建物の名前は “Menara Thamrin”です。
   * 建物は16階建てです。
You can add as many tags as you want to an object. Tags are saved as pairs of text, called keys and values. In OpenStreetMap, the information written above would be tagged as:
あなたはオブジェクトに必要なだけタグを追加することができます。タグは、キーと値と呼ばれるテキストのペアで保存されます。 OpenStreetMapでは、上記で書いた情報は、次のようにタグ付けされます。:
   * building = yes
   * name = Menara Thamrin
   * building:levels = 16
If you select an object in JOSM, you can see all the tags that are attached to it in the Properties panel on the right.
JOSMの中のオブジェクトを選択すると、画面右側上のプロパティ・パネルの中でそれに付けられているタグをすべて見ることができます。
Properties Panel
プロパティパネル
You can add, edit, and delete these tags from this panel. The tags are traditionally in English however, so it is often better to use the Presets menu.
あなたは、このパネルからこれらのタグを追加、編集、削除することができます。しかし、タグは伝統的に英語なので、プリセット・メニューを使うほうが多くの場合はよいです。
Keyboard Shortcuts
キーボードショートカット
Sometimes it can be annoying to click over and over to select different options and menus in JOSM. Luckily there are shortcut keys on the keyboard that allow you to do many common tasks. Here is a list of some of the most commonly used shortcut keys, along with what they do:
時々、JOSMの様々なオプションやメニューを選択するためにあちこちクリックするのが面倒な時があります。幸いにも、多くの共通のタスクを行えるようにキーボードのショートカットキーが用意されています。 これは最もよく使われるいくつかのショートカットキーについてのリストで、何ができるかも書かれています:
   * s – Choose the Select tool
   * a – Choose the Draw tool
   * z – Choose the Zoom tool
   * + (plus) – Zoom in
   * - (minus) – Zoom out
   * p – Split way
   * c – Combine way
   * o – Align in circle
   * l – Align in line
   * q – Orthogonalize (make a shape square)
   * s – 選択ツールを選ぶ
   * a – 描画ツールを選ぶ
   * z – ズームツールを選ぶ
   * + (プラス) – 拡大
   * - (マイナス) – 縮小
   * p – ウェイの分割
   * c – ウェイの結合
   * o – ノードを円形配列
   * l – ノードを一直線に配列
   * q – 直交した形状にする
