Go Map!!
| Go Map!! | ||||||||||||||||||||||||||||||||||||||||||||||||||||||||||||||||||||||||||||||||||||||||||||||||||||||||||||||||||||||||||||||||||||||||||||||||
|---|---|---|---|---|---|---|---|---|---|---|---|---|---|---|---|---|---|---|---|---|---|---|---|---|---|---|---|---|---|---|---|---|---|---|---|---|---|---|---|---|---|---|---|---|---|---|---|---|---|---|---|---|---|---|---|---|---|---|---|---|---|---|---|---|---|---|---|---|---|---|---|---|---|---|---|---|---|---|---|---|---|---|---|---|---|---|---|---|---|---|---|---|---|---|---|---|---|---|---|---|---|---|---|---|---|---|---|---|---|---|---|---|---|---|---|---|---|---|---|---|---|---|---|---|---|---|---|---|---|---|---|---|---|---|---|---|---|---|---|---|---|---|---|---|
| Author: | Bryce Cogswell | |||||||||||||||||||||||||||||||||||||||||||||||||||||||||||||||||||||||||||||||||||||||||||||||||||||||||||||||||||||||||||||||||||||||||||||||
| License: | ISC License (free of charge) | |||||||||||||||||||||||||||||||||||||||||||||||||||||||||||||||||||||||||||||||||||||||||||||||||||||||||||||||||||||||||||||||||||||||||||||||
| Platforms: | iPhone, iPad, macOS, and visionOS | |||||||||||||||||||||||||||||||||||||||||||||||||||||||||||||||||||||||||||||||||||||||||||||||||||||||||||||||||||||||||||||||||||||||||||||||
| Status: | Active | |||||||||||||||||||||||||||||||||||||||||||||||||||||||||||||||||||||||||||||||||||||||||||||||||||||||||||||||||||||||||||||||||||||||||||||||
| Version: | 5.3.3 (2025-11-09) | |||||||||||||||||||||||||||||||||||||||||||||||||||||||||||||||||||||||||||||||||||||||||||||||||||||||||||||||||||||||||||||||||||||||||||||||
| Languages: | ||||||||||||||||||||||||||||||||||||||||||||||||||||||||||||||||||||||||||||||||||||||||||||||||||||||||||||||||||||||||||||||||||||||||||||||||
| Install: | ||||||||||||||||||||||||||||||||||||||||||||||||||||||||||||||||||||||||||||||||||||||||||||||||||||||||||||||||||||||||||||||||||||||||||||||||
| Source code: | bryceco/GoMap GitHub | |||||||||||||||||||||||||||||||||||||||||||||||||||||||||||||||||||||||||||||||||||||||||||||||||||||||||||||||||||||||||||||||||||||||||||||||
| Programming language: | Swift | |||||||||||||||||||||||||||||||||||||||||||||||||||||||||||||||||||||||||||||||||||||||||||||||||||||||||||||||||||||||||||||||||||||||||||||||
|
Easy to use iOS/iPadOS/macOS/visionOS editor for OSM, OHM, and OGF. | ||||||||||||||||||||||||||||||||||||||||||||||||||||||||||||||||||||||||||||||||||||||||||||||||||||||||||||||||||||||||||||||||||||||||||||||||
| ||||||||||||||||||||||||||||||||||||||||||||||||||||||||||||||||||||||||||||||||||||||||||||||||||||||||||||||||||||||||||||||||||||||||||||||||
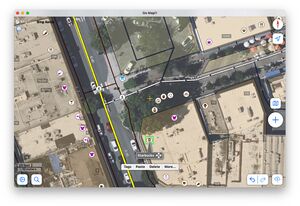
Go Map!! is an iOS and macOS app that lets you create and edit information in OpenStreetMap. Go Map!! supports editing nodes and ways and arbitrary tagging. The source code is published under the open ISC licence on GitHub.

Compatibility
- iPhone
- Requires iOS 12.0 or later.
- iPad
- Requires iPadOS 12.0 or later.
- iPod touch
- Requires iOS 12.0 or later.
- Mac
- Requires macOS 11.3 or later.
- Apple Vision
- Requires visionOS 1.0 or later.
Features
- Quickly add points of interest
- Edit nodes, ways, and areas
- Track your location and heading
- Create, upload, and download GPX traces. To import a GPX trace on Mac, just double click the GPX file.
- Bing, Mapnik, and user-defined backgrounds available.
- Supports arbitrary tag values
- Integrates tagging presets from iD Tagging Schema GitHub and NSI GitHub
- Full undo/redo support
- Work online or offline seamlessly
- See who last edited an object and when
- Find other mappers nearby
- Search for places using Nominatim
- Copy and paste tags
- Create and resolve notes
- Map rotation
- Free. No ads or in-app purchases
Screenshots
Usage

Go Map!!/Guide
This Guide will help you get started, get familiar with the UI, and know basic editing. It is intended for beginners to read the guide from the beginning. This is a guide for any user who wants to edit OSM on a iPhone or iPad.
See also
- Beginners' Guide
- OSM hand-book. A hand-book with illustrations to explain misconceptions and things in the OSM editing process for beginners. Made by bxl-forever.
- Go Map!! tutorial on learnosm.org (Outdated)
Go Map!!/FAQ
Covers common questions.
Video Tutorials
Video tutorials that are currently outdated but they have some similarities to the more recent version of the app.
Help with Go Map!!
You can get support in the Slack channel from the developer and also from other users. Additionally, you can create a discussion in GitHub.
Contribute
Issue Tracker
There is a issue tracker GitHub for feature suggestions and bug reporting.
Test Pre-releases
There is a TestFlight for Go Map!! to help test Pre-releases.
Localization / translation
Go Map!! uses Weblate for app translations and uses iD Tagging Schemas translated presets in-app.
Additionally, translate the wiki!
App History
Its development would begin in December 2021. The app would be released on the App Store on January 24, 2013.
Early Development
On December 6, 2012 Bryce Cogswell announced in his diary that he will be working on a native Cocoa based editor mainly for desktop. (But then moved to only iOS.)
In the early stages of the apps development when it was in beta the app would be called OSMiOS but when it would be released on the App Store Bryce ultimately changed the name to Go Map!!
Go Map!! would have a proprietary license in its early years and would be coded in Objective-C and Cocoa. It would also be only available only on the iPhone and iPad.
Please read this diary by Cogswell for a detailed background on the app.
Recent Years
On October 3, 2021 Bryce Cogswell would publish a diary on the change from the apps proprietary license to ISC and being open source on version 1.6 allowing its users to contribute to the app.[1]
On version 2.0.7 Go Map!! would go under a huge change on its look in which what it looks like today.[2]
Later on Go Map!! would start moving away from objective-c to swift in order to be “faster, easier to understand, easier to debug, and [to be] in line with Apple’s direction for modern apps.”[3]
On the 16th of October in 2021 Bryceco would release the app on Mac. (With this, mouse and keyboard support on iPad.) [4]
Privacy Policy
(Effective Date: September 21, 2014)
This privacy policy governs your use of the software application Go Map!! for mobile devices that was created by Bryce Cogswell. Go Map!! allows you to edit and upload geographic information on the openstreetmap.org website.
User Provided Information
Go Map!! requires you to be a registered user on openstreetmap.org in order to upload changes you make to the map. You are required to provide your openstreetmap.org name and password to the application before uploading data. Your openstreetmap.org name and password are securely stored on your device and are not shared with or accessible to the application developer.
The data you edit and upload to openstreetmap.org using Go Map!! is subject to the OpenStreetMap Privacy Policy.
Location Information
Go Map!! uses your device's GPS to locate and orient your position on the map, and to record and store GPX tracks on your device. Location information is not transmitted to any party.
3rd Party Access
Your openstreetmap.org login information is securely transmitted (using SSL) to openstreetmap.org when you upload data, solely for the purpose of authentication. Your information is not shared or transmitted to any other parties including the application developer.
Opt-out Rights
You can stop all collection of information by Go Map!! by uninstalling the application. You may use the standard uninstall processes available as part of your mobile device.
Changes
This Privacy Policy may be updated from time to time for any reason. We will notify you of any changes to our Privacy Policy by posting the new Privacy Policy here. You are advised to consult this Privacy Policy regularly for any changes, as continued use is deemed approval of all changes.
See also
- If you are using Go Map!! for editing you can add this template on your wiki user page to let the world know: {{User Go Map!!}}


