Spline drawing tool
Why using the Spline drawing tool plugin?

This plugin helps to create more realistic and smoother ways than with the standard drawing tool.
Once mastered, it can save time since you only have to focus on control points of the guidance spline you draw, not on the actual way points that are generated optimally at the end of the full process.
Furthermore, it can even replace the standard drawing tool and draw standard segmented ways at the condition the spline ability is used at least once on one segment for each usage.
Availability
You have to activate the plugin "Splinex" from the Plugins Window in JOSM preferences, or you can download it from [1] .
Mathematical bases
That tool is based on Bézier curves. A Bézier curve is defined by a set of control points P0 through Pn, where n is called its order (n = 1 for linear, 2 for quadratic, etc.). The first and last control points are always the end points of the curve; however, the intermediate control points (if any) generally do not lie on the curve.
In that tool is used quadratic Bézier curves. A quadratic Bézier curve is the path traced by the function B(t), given points P0, P1, and P2.
![]()

To draw a line using this equation, one can divide the curve into smaller segments, calculate the end points of each segment using the Bezier cubic equation and draw the line for the segment. For instance, one can draw a line between the points defined by t = 0 and t = 0.01, then t = 0.01 and t = 0.02, and so on.
Usage
- Select the spline tool in the toolbar.
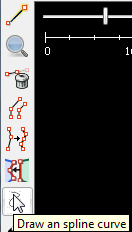 After that, the cursor indicates the tool is selected with a "S".
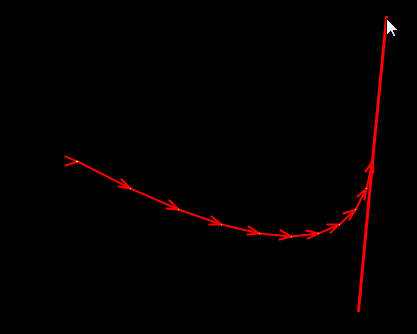
Control of the green tangent when the algorithm is triggered with Click & Drag - Click AND keep pressed (Drag) to create a control point (Pn) in the Bézier curve algorithm : The mouse now controls a tangent segment (in green) at (Pn) that drives the placement of the point P(n+1).
- Release the mouse button to set the tangent and the Pn+1 control point. The cursor now controls a red spline for the Pn+2 control point
- At this step a first spline is defined with its 2 control points. You can : (a) continue the Spline at step 2 with a third or more points or (b) reset the spline : A simple click defines the Pn+2 point and resets the spline algorithm. This means you don't want to control the tangent at this point. This is useful when either the spline is too complex and you want to take back manual control or you just want to draw segments manually. In any case, the spine can be continued at step 2.
- As soon as at least two control points are defined, double click ends the spline and the editing mode with a last point (If the last point has already been created use the escape key before to avoid the creation of an unwanted point). The actual way is generated from the guidance spline. The tool can then be used for another separed way.


Other References
See JOSM/Plugins/Splinex for shortcuts, tricks and usage examples.
Other Example
