SuperTuxKart

SuperTuxKart is a free, open-source racing game. This page is about generating 3D levels for the game, using OpenStreetMap data.
Preparations
- Enrich desired area with 3D tagging and micromapping in general. For example, tag trees using
natural=tree - Download OSM2World (SVN recommended) and practice using small OSM areas. Therefore, loading small parts (less than a district recommend) using JOSM and reopen the .OSM file with O2W
- Install Blender3D >2.65a and learn basic editing
- Install SuperTuxKart Modelling Addon for Blender from SVN
Export
| Don't upload your changes or you will erase data in the OSM DB! |
- Use JOSM editor to download a certain area.
- Store this dump as .OSM file
- Open it with OSM2World (in Texture mode!) again and wait for processing finished
- Export to single .OBJ file
- Since Blender doesn't seem to export the textures correctly if they cannot be found, you have to copy all textures from OSM2World to the same folder as where you exported the .OBJ file
Game Editing
To understand how you model STK tracks with Blender in general, please read the Track Maker's Guide. This will add some menus to the scene and object panels.
- Fire up Blender 3D and enable the STK Addons in Preferences
- Import the .obj
- If you go to the Texture shading mode, you should see the textures appear in the scene
Basic settings
Open the Scene panel and move down to the SuperTuxKart Scene Properties group. Now:
- Check the Is a SuperTuxKart track checkbox
- Set a name/designer for your track
- Set "Sky Type" to plain color and pick one
Driveline
At least the current version of STK crashes if you don't provide a valid driveline for the AI karts. To do this:
- Add Line (across the desired track) at the middle of the lap and at object panel - STK properties tag it as "checkline" and give it a name
- Create a closed single way of faces as described in https://supertuxkart.net/Making_Tracks
- Tag it in Panel - STK Properties as "Driveline (main)" and let it activate the first line you edited
Fixes
At scene panel, open the group SuperTuxKart Image Properties. There open all the Tree textures one after another, and set their "Compositing type" to "Alpha blend". Otherwise your trees will have some black outlines.
Testing
Save the Blender file and in the Scene panel choose Track Exporter -> Export. After a few seconds, the plugin should report a fine export.
Now you need to copy all generate files to your STK track directory. For me this is for example:
/usr/share/games/supertuxkart/tracks/test1/
graph.xml
materials.xml
mensa_stk.b3d
quafs.xml
scene.xml
track.xml
Next you need to copy all textures from OSM2World into the same directory. Now start STK and pick the new track for testing.
Case study Rostock
For Geoforum MV 2013 we micromapped a suburb of Rostock and created an 3D print from an certain area (university campus within the Südstadt district). Thus we used the processes, described above.
-
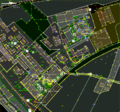
Area in JOSM
-
Area in Blender
-
Area in STK
-
Area in reality
-
Side-by-side
- https://vimeo.com/63076857 - Video showing a ride through the area
- http://ikaria.informatik.uni-rostock.de/mm337/osm/3D%20rostock/SuperTuxKart_Rostock.zip - contains all files from production and for the game
See also
- SuperTuxKart Openstreetmap mod (moddb.com)
Thanks for all the support of the STK community (esp. WillemS and Auria):
- STK forums OSM2World Thread #1
- STK forums OSM2World Thread #2
- Tutorial in french / Tutoriel en français : Création d'un circuit pour SuperTuxKart
- Tutorial / Talk in German by Tobias


