Contributors' guide - familiarisation

- About
- This was a guide on how to contribute to OpenStreetMap. In contrast to the beginners' guide it focused on editing OpenStreetMap only.
- Impact on OpenStreetMap
- It was one out of numerous attempts to update or rewrite the beginners' guide.
- Reason for being historic
- It has never been updated since its initial creation. The guide uses Potlatch 2 which is no longer available.
- Captured time
- 2011
| Home | Sign up | Familiarisation | First edit | to be added | to be added |
Aims
By the time you get to this page you should have registered with OpenStreetMap. If not then you will need to go back one step and do so. By the end of this page you will have selected an area to practice on, entered the editor and clicked on a few elements, view the tags for these elements and will have then exited the editor without making any changes.
To open OpenStreetMap and Map Features
Before continuing with this tutorial you it will be useful for you to open two additional tabs on your browser. Firstly, open the Map Features wikipage in a new tab which provides details on main of the most commons tags and also OpenStreetMap. When you tags are set up they should should something like this:

To select a suitable practice area
You now need to find a place to use to practice on for the rest of this tutorial. There are three main requirements when selecting a place:
1. Firstly, It is desirable if the place is somewhere that you know well and it is even better if it is somewhere you can visit easily so that you can go out and gather some more first hand data and will be able to make use of the resulting mapping.
2. It is important to not choose a completely unmapped place and to also avoid one that is too well mapped. You should avoid totally blank areas of map and also ones where every building is mapped. There are two reasons for this. Firstly, for somewhere that isn't mapped at all you will not be able to learn from what is already on the map, and if it is too crowded with map data it becomes fiddly to work with, there is more chance of messing something up and also these places are more likely to advanced techniques (such as Relations) which are beyond the scope of this first tutorial.
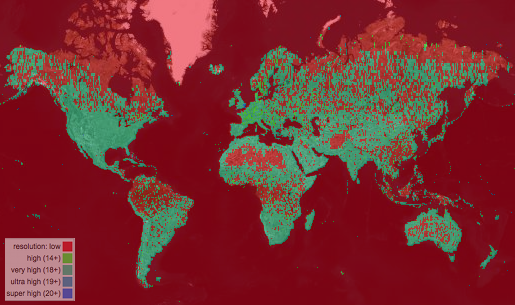
3. Finally, the place you choose should have good aerial photography available. Bing has very generously made aerial photography for the entire planet available to OpenStreetMap as part of their support for the project but the quality of this imagery varies considerably; in some places it is detailed enough for one to see every white lines and crossing place on the roads. In other places, notably in many parts of Africa it isn't possible to resolve smaller roads. The map below shows the quality of imagery in different places. Places coloured blue or green will be best.
To open the editor
- Switch your browser to the OpenStreetMap tab.
- Use the pan/zoom/search controls to select an suitable area, possibly a village or a small area of a town.
When you have completed the above your OpenStreetMap tab should look something like this view of the village of Romaldkirk, a village in Teesdale, England which will be used to illustrate this tutorial. Your map will look different from this one given that is will be for a different area.

- Click on the edit button and the view should change to something like this.
Note: if you are not logged-in to OpenStreetMap then you will not be able to open the editor and will need to log in first. If aerial imagery is not available (including the word 'Bing' in the bottom left) then click on 'Background' in the menu-bar at the top of the map and select Bing from the list. If the roads cannot be clearly distinguished then it will be better to choose another location.
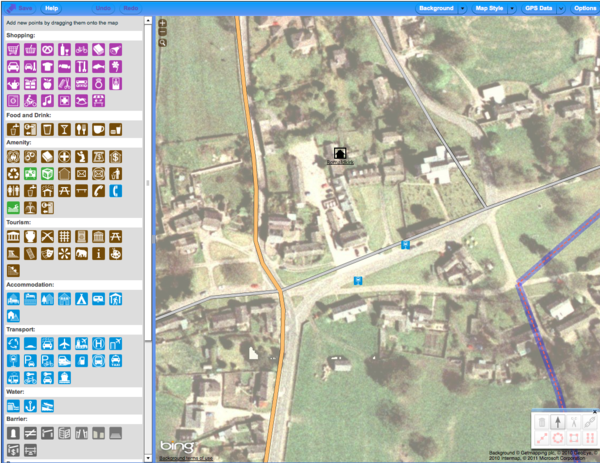
You have now successfully selected a practice area.
To view elements in the editor
- Try dragging the map using the mouse or the cursor keys (up, down, left, right) and by clicking on the + and - buttons at the top left of the map to zoom in and out. If you zoom too far out the editor will get slower to respond due to the amount of data that it needs to load. If this happens the zoom in again.
- Click on a road and notice that the contents of the panel on the left changes to show details of that road, also that the length of the road (which is an example of a Way btw) has been highlighted in yellow. Notice also that the Nodes on the selected road have be highlighted in red (the road shown in my example is a minor road without a name.
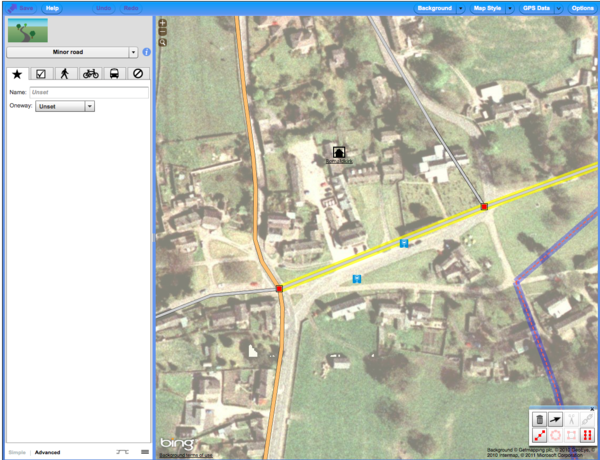
- Click on 'advanced' at the bottom of the left hand panel to switch to a view that shows the values of the tags themselves, in this case
highway=unclassifiedwhich is the code for a minor road, and also a created_by tag which can be ignored for most purposes.
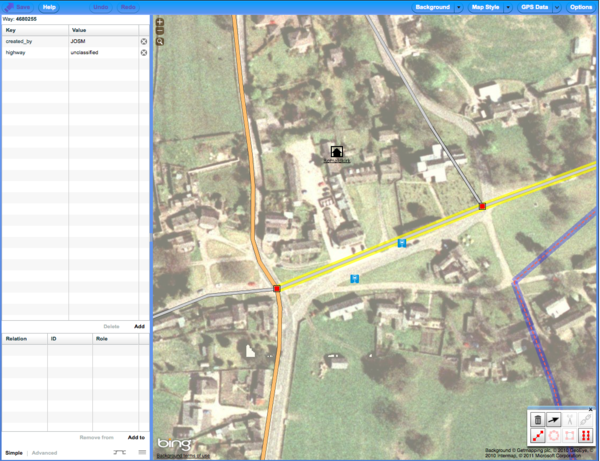
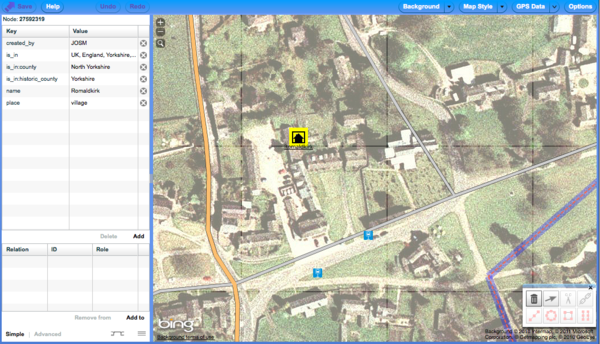
- Click on a few other elements, including nodes and ways and notice which combinations of tags are used for each element. Try looking up some of these tags by searching for the tag name in the page shown on the Map Features tab. The following image shows a point feature for a place using the
place=villageandname=*tags and others.
To close the editor
You have now completed this session and should exit the editor.
- Click on the 'View' tab above the map on the left to exit the editor without saving.
Note: If you have moved any elements even by a bit during this edit session you will be asked if you want to save changes with the message "This page is asking you to confirm that you want to leave - data you have entered may not be saved". If you are asked this then click on 'leave page'.
OK, you have now completed the familiarisation section. Click on the next tab to continue with the tutorial.