Garmin/Taking Screenshots
On-Device
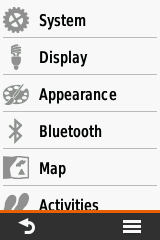
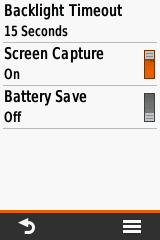
Some Garmin models including the nüvi 205, 1390T, GPSMAP 62 and eTrex 10/20/30(x) Series have a built-in screen capture function. Once the screen capture is enabled in the display settings (it automatically turns off when the device is power cycled), briefly press the power button of the GPSMAP 62 or eTrex 30, or the camera icon on the nüvi's screen, to save a screenshot. Files are saved in the internal memory in the Garmin/scrn directory.
To enable screenshots, go to the Setup menu and select Display
After enabling this, a screen shot is made once you press shortly the power button, but there is no visible or audible feedback so you have to check the Garmin/scrn directory to see if the screen shots were made.
Linux
For taking screenshots of your GPS device you will need QLandkarteGT. Under debian, run as root:
apt-get install qlandkartegt qlandkartegt-garmin
Now run qlandkartegt and go to Setup > General > Device & Xfer and select «Garmin» from the dropdown. Leave the serial port blank, if your GPS is connected via USB, and select your GPS device from the «Type» dropdown.
Now go to File > Device Screenshot and press «Acquire». qlandkartegt might ask you to disable the garmin kernel driver; if so, close qlandkartegt, type as root:
rmmod garmin_gps
and restart qlandkartegt to try again.
Windows
See XImage.

