Lexington KY/Building Outlines Import/Contributor Guide
This guide is based on the Contributor Guide created by the Civic Data Alliance in Louisville, KY. We appreciate their thorough detailing of how to get going on this project! So you want to help out with the Lexington building import? Great! We could use the help. Here's how.
Overview
- This is a work in progress, feel free to add to it or give feedback!
Thank you for your interest in helping with the Lexington building import! Here is a guide for how to contribute.
Install and Configure What You Need
The How to start section contains steps that only need to be completed one time at the beginning. This data import process requires a bit more software setup than nomal OSM editing, but we'll try to make it fast and painless.
See our Software Setup Guide.
1) Import Buildings in One Area
Now that those preparations are complete, we're ready to start working with the building and address data.
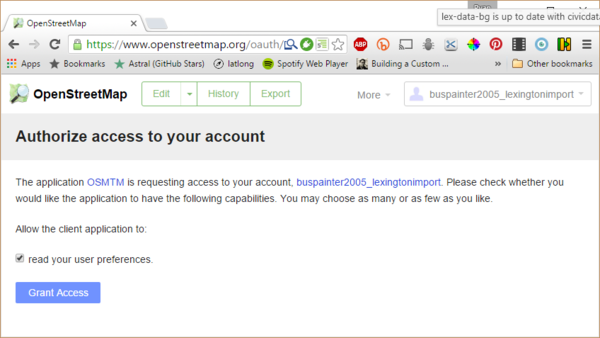
The OSM Tasking Manager is our central tool for coordinating this buildings import project. In order to take tasks you'll need to login to the Tasking Manger with your OSM import user account. Login at http://tasks.openstreetmap.us/
Take a task


In order to make sure two people don't work on the same block group at the same time, when you "take" a task the task tracker will mark it as "currently worked on" and not give it to anybody else. Here's how:
![]() You can watch/listen to a demo of this step from the NYC buildings folks: click here for youtube video.
You can watch/listen to a demo of this step from the NYC buildings folks: click here for youtube video.
- Start with the task manager here: http://tasks.openstreetmap.us/project/28 (Note: you should log in with your
username_lexingtonimportaccount) - Now you should be able to browse the map of the city and see what areas are complete and what areas need work. You "take" a task by clicking on a block group on the map.
- Grey areas are still available to be imported. Click on one of these grey areas to start importing for that block group.
- Green areas have been uploaded *and* verified (checked by a second set of eyes)
- Red areas have been uploaded but not yet verified
- If you don't care what block group you will work on, you can click on "Contribute" and then "Take a task at random" -- this will randomly choose one for you.
Now you have taken a task. If you don't actually want to do it right now, you can click the green "Start mapping" button. The lock on that task will automatically expire in 2 hours.
Where should I start?
Empty areas. For folks just starting out, please don't take one of the more complicated areas as your very first attempt. This means avoid places with a lot of existing stuff on the map: like the Downtown, Mason Headley, and Chevy Chase, various University campuses and hospitals -- these will all require a bit more work to merge existing data with the imported data.
No buildings. Easier tasks suitable for less experienced mappers would be less-dense residential areas where there is little to merge. Try to get places that don't have any grey building outlines when you zoom into the Task Manager map. Then you won't have any conflicts. Since most of Lexington is empty this should be easy.
Familiar areas. In addition to the above, pick an area you are at least familiar with to make things easier and more satisfying.
Invalidated areas. If you click an area that has comments already, choose another one instead. These areas have already been worked on and are in need of additional fixes. If you do want to work on one of these areas, remember to only download the JOSM data (and not the .OSM data)!
Open in JOSM
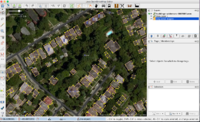
Before proceeding farther, make sure JOSM is running (with remote control enabled, as described above)
- Now you should see in the left task pane a button that says "Edit with". Click the dropdown arrow and select
JOSM. This will load the pre-existing data from OSM into JOSM in a new layer. - Add the import data for your task area by clicking the JOSM Sauce bookmarklet
- If for some reason you have some issues with JOSM Sauce try the following:
- Open a new browser window
- Copy and paste http://localhost:8111/import?new_layer=true&url= into the address bar. Do not press ↵ Enter!
- From the comment of your task, copy the URL https://raw.githubusercontent.com/openlexington/lexington-buildings/lex-data-bg/osm/buildings-addresses-xxxxxxx.osm and paste it at the end of the text you pasted in during Step 2.
- NOTE: xxxxxxx is the blockgroup number of the area your task is based on
- If for some reason you have some issues with JOSM Sauce try the following:
- Turn on satellite imagery layer to give you a better frame of reference. Select Imagery -> Bing from the menu bar. If it's badly misaligned you can adjust it by right clicking the layer and choosing New Offset - this won't affect the building data, only your visuals in JOSM.
Now you should see the buildings for your block group task, as well as the streets and other OSM data that it'll be merged into. In the panel at the top right, the green checkmark shows the active layer, and the eye icon next to each layer lets you toggle its visibility.
2) Work on Data in JOSM
- A side note: JOSM can be a bit daunting to use at first. This is OSM's advanced offline editor, which is quite powerful and allows us to integrate nicely with the task manager and import data. So it is the best fit for this import process. But for many other situations we'd likely prefer OSM's more friendly online editors like iD.
This step is the bulk of our work. Now we will use JOSM to review and make any changes or merges to the data before uploading to OSM's database. Until the upload step, no changes are made to the public map, so you can still bail out if you have problems.
If you haven't used JOSM before, there is a nice guide on this wiki that may be helpful. For our purposes JOSM/Basic_editing will contain most of what's needed to get up to speed. And there's another guide here from the folks at learnosm.org. (Of couse you can also just learn by trying, we're here to help)
Tips for Editing
- Use a mouse, not a trackpad if you can.
- Control + Click will drag the map (or right click).
- Two finger slide up or down will zoom the map (or mouse wheel).
- Command + Shift + V will paste all copied tags into selected item.
- Go to preferences and remap the Delete key to something else (like Eject) if you are on a keyboard without a number pad.
- Add commonly used menu items to the top quick bar.
- Shift Click selects mulitple items at once, Control Click deselects.
- Shift Click to select multiple tags at once, right click a tag for more options (copy selected, copy all, etc).
![]() You can watch/listen to a demo of this step from the NYC buildings folks: click here for youtube video.
You can watch/listen to a demo of this step from the NYC buildings folks: click here for youtube video.
Editing Data
- General sanity check
- Does the data look reasonable compared to aerial photos? (Mapbox at zoom levels 12–17 appears to be the most up-to-date.)
- Overlapping building outlines? If so, we must decide if we want to replace the existing one with the import or keep the existing building. Usually comparing geometries shows that one or the other is of superior quality, when compared with aerial photography.
- If we keep the existing building, we can transfer all the new tags (including
addr:housenumberandaddr:street) from the import building and then remove the duplicate entry from the import data. (to transfer tags, use: Edit->Copy, Edit->Paste tags) - If we replace the existing building, check it for any useful tags (either addressing, name, or other indication of function) which can be transferred to the new building outline. (Might also use Paste tags in this case, if needed.)
- If we keep the existing building, we can transfer all the new tags (including
- Nonexistent buildings? Since the building footprints are from 2007, it's possible that some of the data represent structures that don't exist anymore. Also, because the footprints were derived from orthophotography, it's possible that some footprints classified as buildings were not buildings. Remove those foot prints if it's clear there's no building at the footprint.
- Footprint shape? Does the shape of the footprint generally match the building in the imagery? If it's close, keep it! If the footprint is in the right area but the shape is considerably off, use JOSM to match up the footprint to what you see in the imagery.
- Addressing correct?
- Make sure an address is attached to the main building and not a shed or outbuilding, or floating as an address near the building. Delete address points that are not associated with a building.
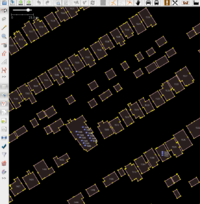
- Multi-unit addresses (for condo/apartment/duplex/multiplex buildings) should all be placed within the building footprint (see 1505 condo in the example to the right).
- If a building and a point have the same exact address data transfer the tags from the address point to the building footprint (to transfer tags, use: Edit->Copy, Edit->Paste tags). Then delete the address point.
Run Validator JOSM tool
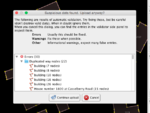
JOSM has something called a Validator (click for details) that attempts to automatically find common errors and alert us to fixes before we finish.
- Run JOSM validator and review any errors/warnings it presents. Typically these only come up in very dense areas with lots of buildings. Most will be about duplicate nodes or ways, which are minor and should be automatically fixed.
- May find these warnings: Crossing buildings; Self-intersecting ways; Building inside building

Now fix the Errors automatically with JOSM. Click the Errors folder in the bottom right, and click the Fix button (see image to the right). Then re-validate and there should be no more errors! If there are fix them manually.
If there are still Warnings related to buildings or ways, please fix those manually (right click the warning and click Zoom to see it):
- If a way intersects a building, you can modify the road so it goes around the new building. Reference the satellite imagery.
- If the interior of a building should be cut out (eg, for a courtyard), the problem is usually that there are 2 interior shapes. Left click and drag to select the entire interior shape, the double click the 'building' selection. Then you can delete this Lojic tagged area.
- If you have serious doubts about the data's accuracy or suspect a technical glitch, contact the rest of the import team for assistance or a second opinion.
Some errors and warnings are from existing data problems with boundaries, roads, tagging etc. If they were already there and not part of buildings or addresses or roads ovelapping buildings, you cna ignore them.
3) Upload Data to OSM
![]() You can watch/listen to a demo of this step from the NYC buildings folks: click here for youtube video.
You can watch/listen to a demo of this step from the NYC buildings folks: click here for youtube video.
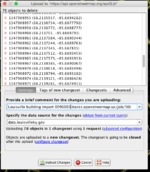
Note: If you changed the existing OSM user data (ie, removed buildings or addresses), upload the changes for this layer first! Then upload the city data layer from task manager.
Click the upload button which looks like this: ![]() on the top button toolbar. This will only upload the active layer, so make sure it's selected!
on the top button toolbar. This will only upload the active layer, so make sure it's selected!


You'll be faced with a dialog listing the modified objects (likely a lot, in the case of our import). It will also ask you for a brief comment and source. We're going to follow a consistent format for these two fields throughout the import, which is important as it allows us to track our work within this rather large chunk of data. It also clearly documents our work so that others in the OSM community to understand how this data got here.
JOSM Upload Comment and Source
Comment:
Lexington building import X (tasks.openstreetmap.us/project/28)
Source:
data.lexington.gov
Detailed changeset settings explanation
- Comment: should follow the form Lexington building import X (http://tasks.openstreetmap.us/project/28) where X is the census block group number, like "0094001".
- How do you know what census block group this is? Here are a few ways:
- You should be able to see these numbers in the Layers pane, upper right corner of JOSM.
- You can also find it in the tasking manager by putting your pointer over the
.osmbutton, and look on the bottom of your browser for the link.
- In either of the above cases, the name should be of the form: buildings-addresses-X.osm
- How do you know what census block group this is? Here are a few ways:
- For the Source field, put: data.lexington.gov
Mark complete in task manager
Back in your web browser, there is a third box with a field for comment. This is a good place to put qualitative thoughts on how the data seemed to you, which parts you are more or less confident of, or any other notes you think the next person looking over this section should see first.
Then click Mark task as done. Now the area will show as done on the task tracker (colored in red).
Congratulations!
How to validate completed areas
After areas are marked as done on the task manager, a second mapper will check it over to see if everything looks right. The task manager calls this the validation step.
Mark as validated in task manager
- This step will be done by the administrators of the Task Manager job.
If Your Area is Invalidated
When an area is invalidated, it is no longer highlighted in the Task Manager. Find it again and click it to see the comments from the admin. If you want to try and fix the errors, just download the JOSM - there is no need to use the .osm file any more since all that data has been sent to OSM already. When you've addressed their concerns upload just the JOSM layer and set the task as done again.
Using geofabrik QA tool
How to get help
- Contacting Louisville mappers organizing this project: https://wiki.openstreetmap.org/wiki/Louisville,_Kentucky/Building_Outlines_Import#Participants
- There's a great community of OSM helpers available here: https://help.openstreetmap.org/
- How to add a note asking for others to check: https://www.youtube.com/watch?v=w8bfKy-dv-E&list=UU7finIieWNix2qRsSeIOt-A&index=4
More info
- General information on Imports in OSM
- The original data source: https://data.louisvilleky.gov
- The source code for processing the data into
.osmfiles: https://github.com/civicdata/louisville-buildings
