User:Balrog/Aerial Imagery/Rectification
This HOWTO describes one of many ways to process aerial imagery so that it's suitable for mapping. Actual action items are highlighted in yellow so it's easier to find them.
Once you have made aerial pictures, and if you're an OSMer, you probably want to see them rectified and displayed as an OSM editor background for tracing or on your website displayed as the map's background, like in Google Maps, Bing maps, Yahoo maps, etc. That's what I wanted anyway, and what the grassrootsmapping.org people do for some of their projects. This is purely a software task and to many people will be less fun than flying a kite for example.
Background (skip this)
I explored various existing ways but haven't found a satisfying tool to do this, but I applied some criteria that other people might not care about:
- I wanted the process to use only open-source software and openly licensed data for the georeferencing.
- I wanted it to be easy/streamlineable/applicable for many, huge bitmaps and imagery taken at varying angles so that I could evetually use it for a kite-imagery-map of the 3 million city, where I live.
- Enough mathematically correct to satisfy the geek in me.
I ended up using a process involving Hugin, a panorama stitching program that I have heard of before in the context of aerial imagery (possibly from Martin Koppenhoefer on the mailing list, or another Martin, possibly one involved in the OpenStreetPhoto..), but I've not seen any instructions anywhere and comments on what it is good for and what it isn't, compared to some other methods like the Cartagen Knitter or Map Warper applications, hence I decided to document my findings here as a tutorial. This is not to say that I have reached the three goals listed above, but I think I'm closer.
Things I specifically didn't care so much about:
- Mountainous or any non-flat terrains and the Digital Elevation Model input.
Other software (skip this)
Open-source software for rectification (not so much for georeferencing) of aerial imagery seems scarce, although some work is already available. Georeferencing is an easier task and can be done with programs such as QuantumGIS or the Map Warper web application using the GDAL library, including some basic deformations of the images. Quality rectification of imagery is more difficult however because it needs software that can understand the camera optics and other parameters.

It is also possible to rectify an image using just a huge number of control points in programs like QGIS or a simple graphics editor (Gimp, Photoshop) but it is very time consuming and results can leave a lot to be desired. Additionally the area must either be very well mapped or reference imagery must already be available for adding control points. Using something like the thin-plate spline method in GDAL and the programs that use GDAL, is what I specifically didn't want as the alignment you get is a function of the number of GCPs you add and in theory you never get perfect alignment for a photograph that isn't taken exactly vertically or has fewer GCPs than pixels. It also means doing a whole lot more manual work (timely and prone to errors) than is needed.
- Cartagen Knitter - Web application using HTML Canvas to display the warped image updated live as the control points are dragged. Each picture is remapped using four GCPs at the corners of a picture, using a 4-point based perspective projection method which is methematically correct for rectilinear lenses and flat land. The interface is demanding on the browser but very intuitive with video tutorials available. Working with Knitter is probably quicker than with Hugin due to instant feedback on every action and the full toolchain set up durectly to generate a tileset, a GeoTIFF file or a WMS service at the output. I have seen slight problems with very varying ground resolution between pictures, probably can be fixed.
- Metacarta map warper - GDAL based and doesn't seem to take perspective mapping into account at all. Also doesn't take camera optics into account but that doesn't matter so much for the popular rectilinear lenses as their distortions are very small. The lack of perspective mapping however means that again you never get correct alignment for a picture that hasn't been taken straight vertically down, and if the direction the camera was pointed, was as much as, say, 40 degrees from vertical, you won't even be close to correct.
- ILWIS, OSSIM - these two are professional heavy-eight GIS / Remote Sensing suites that originally were closed-source but have become Free Software later. ILWIS, while opensource, is Windows-only. OSSIM is built on the Octopus library that seems to have been co-developed by the French government. I have not tried these two programs yet, but they do know about the elevation model and there's hope that they are better at proper georectification than the Hugin or the GDAL based packages. If you have used ILWIS or OSSIM, please update this information.)
Preparing pictures
The goal of this process is to take a set of aerial photographies as input and give you a ready to use GeoTIFF file or a tileset which can be served on the web or used locally in whatever way. An easy-to-use program would probably do all this in one step but we will divide the process in smaller steps because we'll be using various different programs.
The set of input pictures I will use are available here. I have not processed them in any way although it may be a good idea if your camera saves images in the raw format. Since we will be using Hugin in the next step, you should leave the EXIF tags in the files' headers because Hugin will be able to take some of the camera's parameter values from there.
If you're doing Kite/Balloon Aerial Photography with no remote control over the camera and an intervalometer triggering pictures every couple of seconds, then you probably have hundreds of pictures of which most are identical or have overlapping areas, and some are motion blurred if the day wasn't sunny.
| As the first step select the pictures that are the most sharp, most vertical and together cover all the interesting area. |
You can add a picture or two from after the take off and before landing, taken at a lower altitude, because they will have better ground resolution. Sometimes it's a tradeoff between the viewing angle and ground resolution. I have selected 46 pictures which is quite a lot for one spot but I just can't decide. They are taken in the winter with snow covering the land because that were the pictures I had at the moment, the snow shouldn't be much problem for mapping.
Rectification
We're interested vertical aerial photographs but it would be impractical to only use pictures looking exactly vertically down because the covered area would be small and the cost of expanding the area high. The maximum angle distance from vertical is used as a measure of the quality of orthoimagery but, if you're doing KAP/BAP, you probably don't want to set any quality limit at first. Instead you can process all the pictures you have and take the most vertical photographies you have for each area. Even images taken 60 - 70 degrees may be useful sometimes.
Since we deal with images taken at an angle (even those that seem exactly vertical usually aren't), we have to rectify them. That is, we have to undo the deformation resulting from looking at the ground surface at an angle. After this they will (hopefully!) have the property of a Mercator-map: right angles on the ground will be preserved in the imagery, and equal ground distances will be equal in the imagery too. All of our images will have the same scale after this operation so that it is easy to stitch them into a single imagery map afterwards.
Hugin
We will use Hugin, the open-source panorama stitching program, to do the rectification because its optical model is extremely complete and accurate. You can imagine the task of stitching a panorama in Hugin as a using a set of photos of fragments of a big graffiti on a flat wall to reproduce the full graffiti. This is similar to our task where we have the earth's surface as the big wall and the map features on it forming the graffiti. For the needs of this tutorial we assume that the place we have photographed is mostly plain terrain and it is small enough that earth's curvature is not making much difference. If the place isn't flat you either need to use more sophisticated GIS software (this will require having a Digital Elevation Model for the area too, and perhaps using some closed-source commercial tools), or more vertical pictures which either means photographing at higher altitudes or more densely.
 |
Reference map
Throughout our work with Hugin we will be aligning all our pictures against some background which we know is already orthographic (e.g a Mercator map). There are several choices for the background layer:
- GPS traces -- our own or taken from OpenStreetMap for example, and projected to Mercator.
- existing imagery layer (Bing or Yahoo!, while low resolution, might be suitable. In theory their terms of use only allow usage through their respective APIs or OpenStreetMap editor, in case of Bing. However, locally making a screenshot of the tile layer in JOSM and then using the screenshot in Hugin would be very hard to object to by these imagery providers...)
- one of our pictures which we know for sure is taken exactly vertically down. The most popular cameras use rectilinear lenses, which means such pictures are already "Mercator projected".
As we proceed aligning new pictures to our background layer, these pictures also become "vertical" in a way, and we can align successive pictures against those.
For the purpose of this tutorial we will use the GPS traces option for the initial reference simply because this is most universally available and there are no license problems. Optimally a map background with selectable layers (WMS, TMS, OSM vector data or GPS traces) would be integrated into Hugin or a Hugin spin-off made for this purpose, but at the moment we'll just load a screenshot of JOSM showing the desired layer as another picture in Hugin, with JOSM configured to use the Mercator projection.
Other projections can also be used but Mercator seems the easiest because it's closes to what an aerial vertical picture shows.
 Save the picture to a file and load the file into Hugin again using the "1. Load images..." button.  |
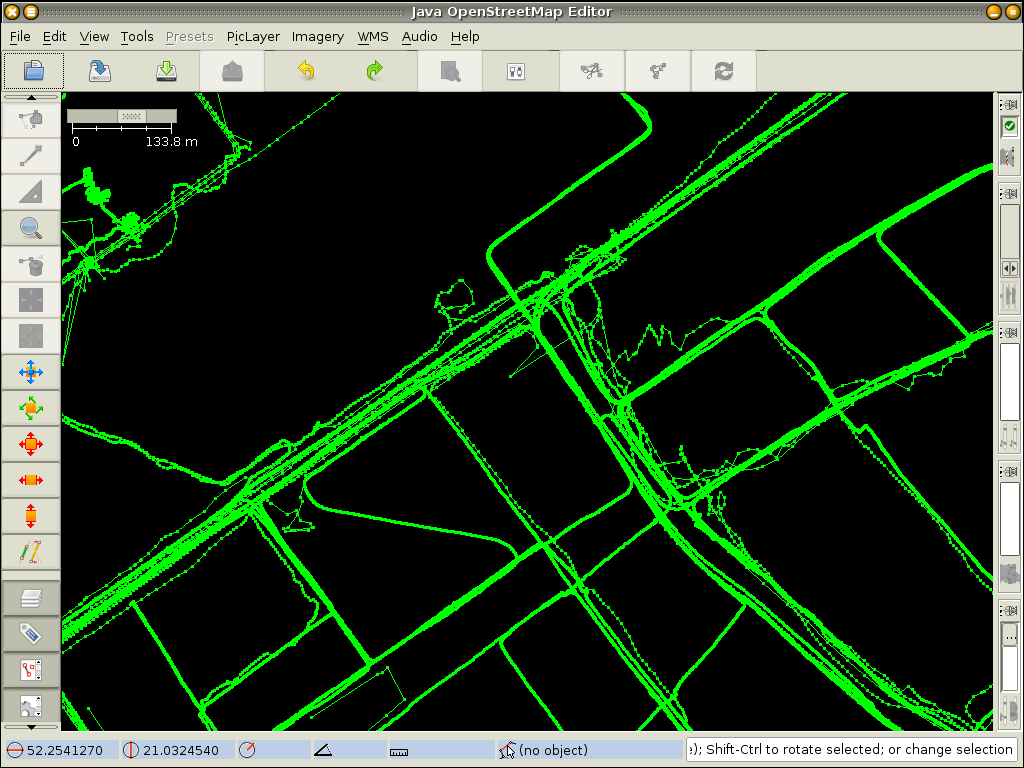
My reference image is here.
Lens parameters
If you now switch to the Camera and Lens tab, you will note that Hugin deduced that all the first 46 pictures we loaded were taken using one camera and lens, and named it Lens 0. Our reference image was assigned the next free lens number, Lens 1. This is very convenient because the camera parameters of all our photographs are linked and we can set the parameters values in just one place.
The picture's light value (EV), focal length and the lens's Field of View (v) values have been retrieved from the EXIF data. The a, b, c, d, e, g, t parameters describe different types of lens/sensor distortions and with modern cameras the distortions are usually insignificant and the numbers close to 0.0 (or 1.0 for some parameters). Their values are not (usually) stored in EXIF tags, so initially you can just leave them alone hoping that the distortions are below a noticeable level. The a, b, c values are different per focal length and should be specially low and insignificant when the focal distance is maximum, which is very likely to be the case for aerial images because the photographed object is far from the camera. If you're concerned you can find the a, b, c, d, e values for the given focal length using a photograph made with the same camera, where many straight parallel lines (optimally a regular grid) are visible, using Hugin and other available tools. There also exists a crowd-sourced database of these values for some cameras which currently is quite incomplete and I'm not sure about its licensing conditions. More information about this is available from the panotools wiki.
For the preview dialog to be useful, set the Exposure (EV) in the Photometric tab, for the reference image, to some kind of average of the other picture's light values (in my case 12).
Camera position & orientation
The next and the most time-consuming step consists in using Hugin to calculate the exact position and orientation of the camera in relation to the earth's surface for each picture. Knowing these positions Hugin will be able to rectify the pictures to look as if they were taken vertically (ok, not exactly, but at least where things don't stick out of the surface). The added bonus is knowing the exact camera's whereabouts which can be used to calculate what altitude our kite was at, its geographical coordinates (with a precision better than GPS!), and the distance between the camera and the ground pixel so that the contrast and white-balance can automatically be adjusted taking into account the amount of air through which light had to pass before reaching the camera. This can have a noticeable effect even at 500m of altitude (the objects farther from the observer becoming blueish).
The camera's position is described by three numbers, we can call them the easing, the northing and the altitude, Hugin calls them X, Y, Z. The orientation is described by pitch (p), roll (r) and yaw (w) angles. These are the six numbers per picture we are looking for. We can leave them all at zero for the reference image (the JOSM screenshot), this way we have a reference point at (0, 0, 0) and all the other camera positions will be calculated in relation to that point, which we can imagine in the physical space lies a couple hundred metres above the middle of our reference picture. Exactly how high can be calculated from the picture's resolution, HFOV and the bbox of GPS data visible. This distance will become for us the 1.0 or the unit of all the X, Y and Z values we deal with.
Since we have six unknown values (six outputs) we also need at least six inputs per picture. Like in other programs (Map Warper, Cartagen Knitter, QGIS) we provide the inputs through Ground Control Points. Each control point counts as two inputs (the X and the Y or latitude and longitude), so we need 3 points per picture, that is three clicks on the picture in question and three clicks on the reference picture to give the corresponding coordinates. You can always add more points but it does not guarantee a better result like in Map Warper for example. The three points already provide enough information to find the unknown values and if the inputs are exact the outputs are also exact. Giving more inputs may have (not always, see below) the effect of cancelling out the errors from some control points. In short, if you're a mathematician, you'll probably want as few GCPs as possible and if you're a statistician you'll want as many as possible. Alternatively if you're an optimist you want three and if you're a pessimist you want many.
(As an aside many people working on aerial photography drones, quadcopters, ritewing airplanes, et cetera. -- of which there are a number of projects on the web, but few of which actually reached a working state -- consider using GPS and accelerometer+gyro measurements to calculate the camera position+orientation. The mikrokopter.de based drones already have this information available because it is used by the on-board software for flight control. I'd like to be proven wrong but my feeling is that the accuracy is going to be much too low for our purpose. However, if this information is really available then it can be entered into Hugin automatically -- perhaps by using a script to produce a Hugin project file, which can then be loaded into Hugin. On the other hand the main value of using Hugin for me is that it knows how to find those values. The final rectification is technically a much easier step and it might make more sense to write a custom standalone program to do the rectification if the camera positions are already known.)
The Optimizer and the GCPs
The Hugin's equation solver (called Optimizer) works iteratively and sometimes gets stuck in local minima. In my experience with just three GCPs it is the least likely to fall into such local minumum and quite often finds the exact solution (0.0 error). Another thing that apparently has bearing on how well it performs is the number of discrete pictures being aligned and the number of pictures against which these are being aligned. Optimally the two sets have no common part and optimally they both consist of just one picture. So if you notice that after clicking "Optimize" the picture is not where it "should" be and the error value is big (in hundreds or thousands range), most likely the Optimizer is stuck in a local minimum. I found various ways to "unstick" it.
- delete excessive control points,
- uncheck any pictures except the one being optimised and the one or various, against which the CPs are set. Unchecked pictures will not be "seen" by the Optimizer at all,
- select a subset of unknowns, for example first optimize a picture's roll (r), then the X, Y pair, then Z, yaw and pitch. This way you can easily monitor if the values are more or less changing in the right direction,
- in the extreme cases try to roughly estimate the values, input manually and then optimise with Optimizer.
Normally none of these will be needed as we'll just use three control points and always enable only the picture being optimised and the reference picture, and we'll disable it as soon as we've optimised it. All of this, too, could be handled automatically by the program, so that the user needs to do nothing more than marking the control points with mouse.
You will also notice that Hugin boasts an automatic CP finding feature. It can be accessed from the "Assistant" tab with the "Align..." button, from the "Images" tab ("Feature matching (autopano)") or from the menu. It works really well for finding common features visible in many pictures, but this isn't actually what we want. We need all of our GCPs to be in one plane, exactly at the ground level. CPs that are on buildings rooftops, treetops or even tops of parked cars are no good, they will skew the results. They are not technically GCPs -- they are control points, but not ground control points. So by using the automatic CP finder you usually get some 50 - 100 control points of which 90% you need to delete. In conclusion it's faster to start with no GCPs.
The optimising
 The following instructions need to be repeated for all pictures we want to align. Let's start with the ones covering the biggest areas, so that we quickly get an overview of what the final result will look like, and so that the lower-altitude pictures can be aligned (through GCPs) against the ones we have already optimised.

 |
Obviously save the state of the project to a file every now and then.
I have put my resulting project file here so you can check what result is expected at the end of this step. It is a text file which references all of the images in the input subdirectory and the JOSM screenshot reference image, so you need to download all of these files (tarball) before opening it in Hugin.
Masking & images order

Now that we have all the pictures aligned and the camera positions are known (or at any intermediate point before) we can select which pictures will be on top where there is an overlap because part of the area is visible on various of our pictures. The pictures are ordered in a stack with the ones closest to the top being visible over other pictures. The order is the same as visible in the listbox in the Images tab. So to change their order let's go to that tab and use the Move up, Move down buttons until the map looks optimally in the preview. Usually three parameters are important: ground resolution (lower altitude photos have better resolution, but are smaller), angle from vertical and sharpness/quality, so you want to put the images that combine these three qualities on top. Normally I move each picture to the right place in the stack as soon as I select it to be optimised, with possible adjustments at the end of the process. The "identify" feature in Fast Panorama Preview dialog (see the image) is useful for finding which pictures may be obscuring a part of some picture.
If just part of a picture is good, go into the Mask tab and draw a polygon over the unwanted part of it, then click Add new mask. In Hugin 2010.3 the masks are not reflected 100% correctly in the quick preview, so don't worry about this -- in the final imagery the masked areas will just be fully transparent and the edges will be softened. Masking is useful for pictures with part of the image motion blurred due to rotation, obscured by fog/clouds/dust or ice on the lens as in some of the example winter images, or kite line or balloon tether. It is also useful with pics taken far from vertically if the horizon line is visible. You want to cut them at some distance from the horizon (note that after calculating the camera orientation the sky would not be visible anyway as the pixels at the horizon will be projected at infinity on our projection plane).
Output
If you're satisfied with the image map and have considerable amounts of RAM you can just go into the Stitcher tab and generate the image directly from Hugin using nona+enblend for blending the images. The problems I had with enblend were it using much more RAM than necessary or practical for a high-resolution imagery set, failed assertions when pictures have big overlaps and it being very slow. It also doesn't let you look at individual remapped (rectified) images and tweak them before the final stitching. So I'll assume we won't be using enblend and I have split out the stiching as a separate task below.
 Uncheck all of the checkboxes except Exposure corrected, low dynamic range to the right of "Remapped images". This tells hugin to not run enblend. It will only rectify ("remap") each picture using nona, write the configuration Makefile script and save every remapped image into a separate TIFF file. Make sure all of the aligned images are enabled in the panorama preview and the background (reference) image is disabled. Then hit "Stitch Now..." |
Stitching
Each resulting TIFF file can now be opened in Gimp and inspected, possibly retouched, e.g. if the kite line is visible somewhere it shouldn't be. Or if you think everything is fine you can proceed to "blend" them. To merge all the layers into one image I used a Gimp python-fu script. Gimp is capable of working on huge bitmaps, much much bigger than would fit in the computer's RAM. This step can take many hours if the resolution is high, though.
To merge a number of files using gimp, download this script and update the paths to images in it:
 ...
 outname = "20110105-not-georeferenced.tif"    # Output filename
 names = glob.glob("20110105-layers-????.tif") # List of input filenames
 names.reverse()

 def blend_multipage_tiff(name, outname):
 ...
Run the script with: gimp --batch-interpreter=python-fu-eval -i -b 'execfile("blend.py")'
|
After this we should have our photo map in a single giant image which is rectified but has no georeference in it.
For some uses it would be desirable to do the blending of fragments of the map on demand instead of having it all in one big file. For example to make a website like Nearmap's imagery browser where the imagery to display can be selected using different criteria, like viewing angle and age, we could decide to use a server side script to order all the layers using the selected criteria and then use the top visible layer or blend the top layers if the top image doesn't cover all of the area of that tile.
Final georeferencing
While this image is mostly correctly orthorectified, it is not georeferenced. In other words the pixels in the image are not yet assigned geographic coordinates. Ultimately either a special version of Hugin or brand new program needs to be made which will be geo-conscious, for aerial imagery orthorectification, but I have not had much time yet to work on it. For the moment we do this as a separate step and I have been using QuantumGIS for this.
 Now switch to the main QGIS window and let's select some reference data for GCPs. It can be GPX files, OSM data (requires the QGIS OpenStreetMap plugin), a shapefile or a WMS layer, anything. Go back to the referencer window and add perhaps 6 or more control points by panning & zooming to a place in the image, then clicking the red dots button (the dots are the GCPs if you wonder) and then on the image. The user interface is not very friendly but it works. Switch to the main window, locate the same place you've clicked on the map, switch back to georeferencer, and click the From map canvas button in the Enter map coordinates dialog, click on the map, confirm with Ok. You can save the control points to a file just in case. When you're done, click the play button (Start georeferencing). QGIS will ask for the transformation settings first. The Thin Plate Spline type is pretty much the only usable transformation, alternatively if you're very confident in the quality of your Hugin orthorectification, you can use the Linear type, which only needs two control points. With Thin Plate Spline the number of CPs needs to be higher and they positively affect the resulting GeoTIFF. I.e. if the rectification in Hugin didn't go too well because errors have accumulated from rectifying one picture against another, additional CPs will correct that. (optional) To create a GeoTIFF, set the output filename in Output raster: and you can also set the Target SRS to EPSG:900913, although GDAL would later reproject the file if needed. Then hit Ok to start. The process can take a long while depending on the bitmap size. |

QGIS doesn't deal with huge images so well, but it should eventually finish and we will have a GeoTIFF with all our imagery covering possibly very big areas at high resolution, without running out of RAM.
The part I indicated as optional above will create a big, georeferenced, warped GeoTIFF file which can be used with many GIS programs or to set up a WMS server. If you don't want a WMS, you can use a trick and produce a GeoTIFF that isn't warped but contains the control points in it and this should take much shorter. In the next step when we will be tiling the imagery, gdal2tiles will warp the image on the fly if needed. To do that, click the button next to the play button, with an icon that says "GDAL". This shows a text box with two commands that generate the warped TIFF. It's enough to run just the first command before running gdal2tiles in the next step. You can adjust the parameters (see the gdal_translate --help output) and the output filename. In my case this was the command I ran:
$ gdal_translate -of GTiff -gcp 4318.77 5607.75 21.035 52.255 \
     -gcp 3008.49 3818.66 21.0329 52.2567 -gcp 2876.56 1697.87 21.0327 52.2586 \
     -gcp 7508.92 2522.4 21.04 52.258 -gcp 7289.05 6312.24 21.0397 52.2543 \
     -gcp 1605.29 12269.8 21.0308 52.2487 \
     20110105-non-georeferenced.tif 20110105-single-layer.tif
Input file size is 8608, 13112
0...10...20...30...40...50...60...70...80...90...100 - done.
Tiling or setting up a WMS
Generating a standard TMS tileset out of the georeferenced TIFF is very straightforward using GDAL:
$ ./gdal2tiles.py -z 11-20 -w none --s_srs EPSG:4326 -n 20110105-single-layer.tif
Generating Base Tiles:
0...10...20...30...40...50...60...70...80...90...100 - done.
Generating Overview Tiles:
0...10...20...30...40...50...60...70...80...90...100 - done.
You may want to adjust various of the parameters, like the zoom levels (here 11 down to 20 -- see note on zoom levels in the "Output" section above). If your working directory is accessible through a http server on your computer, it's enough to add an "XYZ" layer in OpenLayers to display the tileset now:
       new OpenLayers.Layer.XYZ("20110105: z11 to 20",
               "tiles/20110105-single-layer/${z}/${x}/${y}.png", {
                       sphericalMercator: true,
                       isBaseLayer: false, numZoomLevels: 21,
               })
One additional step I do after tiling is inspect every PNG tile's alpha channel and if inside a single bitmap there are only fully opaque pixel, the file is converted to a 255-colour paletted PNG with no transparency. Effectively only the tiles on the borders of an imagery set are full RGBA PNGs. The effect of this is lower bandwidth usage and more importantly better browsing experience on slower computers or those that don't have/don't use hardware acceleration when drawing bitmaps. I noticed that panning & zooming in either OpenLayers or KHTML was jumpy with my imagery tiles compared to the OpenStreetMap mapnik tiles. Both are PNG tiles and the difference turned out to be the palette size.
Normally imagery is served as JPG and this would indeed have been even better, but this rules out transparency.
WMS
To create a WMS service it seems easiest to use the mapserver program. Depending on your distribution, there may be a ready to use package in the distribution's repository, on Gentoo the package is called sci-geosciences/mapserver. If there isn't one, you'll need to build mapserver and place the binary under a path such that it will be seen by the web server as an executable (CGI script). The mapserver uses a "world file" to find the layers to serve. QGIS is capable of automatically generating a stub world file for all of the layers you have opened in QGIS at a given moment. So remove all other layers leaving just the GeoTIFF raster layer containing your imagery. Click the MapServer Export toolbar button or menu entry -- this requires the MapServer Export plugin to be enabled. The resulting world file is just a stub and may need to be heavily edited. It's probably best done with example world files (you can find many on the web). My world file for the images I used in the examples is here.