Video mapping
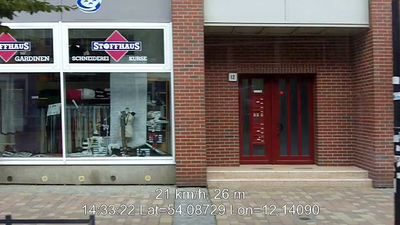
Video mapping is a mapping technique some people have experimented with. It works pretty much like photo mapping, except that a camcorder is used instead of a still camera. Mount it somewhere in your vehicle or carry it with you, and leave it recording for the duration of your journey. Afterwards, watch it back to find features in the recordings, and input data into OpenStreetMap. You might also correlate the video data with your GPS tracklog.
Note: It looks similar to ideas around creating Google StreetView clones, e.g. to video every street, however video mapping is basically just another technique for taking notes. The videos don't need to be published after the analysing phase.
Advantages
- easier than any other mapping technique. You don't need to stop and start at all. You're leaving all the work to do later. You set the video and GPS going, and then forget about it. In fact you could set it going recording your mother's car journey.
- possible to split up the job to collect data and to analyse/add data by a second person, cause you will have a superb visual impression
- the video camera sees everything within its viewing angle, so nothing is missed. Details like bus stops and telephone boxes will all get captured on a video even if you are in a vehicle and cannot stop to take a photo. Pen & paper mappers find these things quite tedious to make notes of. Video mapping makes it easy to examine the roads that cross a long stretch of highway (which ones go over the highway and which ones go underneath it) - if you are alone in the car, this is almost the only option.
- refer to the video and immediately remember where you saw what, and which road was which. It also allows you to make audio notes into the video camera. If you have a good enough video camera, you can also show the camera your GPS device now and again to add a positional fix to the video context.
Possible enhancements
- Poor tool support (see below;
JOSM Video Mapping Plugindoes not work any more) - The video will be rather boring to watch if you are in an area that is mapped already. It would take as long as the journey itself or even a multiple of that, except that you could fast-forward some bits.
- If you can't see a street sign on the video, then you've failed to map that street.
- The viewing angle of the camera is very limited and the resolution is much lower than of a still image camera.
- Conventional video cameras record interlaced videoframes, thus still images may look jaggy when moving fast.
- Video storage (e.g. tape length) might be a limiting factor
- Georeferencing is somewhat crude and vulnerable to even minimal time drifts between GPS and camera. Most time synchronization methods have errors of up to a second, which is hardly an issue with photomapping if you stop for each photo since the time you take to aim, shoot and pack up the camera again is likely to compensate for minor inaccuracies. With video data you are likely to be moving as you film and the inherent inaccuracies of synching GPS and video time will result in positions being a few meters off. The camera orientation may make matters even worse (see below).
- Depending on your country you might get problems with law if you try to film persons, restricted scenarios and if you film in public transport, you might need a permission (in Germany see wikipedia:de:Drehgenehmigung)
Demovideos
- Videomapping with helmet camera
- Bici Video Mapping para Openstreetmap
- Old Python Script for sync
- Car trip Göteborg to Landvetter with GPS at Sweden
- TrackMyJourney with gauges
Videomapia - search any video using the map.
Correlating video and GPS data
As you record, you can:
- Film the display of your GPS unit showing the GPS time (if your camera can get a good image of that).
- Note down the GPS time at which you started the video recording.
The Pause button should be handled with care as it can seriously mess with GPS correlation:
- Unless your camera records timestamps per frame (tape-based DV cameras do that), make sure you re-sync as you did at the beginning of the recording.
- Make sure you start a new video file each time you press Pause. For tape-based DV cameras, there is a tool called Scenalyzer which will split a single AVI DV file into multiple ones based on "skips" in the timestamps. For newer cameras that record onto memory cards, try Pause once to find out if it starts a new file - else avoid using it.
Back at home, you can correlate the data in different ways.
Manual correlation Works always, but is most tedious of all: Note the timestamp of anything interesting in the video (e.g. "Shops on the left between 1:32 and 1:37") and correlate that with the GPS tracklog.
Extract georeferenced still images Main article: Video gpx script
Subtitles
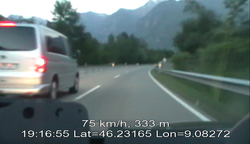
Since version 1.4 of GPSBabel is able to create a subtitle file from a GPS tracklog in any format that gpsbabel can read (which should be plenty of choice). It is realised using the SubRip module.
Inputs are:
- A GPS tracklog
- A GPS timestamp and the position in the video to which it corresponds (e.g. video position 0:01:42 corresponds to 2010-04-09 19:25:21 GPS time). This might get a little bit confusing cause of different timezones between GPS signal and internal clock, filedate,... so please have a look at the .GPX track for the right time!
gpsbabel -i gpx -f tracklog.gpx -o subrip,video_time=000142,gps_time=192521,gps_date=20100409 -F subtitles.srt
It will create a subtitle file with speed, altitude (if available), GPS time and coordinates. Place it in the same folder as your video file, with the same base name (if the video is named MOV001.MOD, name the subtitle file MOV001.SRT). You can now watch the video in any media player that supports SRT subtitles (VLC does) and have the relevant GPS data as subtitles. Some of you might have seen similar movies featuring themselves as drivers, courtesy of local law-enforcement authorities ;-)
Barcodes
- Ben did some work on storing lat/lon within the frame in the form of a barcode. There was also some discussion on the mailing list around using the audio track to store the position in FSK/APRS/etc.
Video mapping plugin for JOSM
Main article: JOSM Video Mapping Plugin (Still "under development", unmaintained; doesn't work under Linux [or at all]).
The JOSM videomapping plugin was removed in 2018 since it never have been finished, was buggy and unmaintained. There are no known videomapping plugins today.
Cameras
Recommendations
- widest viewing angle you can get, such as a fisheye lens
- highest resolution, such as full HD, as video is always very low-res, compared to a photo
- multiple cams to extend view angle, only if they are cheap (such as these key chain cams for around 10-15 €, which you can get from China/Hongkong e.g. on eBay) or you need more than one
- prefer better video codecs, if possible to reduce amount of data for writeback (common ones, best to worse: H.264/MPEG4-AVC, MPEG4-ASP/DivX, MPEG2, MJPEG, DV)
- prefer digital cameras (as they are nearly always progressive scan (this means they save one full frame at once)) over old analog video cams which save two half frames after each other for one full frame
- bad audio such as 8 bit, 8000 kHz, mono is always good enough for mapping (and to record your comments)
| price | recording capacity | resolution | power supply | shock resistance | comfort | |
|---|---|---|---|---|---|---|
| digicam (moviemode) | 100€ | 1h | low | 30min | + | - |
| webcam | 50€ | inf. | low | offboard | ++ | + |
| smartphone | 100€ | 3h | medium | 3h (+offboard) |
+ | + |
| pocket cam | 150€ | 2h | HD | 2h (+offboard) |
++ | ++ |
| spy cam | 50€ | 2h | 720p | |||
| action/helmet cam | 300€ | 2h | 720p | 2h | ++ | ++ |
| camcorder (HDD) | 700€ | 5h | HD | 2h | + | ++ |
| camcorder (DV tape) | 300€ | 1,5h | SD | 1,5h | + | -- |
| Cheap Chinese windshield-mounted cam | 40€ | Up to 16h (32GB SD card) | 640x480 px | Cigarette lighter adapter | + | windshield-mounted |
| industrial cam |
digicams
The movie mode of digital cameras is mostly very limited (short rec time, low quality encoding, no further options) so it's not recommended, even if a lot of people have such devices and the optics are great.
webcams
- see /with webcams
smartphones
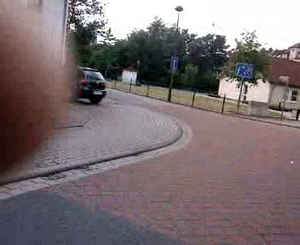
The image quality is somewhere between a webcam and a pocket camcorder. This might be a cheap solution to capture videos over a long time.
- cheap
- easy external power supply
- might be already in use for your GPS
Pocket Camcorder
Very small DV camcorder, handy enough to keep it always with you and to take it in hand all over the time. The video quality is similar to a real camcorder but lacks the zooming and is a little bit less light-sensitive.
- monitor allows quick checks
- light enough to keep it in hand (even on bike)
- might be HD quality
- very cool for house numbers!
Action / Helmet cameras
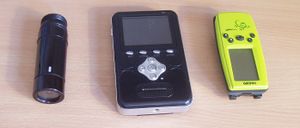

There are compact action cams out there, which can be attached to helmet, handlebars, goggles...
- GoPro
- GARMIN Virb Some models include GPS
- ELMO SUV professional cablecam
- Vholdr Contour HD, several models even with internal GPS
- AT-1 wireless helmet camera
The latter model has been tried by user Ojw but no details on his experiences, the link to his sample photos is reportedly dead...
Resolution varies from 640×480 to something in the 2 megapixel range.
- easy to mount in a lot of different perspectives
- mostly a separated display to check the camera point of view
- you follow interesting objects per instinct
- very shock resistant
- not the best optics but better than webcam
- pay attention to the traffic, even if you watch for interesting objects beside the street
- to get sharp images, the objects have to be not too far away
- you can decrease the FPS for long time recording
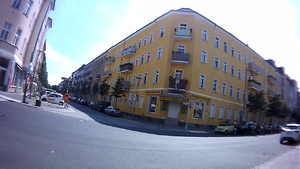
Camera glasses, spy cams, ...
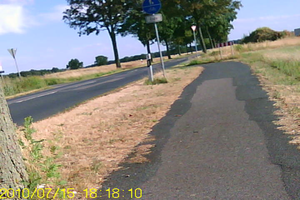
For mappers without a car, sunglasses with a built-in video camera might be an interesting idea.
Technical features:
- 320×240 video resolution
- 1 GB internal storage for around 3 h of video
- microSD card slot for up to 2 GB of extra storage (total 3 GB or 9 hours of video)
- USB connection for charging and data download
Resolution is quite low for mapping (lower than a TV image) unless you kiss each road sign you see; you might be able to partly compensate for that as you tilt your head and thus follow signs as you drive past them. Storage should be sufficient for mapping, though the vendor's data sounds as if SDHC cards are not supported, thus limiting the user to a maximum of 3 GB storage space altogether.
- bad light dynamics
If anyone has tried those, please share your experiences here!
Others:
Camcorders
This are the most common equipment, you might get one from your buddies. It has great optics, can store a lot of content and is robust enough to get mounted on a tripod.
The video data gets recorded as a stream on tape, with timestamps for each frame. You will need an IEEE 1394 (Firewire) port on your PC and the appropriate software to get the data into your PC. After that you will have to split the video stream into separate files for each time you pressed Pause. There are two ways to do that: either by analyzing picture data or by analyzing the timestamps in each frame (a jump means a new scene and thus a new file). There is one commercial tool, Scenalyzer, which can split a single DV stream into multiple files based on timestamps: the free-of-charge (yet proprietary) version can do that only with data that has already been streamed to the PC; the commercial version can use the video stream from the camera. If anybody is aware of a free (as in free speech) alternative, please add it here.
But of course there are cons:
- huge power consumption
- Streaming from DV tape to PC takes place in realtime, which takes a lot of time again
- not really handy
Windshield-mounted cams
There are a couple of places on the Internet [1] [2] [3] where you can buy cameras specifically designed for mounting them on the inside of a car's windshield and record what's happening on front.
They usually come with a SD slot, start recording as soon as they get power via a cigarette lighter adapter, and come with a suction cup and wide-angle lens.
The different models differ in characteristics, so YMMV. Mine writes a new file every 15 minutes, prints a green timestamp on the top part of the image, and deletes the oldest file when there is no space left in the SD card. At 640x480 resolution, expect 30 minutes to take up 1 GB of your SD card, so plan cards accordingly.
You can also get a cigarette lighter 3-way + USB adaptor, and power up 3 cams (front and sides) plus a GPS.
As of 2016, a number of dash cams are available which record geo-coded videos, in MOV or MP4 format, at HD resolution (typically 350MB for a three minute MOV video, or 150MB for three minutes of 720P MOV video). These videos can be viewed using software supplied with the cam which plays the video alongside a map depicting the current position and direction, and any other telemetry the camera may have recorded. The program "Datakam Player / Registrator Viewer"[4] will read many cameras' files (many cameras use a common chip set but are "brand engineered") and it displays the position and direction on OpenStreetMap or a number of closed source maps. Of special relevance to OSM mapping, this program can also output a GPX or KML file which corresponds to the video.
The emergency button on the dash cam can be used when surveying, which will prevent the video being overwritten, while allowing other less important files to be overwritten. This permits the dash cam to be used for mapping while undertaking a long journey in which old segments of video would be overwritten.
If you use a car for surveying, these are pretty much a no-brainer.
GPS enabled cameras
There are devices, for example the Garmin Virb Elite which record Video and GPX tracks. The pictures can be processed via this script to geotagged pictures: https://github.com/AddisMap/BAME-tools/blob/master/BAME-Virb2OSM.sh
Setups
There are different approaches which/how many cam(s) to use and how to mount it:
If used in a vehicle, it is most convenient to install the camera at a fixed location; the drawback is that it will not see everything. Professional mappers use multiple cameras to compensate for this: e.g. one pointing straight forward, one pointing forward at an angle towards the "near" side of the road (the side that the vehicle is driving on), one pointing to each side and one pointing backwards at an angle towards the "far" side of the road (this allows capturing of traffic signs for the opposite direction). With cheap webcams, this may also be an option for a nonprofessional mapper.
| pros | cons | |
|---|---|---|
| front | traffic signs road structure |
shop labels parallel to road bad georeference |
| front trav. side | plus parallel shop labels | fast less road structure |
| front trav. opposide | plus parallel shop labels | less road structure |
| side | good georeference | less overview very fast might miss traffic signs |
| opposide | good georeference | less overview fast might miss traffic signs |
| back trav. side | traffic signs only from back fast | |
| back trav. opposide | traffic signs only from back |
| speed | stability | details | hidden details | power supply | danger/legal issues | |
|---|---|---|---|---|---|---|
| walking | ++ | + | - | -- | + | + |
| cycling | ++ | ++ | + | - | + | - |
| Motorcycle | -- | |||||
| car | + | ++ | - | ++ | + | |
| bus | + | - | + | + | - | - |
| bus(double) | ++ | + | ++ | ++ | - | - |
| tram | + | + | + | - | - | - |
| train | -- | + | -- | + | + | - |
Car setup with a video camera
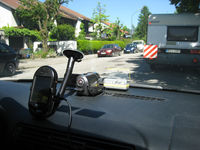
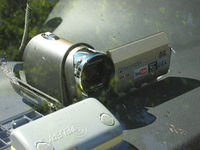
Placing a tripod in a car is not always an option, especially when traveling with large amounts of baggage or passengers in the back. A mini-tripod on the dash is not recommended as it is unstable and easily falls over in sharp turns. There are a few workarounds:
The camera sits right in front of the windshield, on top of the ventilation grille. It is held in place by a piece of wire (obtained from a wire hanger, the classic material source for all kinds of kludges), bent to fit around the camera and covered with a piece of heat-shrink tube to avoid scratching the camera case. The wire is U-shaped; cut it to length so that it will go down into the ventilation grille as deeply as possible. The clip prevents the camera from sliding around on the dash and, to an extent, prevents it from falling over sideways. This setup has survived a rather speedy drive on a curvy mountain road, so it should be stable. The clip goes through the hand loop of the camera, this and the open display prevent the camera from sliding out.
Test results are OK, the windshield wiper may obstruct some of the bottom of the picture. It might help (untested so far) to raise the camera a bit - possibly just the front part, this will additionally give the camera a better view of overhead signs on the highway.
Alternatively, the camera can be hung from one of the sunshades by a flexible mini-tripod. This way, it can't fall over, and vibrations are partly damped. The image can be easily turned back upright using software.
Vibrations may be a problem on bad roads. If your camera has a picture stabilizer, use that; also look into ways to absorb vibrations.
Power supply The battery of the camera may be insufficient for longer trips; it is worth looking into an external power supply. If you can get a car power supply for your camera, get that. Another approach would be a 220V power inverter hooked up to a 12V outlet in the car (preferably one that is switched off with the ignition, to avoid draining the car battery) which powers the normal power supply for the camera. Power inverters can be picked up for less than € 20 at electronics retailers.
USB power supplies may be problematic as the power consumption of a video camera may be above the 500 mA limit of a real USB port. However, if you are going to use a simple power adapter without any control logic (hence not a real USB power supply, just a power supply that happens to have a USB connector), check the rating of that; if it matches or exceeds that of your camera's power supply, you should be fine.
Car setup with webcams
- See /with webcams.
Pedestrian
- don't move the cam to fast, take your time to record the objects
- you can 'point' to interesting objects!
- after ~15min a camcorder becomes to heavy, think about a body mounted wikipedia:steady cam tripod (build your own)
- takes a lot of time for a small area, good for high density where you can't use a bike (pedestrian area, city market place,....)
Bikecycling
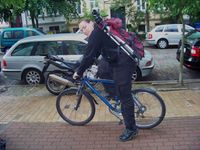
- carrying in hand is NOT RECOMMEND for own security! Think about to mount your cam carefully, or you might hit others!
- mounted tripod works fine
- very good for max area/time especially for high density areas
- cam can be adjusted to film buildings and housenumbers
- second person for setup is recommend
- cobblestone is very bad
See also: Mapping bike Frida V
Motorcycle
- no experiences
Bus
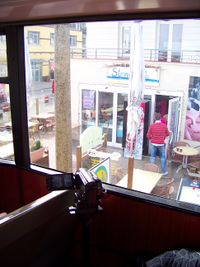
- heavy accelerations possible -> hold your tripod still
- heavy vibrations possible -> blurred Image!
- difficult to get a place in front
- second floor is perfect! You will have no hidden objects and a real good overview!
Tram
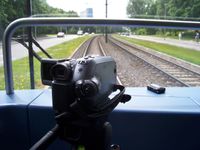
- quite ride, you don't need a tripod necessary
- mostly just back or sideview is possible
- you will cover the most important city parts, automatically
- direct backward filming is not recommend cause a lack of relevant details
Rapid transit, Train, ...
- mostly to fast, possible with good (pocket) camcorder otherwise only start/breaking low speed sections are good enough
- useful to detect intersections and ways beside the rails
UAV
- mostly they take only photos, so no video options? I was told they were used in the professional scenario
See also:
Underwater

- Useful for underwater features
- Hermetic box is needed
Tools
- Cutting (and demuxing streams): VirtualDubMod,AVIdemux
- Mixing: kdenlive
- Subtitle Workshop
See also:
Extracting pictures
One method to work with video is to extract frames at suitable intervals and using them for example in Josm as geotagged images (or against gpx-traces). Unfortunately exif-timestamp resolution is 1 second so you are limited to maximum of 1 picture/sec. Unfortunately ffmpeg generates exif-timestamp based on current time (not video based time) so you need some scripting to correct.
I used a following script to batch extract on my Linux box. It needs only two common programs ffmpeg and exiftool. The idea is to extract frames at 1Hz rate, time stamp them to whatever the videofile timestamp is and adjust each picture time 1sec further.
#!/bin/bash
videofile=$1
echo Extracting frames at 1Hz rate
ffmpeg -i $videofile -y -ss 1 -an -sameq -f image2 -r 1 pic%05d.jpg
# Get video date/time from exif info
echo Initially set time/date for all files at the beginning of the video file
exiftool -CreateDate="`exiftool -CreateDate -S $videofile | sed 's/.*: //' `" *
# Adjust time of each jpeg
num=0 #num of seconds to add
for file in pic*.jpg
do
 exiftool -CreateDate+=0:00:$num $file # adjust file 1 +1s, file2 +2s, ..
 num=$(( $num + 1 ))
done
tip for geotaging photo (with jpg and gpx in the same directory):
for file in pic*.jpg
do
  touch -t "201402171126.39" $file
  # where 2014-20-17-11:26:39 is time of gps + timezone
done
exiftool '-DateTimeOriginal<FileModifyDate' dir
exiftool '-CreateDate<DateTimeOriginal' dir

for file in pic*.jpg
do
  exiftool -q -DateTimeOriginal+=0:00:$num $file
  exiftool -q -CreateDate+=0:00:$num $file
  num=$(( $num + 1 ))
done
exiftool -geotag myfile.gpx "-geotime<DateTimeOriginal" -P ./pic*.jpg
rm *.jpg_original
Based on the above script for extracting from Garmin Virb Elite https://github.com/AddisMap/BAME-tools/blob/master/BAME-Virb2OSM.sh
See also the mapillary python tools https://github.com/mapillary/mapillary_tools
Tips and tricks
Viewing angle The viewing angle of the camera is very limited. Pointing sideways or at a 45 degree angle might improve the view, but then you only get features of one side of road. Street sign are often only on one side of the junction, meaning they might only be visible on the view behind the car. If you can, use multiple cameras and/or take photos in addition.
With custom 360° surround mirrors you can get a full panorama within one frame, that have to be unwrapped later.
Picture quality The overall picture quality of cameras is much below that of photo cameras (this goes even for photo cameras when used in video mode). As a result, some details will not be visible and signs may be illegible. Taking additional photos with a good still-image camera helps. Also consider the following to get the most out of your equipment. Get to know its limits, what to expect of it and what not.
Video cameras The resolution of video cameras is typically targeted at a TV screen, with image heights of 625px (EU) or 525px (US). A European 16:9 video camera has a resolution equivalent to less than 0.7 megapixels.
Video cameras record interlaced pictures by default: while TV screens operate at 50 or 60 hertz, each of these frames contains only half the image - one frame shows all even rows, the next will show the odd ones; this gives the viewer the impression of a more steady, less flickering image. In digital video, two subsequent half-images are combined into one frame, resulting in a nominal frame rate of 25 with 625 lines each (Europe; in the US it would be 30 frames with 525 lines each); however, the image is actually composed of two images which are a fraction of a second apart. This creates visible effects when the camera is swiped; still images will look jagged.
Some cameras offer a progressive mode in which they will record one full image rather than two half-images; on a TV screen the image will look more jumpy but still images are clearer. When shopping for a new camera, make sure it offers this feature and activate it for mapping. Otherwise, VLC also has a deinterlace option which basically removes every second line and interpolates it. While theoretically not as good as a progressive image, it still makes images less jaggy (e.g. linear deinterlacing).
Webcams If you are going to use a web cam, compare before you buy as resolutions of web cams on the market differ. Other factors may be autofocus (only the more expensive) and lens quality.
Photo cameras in video mode Almost every photo camera nowadays also has a video mode, many producers of digital cameras also produce video cameras (and want to sell them), so video mode is often restricted. Take a close look at the resolution (which in any case is much lower than in photo mode) and possible restrictions, especially on video lengths. If videos are restricted to no more than a few minutes in length, the camera will not be of much use for video mapping.
Time for analysis Depending on how much information is mapped already, the density of relevant data in the video varies: if all you need is the bridges across the highway you drove along, the video will contain much less information per time unit than it would if you were to map an entirely new area. Depending on that, you can adjust the playback speed. If you use VLC, you can use the +/- keys to quickly speed up or slow down playback.
Further ideas
Speeding up time for analysis
The time needed for analysis is a multiple of video length, a main time killer being long meaningless sections. Especially when you're adding features to an area that is already covered, your video may contain large sections without any important information.
A solution would be to somehow mark the interesting points in a video and correlate them to video data. For example, if we can geotag a video, we might use waypoints and when the GPS position of the video gets near a waypoint, we can tell there is something of interest around.
A player (such as the JOSM video mapping plugin) could then be set to fast-forward through the less interesting sections and automatically reduce speed when approaching a section marked as interesting.
Alternatives to video
An alternative to video might be using a still image camera to take a series of pictures, either at fixed intervals or at fixed distances from one another. This can be accomplished by using the USB control interfaces offered by some digital cameras through which photos can be triggered by a computer.
This technique may overcome some shortcomings of video cameras: Higher resolutions may become possible; the higher storage requirements can be compensated for by choosing longer intervals between images (professionals work this way, taking photos at 1-second intervals). It might be possible to later assemble the still images into a video stream, or enable the upcoming JOSM video mapping plugin to process them in a similar way.
- OpenSource Digicam (massive options).
Machine recognition
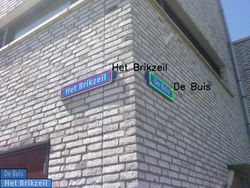
It might be possible to do some machine recognition on video footage, to automate or semi-automate the process of extracting relevant data for OSM.
Information a computer would need:
- Video footage.
- GPS Position and speed (correlated by time stamp of DVI video and GPS track).
- View angle of camera (focal length and that stuff).
- Angle of offset from motion of travel (which is constant).
Match moving is a technique from movie special effects which can be used to automatically estimate the parameters of the camera, including its motion. By best-matching this data with the GPS, you will be able to fill in gaps in the GPS signal and produce a more accurate trace.
See also:
- SignFinder (Google code archive, author’s mirror at https://github.com/tijszwinkels/signfinder)
- jtrasign - Java Traffic Sign Recognition (Google code archive, mirrors at https://github.com/CristianDallos/jtrasign and https://github.com/NathanMaia/jtrasign, both without further commits)
- Road Sign Recognition System
Basic recognition of features
Probably the simplest machine recognition we might attempt, would be to identify things like phone boxes, post-boxes, post-office signs etc. Then there's more difficult things like street signs and pub signs.
A semi-automated solution could extract static images of interesting looking features, and then present these as a set of timestamped (and GPS correlated) photos to be processed manually with our Photo mapping tools. This eliminates the need to watch video footage, but leaves a fair bit of manual work still to do. It lowers the need for accuracy of the machine recognition, which makes it more feasible.
Video Radar
This is an idea for a form of video "radar" that could determine distances from video mounted on a moving vehicle.
Core idea: A human seeing a video take from the window of a moving vehicle can visually estimate distances to buildings and other features based on their apparent motion. Could a computer connected to a video camera and GPS do this automatically?
Based on motion of objects in the video, distances could be determined by computer. To what accuracy remains unknown.
Problems: moving objects like cars could confuse the system.
Output of system: A series of "echo returns" from buildings, stationary objects (and road markings?) forming a 2D map.
Alternatively, a user could click on paused video and the system would estimate the lat, long of that point.
See also:
3D model with texturing
If the above system is implemented, 2D surfaces could be recognized and stored. This would produce a 3D model of a neighbourhood with texturing!
This would involve a serious amount of development. Occlusion would be a nightmare.
Commercial alternatives
This technology is state-of-the-art in the commercial geodata collection.
- Ubipix: GPS tagged Multimedia Platform -Support for SmartPhone, POV Cameras, BlackBox, MMS, UAV, ROV and many more
- CNET Asia "to the mapmobile!" - Teleatlas Data Collection vans
- Techrada - Street to screen: how sat-nav maps are made (Navteq)
- Techradar - behind the scenes with Google Street View
- Yotta DCL (UK).
- Topcon IP-S2 device
- EagleEye Technologies (Germany)
- MOFA-S (Germany)
- Logiball using UAV video collection (Germany)
- Imajing with own camera boy for analysing roads and rail networks (France)
- VLS: Pioneer in very large scale uncompressed HD projection (france)
Users
List users here, that do mapping with video:
- user:stanton
- user:GerryLight
- user:badger123
- user:fogs
- user:slashme
- !i! 21:59, 18 June 2010 (UTC)
- simon
- User:Waygo
- EdLoach
- user:and1969 (equipment used: NextBase 402G Professional dash cam)