Lesotho/Phase 4
Structure
The content of this page is laid out in such a manner as to allow you to start from scratch, with no knowledge of any of the tools, and still be able to set up and use the following:
- JOSM with all the necessary tools, plugins & presets
- Mapillary
- Field Papers
- StreetComplete
This page is divided into a number of sections:
- Tools - Just a list of links to everything that will be used
- Error Checking - A list of links to error checking tools. Error checking should be completed on a regular basis.
- Section 1 - Getting started. This will provide all the detail you need to begin with any of the above tools
- Section 2 - Field Surveying. What you need to know before you being a field survey
- Section 3 - Consuming the information. Once you return to your desk, how do you make use of the information you have gathered in section 2.
For sections 1-3, each section will contain a subsection for each of the 4 tools listed above so section 1 will contain information on the setup for JOSM, Mapillary, Field Papers and StreetComplete.
| Tool | Bandwidth Requirement | Section 1 | Section 2 | Section 3 |
|---|---|---|---|---|
| JOSM | Low to Medium | Yes | No | No |
| Mapillary | High | Yes | Yes | Yes |
| Field Papers | Low to Medium | Yes | Yes | Yes |
| StreetComplete | Low | Yes | Yes | Yes |
Note, JOSM is not detailed in sections 2 & 3 as section 2 relates to Field Surveying and in section 3, the instruction for JOSM is contained within the instruction for the other tools.
Assumptions & Considerations
At the beginning of each sub-heading you may find a list of Assumptions & Considerations. These are pieces of knowledge gained by users of these tools and are there to guide you in your decision making process. If, when you read these, you find something that is a concern, for example high speed internet is required for Mapillary uploads, then you are advised to review other options under that section which may work better for you.
Tools
There are a number of tools available for use during this phase.
In addition, there are a number of supporting tools/websites available
| TagInfo | OSM Wiki | LearnOSM | MapLesotho Bookmarks |
|---|---|---|---|

|
|

|

|
| Contains data on every tag ever used in OSM | The main OSM resource | A fantastic resource for learning about a lot of different tools within the OSM ecosystem | Download to your desktop and import to your bookmarks in your browser to have a list of the most important MapLesotho links |
| Link | Link | Link | Link |
Error Checking
Tools for use as part of error checking are as follows:
| Osmose | KeepRight | OSM Inspector |
|---|---|---|
|
|
|
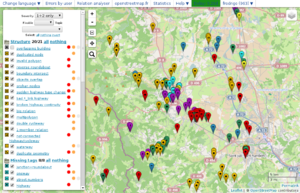
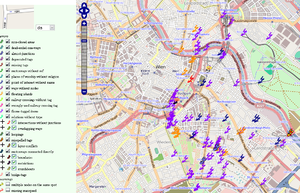
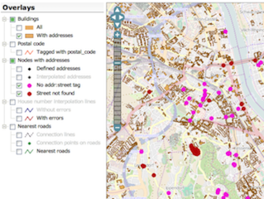
| Osmose, whose name means OpenStreetMap Oversight Search Engine, is one of many quality assurance tools available to detect issues in OpenStreetMap data. | Keep Right (keepright.at) is a Quality Assurance tool. It shows automatically detected errors on map or in list form. | The OSM Inspector (alias OSMI) is a web based debugging tool for advanced OpenStreetMap users offered by Geofabrik. |
| Link and Wiki Page | Link and Wiki Page | Link and Wiki Page |
Additional error checking tools are available on the Quality Assurance wiki page
Phase 4 Data Gathering
Buildings
Buildings are the most frequent item to be tagged in phase 4, since we are trying to focus on shaping the built environment through local area plans. In phases 1-3 buildings were universally tagged as building=yes, and therefore at this stage most buildings encountered will still be tagged that way.
We now have to achieve a clear picture of the use of land and more specifically the building uses.
The following tagging rules now apply:
Building use
- All tags take the basic format key="value"
- Where there is no field papers data, and no mapillary, and the mapper has no personal knowledge of a building use it will remain tagged as building=yes as this provides an indicator that further data is needed about the structure
- Buildings will mostly be tagged as residential types i.e. house, shack, apartments etc. In cases where a residential building and shop co-exist in the same building the house tag will be of secondary importance. It is important that a note of such an occurrence is recorded in the following way building=shop/retail/commercial etc + building:multi_use=yes
- The general tags recording use that are to be anticipated are:
- building=shop
- building=school
- building=commercial
- building=retail
- building=civic
- building=church
- building=shed
- building=toilet - Consider the use of the access tag to indicate if it is a private toilet
- building=barn
- building-sty
- building=cowshed
- building=hut - See additional tagging information on the Lesotho page in this wiki for the different types of huts used in Lesotho
- If a building of any other type not included is encountered mappers will consult the wiki buildings page for guidance
- An additional source of information is TagInfo which can give a good indication of the level of usage of a tag.
Building construction type
It will be necessary to further tag the building by the type of building design that it is. The options here may include
- Any building that is under construction will continue to be tagged as building=construction. Material and Building:level can still apply depending on how far the construction has progressed.
- Buildings that are ruined will be tagged as building=ruins
The 3D tagging Preset will make a lot of the following very easy. Use it to ensure tagging is kept consistent and accurate.
- Material (building material e.g stone,concrete,metal)
- Refers to the material that has been used to construct the walls of the buildings.
- Building:level= 1,2,3…
- Roof_type= corrugated_iron, thatch, clay_tile
- There may be corrugated_iron that mimics the look of a clay tile, it is important to be mindful of those and tag them as roof_type= corrugated_iron not roof_type= clay_tile
Amenities, retail and commercial locations
The wiki and TagInfo will guide you as to the most used tags for each item. For example, the wiki will show shop=hairdresser is the standard tagging format for this type of business while TagInfo shows it has been used over 160,000 times around the world, indicating it is the normal way to tag this type of business.
Additional Features
Barriers
Barrier can indicate barriers for different purposes. Barrier was tagged as either barrier=wall or barrier=hedge in phases 1-3. There needs to be more clarity depending on their uses (see below).
Some examples are as follows: barrier=wall + material=stone, barrier=fence + material=wood
Highway
In OSM terms, “highway” can refer to a path, motorway, track, etc. Additional attribute tags sought are:
- surface=asphalt/stone/clay/rock/gravel etc
- lanes=1/2/3/4 etc
- lit=yes/no
- speed_limit=50/80/100 etc
Electrical Infrastructure
While viewing Mapillary images, or while out using Field Papers, watch out for electricity poles and map as follows
- power=pole
- power=line/minor_line
Section 1 - Getting Started

JOSM
Assumptions & Considerations
- This instruction assumes you have at least basic internet access and a windows laptop/desktop and mouse
- The instruction assumes you have installed JOSM and JAVA and have configured your login details in JOSM.
- When you open JOSM, if it states "You should update!" then please do so as functionality will be lost over time if your JOSM is not kept up to date.
Additional Information
- This instruction provides details specific to MapLesotho phase 4 only. It does not go into detail on how to map with JOSM. There is a full and complete guide to using JOSM available on the wiki here and on LearnOSM.org here
- JOSM Guide
- JOSM FAQ
- JOSM Videos
- JOSM Youtube Videos
Instruction
Tagging Presets
In JOSM, go Edit and select Preferences. Select the 3rd tab down, "Map Settings" and then the "Tagging Presets" tab in that window. Install the following list of tagging presets in JOSM
- 3D Simple Buildings
- Building Preset
- Crafts
Plugins
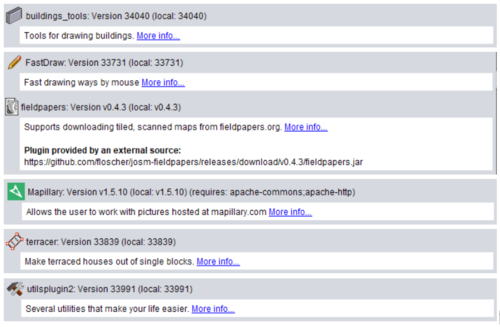
In JOSM, go Edit and select Preferences. Select the 4th tab down, "Plugins". Install the following list of plugins in JOSM
Remote Control
When downloading data from various websites into JOSM, you will need to supply JOSM with a certificate to allow it to receive data from websites with addresses beginning with https://. To instal this certificate, complete the following steps.
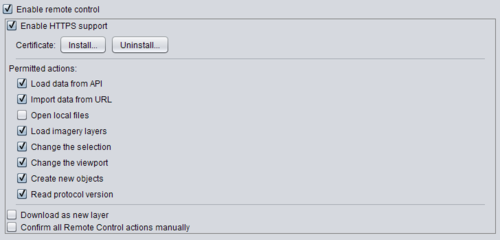
In JOSM, go to Edit, then Preferences, then select the 9th tag down for Remote Control options. Tick the boxes as per image below
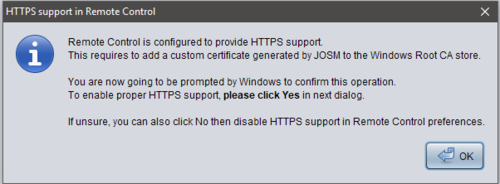
Next, click the "Install" button under "Enable HTTPS Support". You will see an onscreen popup message as follows:
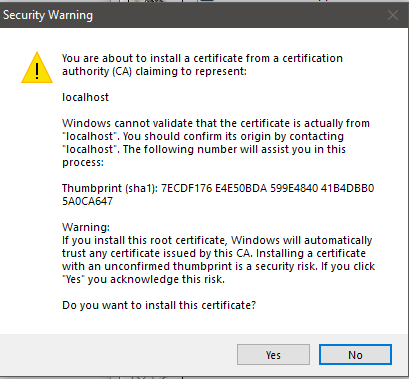
Click Ok, Next you will see a security warning as shown below
Click "Yes" to install this certificate. Finally, you will see a message stating the certificate has been installed.

Mapillary
Assumptions & Considerations
- This instruction assumes you have a smartphone with internet access
Additional Information
Instruction
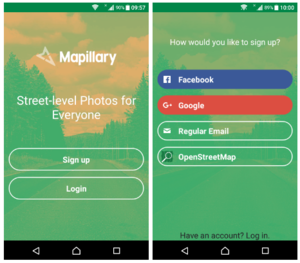
- Go to App Store(iPhone) or Play Store (Android), search for "Mapillary", download and Install, and then open.
- Click on Sign Up to create an account: (you need to provide a working email address and verify a link they will email you) or use your OpenStreetMap account details
- Once you are logged in, click on the menu icon , go to settings, and then storage
- Ensure the external SD card is selected for storage
- Still on the settings menu navigate to the Capture menu, deactivate Distance Based Capture
- Set the Time threshold to 2 seconds and Distance threashold to 5 meters
- Activate the following: 1. Pause on face down, 2. Pause on shake and 3. Pause while Tilting
- Set Power Saving mode to On and Prevent Overheating to On also
- Finally, Sequence Break should be set to 300m

Field Papers
Assumptions & Considerations
- This instruction assumes you have access to basic internet, a windows PC/laptop and a printer (black & white is sufficient)
- Consider the area you wish to survey.
- The field papers you create should be no more than 10 pages, max, as much more will be awkward to use in the field.
- Also, consider the amount of information to be gathered on each page. If the area covers too many buildings it might be cumbersome to record information on the page and worse, unreadable later.
- Lastly, you should aim to create a field papers atlas which will allow 1-2 people to easily complete a full survey in a single trip. If it covers too large of an area, the same field papers pages will be required for further surveys are are more likely to get lost, damaged or become generally unusable later on.
Additional Information
Instructions
- Go to the Field Papers website.
- If you have not done so, sign up. You will need an account to access information later on
- Click on “Make an atlas to print”’ or “Make yourself an atlas” from the Field Papers home page. Review the assumptions and considerations above.
- Give your atlas a name so that you’ll be able to find it later when you log in to Field Papers.
- Type in the geographical area that you would like to access or navigate to the area using the map. You can be as general (a country) or specific (an address) as you would like. Once Field Papers pulls up your atlas, you can pan and zoom to the specific area you’d like to see.
- Adjust the area for your atlas using the selection area (highlighted).
- Click on the plus and minus buttons to add and subtract pages. Field Papers automatically creates your atlas on two pages. TIP: Try to select the least number of pages as you need for your atlas to avoid possible delays in atlas generation.
- Click on the zoom plus and minus buttons to increase or decrease the size of the map background
- Click and hold your mouse down on any part of the map to move the entire atlas.
- Decide whether you would like the atlas to be public or private by checking the “Make this atlas private” box. Private means no one else can find your atlas. Click Next. Tip: If you choose to make your atlas private, you can still share it with others with a unique URL. However, make sure to log into Field Papers when you create the map, so that you will have access to it later through your account.
- Click "Make Atlas". When your map has been generated by Field Papers, you will see it appear on your screen.
- Choose to download the PDF (“Download PDF”) and/or copy it to another user (“Copy this atlas”). Download the PDF to save, print, or share using the unique URL. All PDFs include a QR code that makes it possible for Field Papers to update your map with your edits when you upload it back to the site.
- Print out your map

StreetComplete
Assumptions & Considerations
- This instruction assumes you have an Android phone and some kind of data connection that you can use when out surveying. Note, this app uses a very small amount of data, less than a MB or 2 per hour.
Additional Information
- StreetComplete wiki page
Instructions

- Download the app from the Google Play Store and install it
- Open the app and go to Settings (top right)
- Configure the settings as follows:
- Auto-Sync - On
- Authorize OSM access - Click and log in to OSM (if needed) and click the "Grant Access" button
- Quest Selection - Click and follow instruction below
- The Quest Selection screen contains all available quests
- You can choose which quests are active by ticking/unticking the boxes beside each one
- You can reorder the priority of the quests. In the picture to the right there are 3 road related quests, name of the road, surface and speed limit. Based on the order seen in the image, it will ask for the quests to be completed in that order
- For example, if a road is selected, it will only show the quest to name the road. The surface quest will not appear until the name quest has been completed and likewise for the speed limit quest which will not show up until both the name and surface quests have been completed.
- Keeping this in mind, in the Lesotho context, the quests should be the order laid out in the table below. Note, this table only includes the quests applicable to the MapLesotho project. Other quests in the selection menu can be left as is or disabled.
Quest types
| Icon | Question | Asked for elements | Modified tags |
|---|---|---|---|
| Can you contribute anything to this note? | All OSM notes not created by the user via StreetComplete and not commented by the user, if they contain a question mark. (If activated in the settings, the last requirement can be skipped.) Loaded via the Notes API. | Adds a comment to the note. | |
| How many levels does this building have? | Some building=* types when height=* and building:height=* are not set
|
building:levels=* and/or
| |
| What basic shape does this building's roof have? | ways and areas with roof:levels=* set
|
roof:shape=*
| |
| What surface does this piece of road have? | Many publicly accessible highway=* tags, but not motorways and service
|
surface=*
| |
| Is this section of road lit? | Some highway=* tags with a sidewalk=* (as a sign for developed streets) and if they are publicly accessible
|
||
| What is the speed limit sign for this street? | ways tagged with some highway=* tags, which are publicly accessible
|
maxspeed=* or adds
| |
| What is the name of this road? | Many highway=* without ref=*, noname=*, junction=* or area=* (overpass-turbo)
|
name=*, if needed noname=*, may retag streets as highway=service or highway=track or add "_link" to primary, secondary and tertiary highways
| |
| What kind of crossing is this? | highway=crossing (overpass-turbo)
|
crossing=*
| |
| Does this bus stop have a shelter? | public_transport=platform and highway=bus_stop when it is not used to mark a public_transport=stop_position (overpass-turbo)
|
shelter=*
|
Once configured as per the above, the app is ready to be used.
Section 2 - Field Surveying
Mapillary
Assumptions & Considerations
- This instruction assumes you have sufficient free space and battery available on your phone to use the app
- This instruction assumes you have access to high speed, free wifi with a large data allowance
- Consider, when using Mapillary from inside a vehicle, to ensure the the phone is mounted securely and is capturing images which do not contain any part of the vehicle e.g. the bonnet if front facing, the wing mirrors if side facing.
- Consider, when using Mapillary while walking, to ensure the phone is kept straight and level.
- Consider using a battery pack or car charger when running the Mapillary application as it will consume the battery quite quickly
Additional Information
Instructions
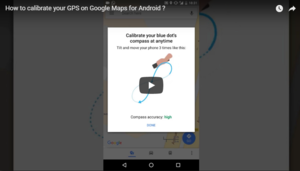
- Firstly, before starting Mapillary, you must calibrate the compass on the phone
- Turn on location and open Google Maps
- Once Google Maps is loaded and you see the blue dot representing your location, tap the blue dot
- Look for the "Calibrate Compass" option. Follow the instruction
- Once completed, close Google Maps
- Open Mapillary
- Select the "Capture" screen
- Follow the detailed instruction contained on the Mapillary website
- Ensure you have surveyed the area in full, with images captured from multiple angles
- Uploading images - Additional information about uploading is available on the Mapillary website here
- Once you have returned to a location with free, high speed internet, you can upload your images
- Open the Mapillary app
- Select the Upload option
- Click the green arrow
- Your uploads will begin.
- Note: Once your images have uploaded, it will take approximately 12 hours for Mapillary to process your images, analyse them and position them on the map for you. Please build this time into your workflow i.e. sometimes its best to upload late in the evening, so the images are ready for use in JOSM in the morning.
Field Papers
Assumptions & Considerations
- This instruction assumes you have a pen (not a pencil) and are on foot
- Consider using a pre-prepared legend and template, see here for an example excel sheet which you can printout and take with you
Instructions
- Firstly, orientate yourself on the printed map to identify where you are
- Plan your route to maximise the amount of ground you can cover without going over the same ground repeatedly
- As you walk through an area, make notes directly onto the printed map pages for that area. Look at recording details related to buildings, infrastructure etc, as laid out in the Data Gathering section above
- Ensure your notes are clear and legible
- Continue surveying the area until you have gathered all available information
StreetComplete
Assumptions & Considerations
- This instruction assumes you have a fully charged phone and have StreetComplete installed and configured as per Section 1 instructions
- You have GPS activated on your phone
- StreetComplete will only allow you to add additional attributes to pre-existing map data. It is advisable to bring a printout of the area with you e.g. Field Papers, as this will allow you to make additional notes about the area if you find features that have not been mapped and therefore don't show up in StreetComplete
Instructions
- Open the app
- It will lock on to your location.
- Note: if the GPS icon is orange, it will remain locked onto your position. If you press the GPS icon to turn it black, you will now be able to pan around the map freely.
- Plan your route to maximise the amount of ground you can cover without going over the same ground repeatedly
- Begin walking around the area you wish to survey
- Icons will appear on the roads, buildings etc in the area.
- Select an icon and answer the question contained in it
- The answer will be immediately uploaded to the OSM database
- Note: StreetComplete uses a minimal amount of data. For approximately 100 answers, the data used is smaller in size than a typical email with each answer only approximately 300bytes in size
- Continue surveying the area until you have gathered all available information
- Once you have completed your survey no further action is required as all the gathered data has been uploaded directly to OpenStreetMap
- Note: If you brought a Field Papers printout with you and made notes on this, you should follow the instruction under Section 3 for Field Papers to ensure this information is added to the map data.
Section 3 - Consuming the gathered data
Mapillary
Assumptions & Considerations
- This instruction assumes you have access to a high speed, free, unlimited data internet connection with which to upload images to the mapillary site.
- This instruction assumes you have a windows laptop with JOSM installed and the Mapillary plugin installed.
Additional Information
- Mapillary - Using images and map editing
- Youtube video on using the Mapillary plugin
Instructions
- Open JOSM
- Download the area you wish to work on
- Activate the satellite imagery layer by going to the "Imagery" option in the top menu and selecting "Bing"
- Activate the Mapillary imagery layer by going to the "Imagery" option in the top menu and selecting "Mapillary"
- Press ⇧ Shift+J to load the available Mapillary images in the selected area.
- Inside JOSM you will see the green Mapillary images loaded as icons strung out on a line, otherwise known as a sequence
- Note: If there are too many sequences showing, in JOSM, go to Windows > Mapillary Filter, and use this filter to remove older images or to show only images by a specific user.
- Select an image
- It will load into the panel in the right of JOSM
- Note: You can zoom in, pan around and adjust your view of this image in order to better examine the contents of the image for extracting information
- Use the detail in the images to add additional attribute information to pre-existing map features and to add new features where gaps are identified
Field Papers
Assumptions & Considerations
- This instruction assumes you have a basic inter connection, a Field Papers account and a smartphone with a camera
- This instruction assumes you have JOSM with the Field Papers plugin installed
Additional Information
- The Field Papers plugin page on the wiki
Instructions
Note
The follow instruction allows you to upload your completed field papers to the Field Papers website and load it into JOSM. This is an additional step you can do to aid your sage of the sheets however it is not required if you simply want to have the sheets on the desk beside you when you work in JOSM. Different users prefer different options. The instruction below allows you this additional option should you chose to use it.
Part 1 - Uploading your Field Papers to the Field Papers website
- After you have marked up the Field Papers atlas that you printed out, take a picture of each page using a camera and save it to your computer or hard drive. The image must be high resolution (at least 200 dots per inch (dpi)) and saved in one of these formats: JPG, PNG, TIF, or GIF. Most camera phones take pictures at this resolution or much better.
- Note: Make sure to save your photo in the largest size possible, especially if you are using the camera on your phone. This will save your image in the highest resolution possible.
- Note: One page equals one snapshot so if your map is multiple pages, you will need to take a picture of each page.
- Note: When taking your “snapshot”, make sure that your map fills your screen (without cutting anything off) and that the photo is not taken at an angle. Also make sure the QR code is displayed in full. If Field Papers is not able to upload your snapshot (it will tell you), try taking another picture using these guidelines.
- Click on “Upload pages you’ve marked” from the main Field Papers page.
- Browse for your file on your computer or hard drive (make sure it’s in one of the file formats recognized by Field Papers) and hit “Upload.”
- You will see a bar tracking the progress of your upload. Be patient, it won’t take that long!
- Optional: Add notes to your snapshot using Field Paper’s basic annotation tools. Click on the x icon to add markers (specific points on your map) or the polygon icon to draw boundaries or borders. You can add notes to each. Note that these edits will not be saved permanently to your snapshot. For more advanced editing options, advanced users can edit their snapshot in iD or Potlach using OpenStreetMap. Click “Finished”.
- You should now be able to see your hand-drawn edits on your updated snapshot.

Part 2 - Using your Field Papers in JOSM
- Complete the following in the Field Papers website
- Ensure you are logged into the Field Papers website
- In the Field Papers website, go to the "Watch" page. You will see all atlas's that you created along with any photos you uploaded of completed papers.
- Note: Select "Snapshots" to show only the photos you've taken of completed Field Papers
- Search for the completed papers file that you want to load into JOSM
- It will show the name you assigned to it.
- Copy the link to this file
- In JOSM, complete the following
- On the top bar of JOSM, you will see a "Field Papers option.
- Select this and then select "Scanned Map"
- Paste in the link that you copied from the Field Papers website and select "Download"
- Your Field Papers will show as a background layer. You can now download OSM data as normal and use your notes to add further updates.
